Last updated on: April 23, 2026
You can create a drop-down for an activity type property by using general lookup tables. When the activity property is used in a multi-instance panel, the drop-down displays with the list of options defined in the general lookup table.
Note: The Activity type must have Allow user edit enabled.
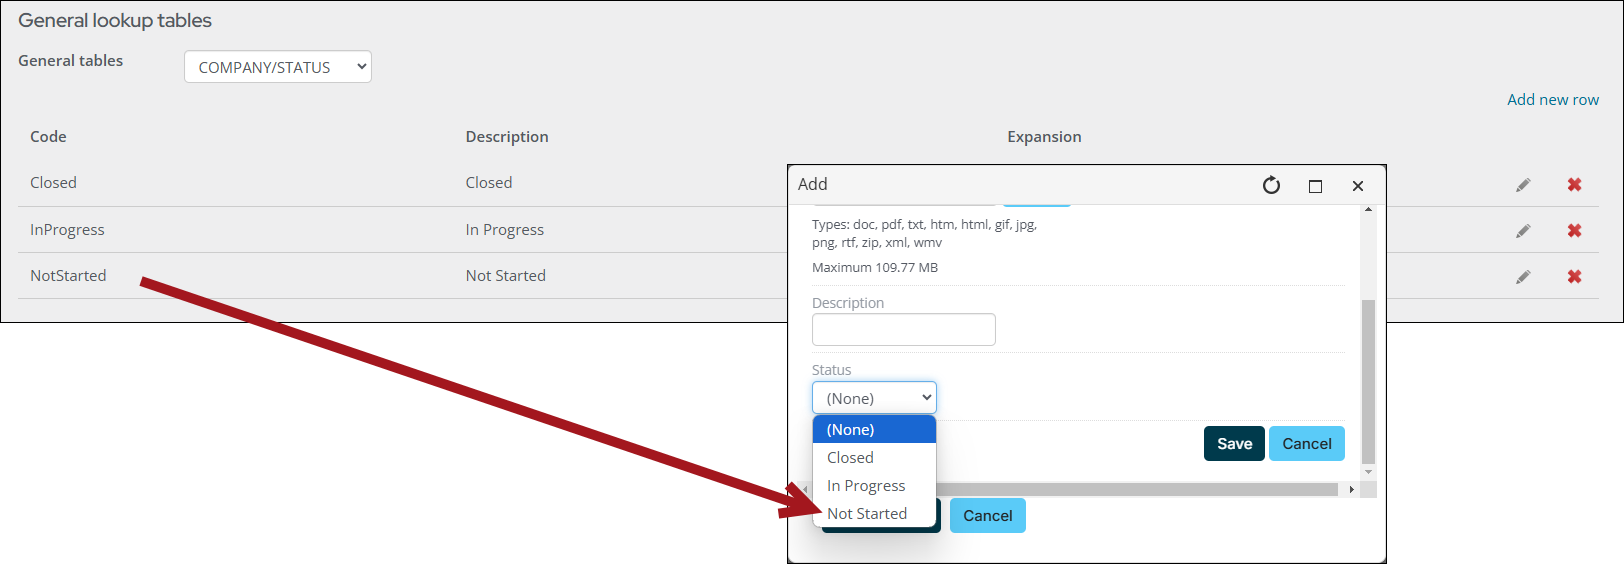
Example: The Complaint activity type has a Status property. Create a general lookup table for the Complaint – Status activity property, so there is a drop-down of options to choose from when the Status property is used in a multi-instance panel.
In This Article
- Identifying the activity type and property to determine the new general lookup table's name
Creating the drop-down options for the activity property
Creating the panel to display the activity property drop-down
Adding data to a panel
Identifying the activity type and property to determine the new general lookup table’s name
To connect the activity property to a general lookup table, the general lookup table name must adhere to the following format: Type/Property. The Type is the name of the activity and Property is the field label assigned to the activity property.
Do the following to identify the activity type and property:
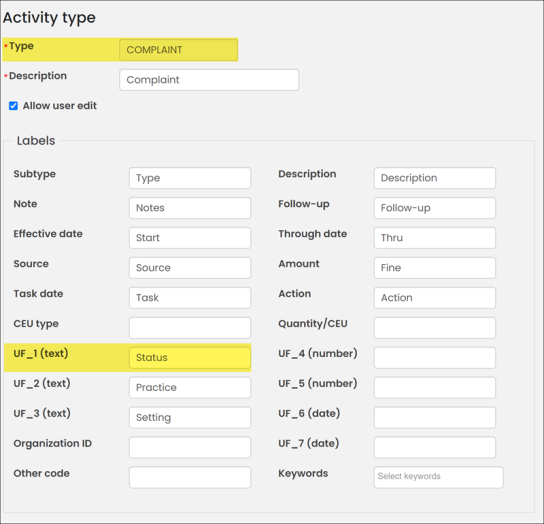
- Go to Settings > Contacts > Activity types and open the activity type.
- Make note of the Type.
- Make note of the property field label.
In this example, the name of the new general lookup table will be: Complaint_Status.
Creating the drop-down options for the activity property
Do the following to create the drop-down options for the activity property:
- Go to Settings > General lookup tables.
- Select Add new table.
- In the Table name field, enter the table name that you identified in the previous section.
- Give the Row a Code. For example, Status.
- Give the Row a Description. The description matches the Code except spaces are allowed. For example, the InProgress code’s description would be In Progress.
- Click Save & Continue.
- Repeat the process of adding codes and descriptions related to complaint statuses such as Closed or Not Started.
Note: Spaces are not allowed in codes. Run words together, for example, InProgress or NotStarted.
Creating the panel to display the activity property drop-down
Do the following to create the panel with the activity property drop-down:
- Go to RiSE > Panel Designer > Panel definitions.
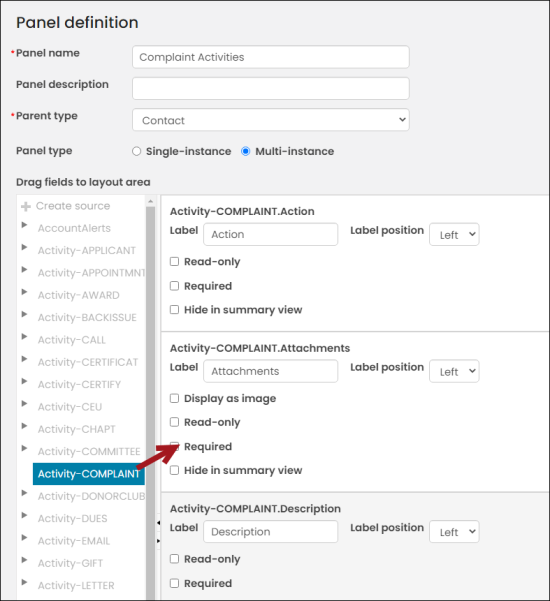
- Click Add panel definition.
- Enter a name, such as Complaint Activities.
- From the Parent type drop-down, select Contact.
- From Panel type, choose Multi-instance.
- Drag the activity properties to the panel layout area.
- Click Save & Close.
Adding data to a panel
The panel must be added to a content record before you can add data to it. Do the following to add the panel to a content record and make it available for staff use:
- Go to the page you want to put the panel on and enable Easy edit.
- Add the Panel Editor content item:
- Give the Panel a name. For example, Complaints.
- Select the panel from the Panel drop-down.
- Enable Allow users to add, Allow users to delete, and Allow users to edit.
- Click OK.
- Click Save & Publish.
The drop-down is updated any time a new row is added or an existing row is updated in the general lookup table.