Last updated on: January 27, 2026
When a customer purchases an item, it is important that the zip code and tax code of the order match based on the customer’s default billing address, so that the appropriate sales tax rate can be applied in accordance with certain state laws. You can add or edit zip codes and associate the zip code with an existing tax code.
In This Article
Manually associating tax codes with zip codes
Do the following to associate a zip code with a tax code:
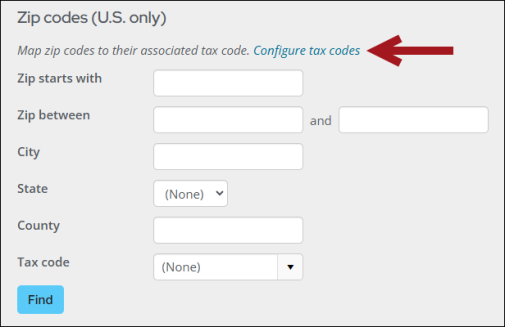
- Go to Settings > Finance > Tax by zip code.
- Select Configure tax codes if you need to add a new tax code before associating it with a zip code.
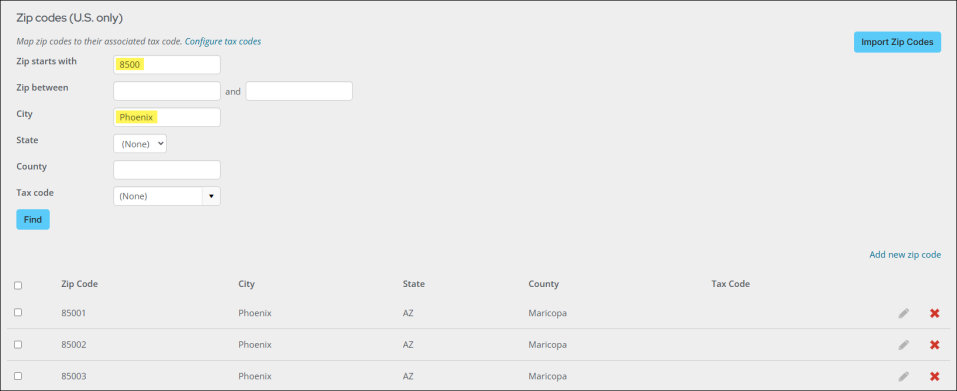
- From the search fields, locate the zip codes you need to associate with a tax code. For example, if you need to associate all zip codes that begin with "8500" in the city of Phoenix, enter "8500" in the Zip starts with field and Phoenix in the City field.
- Click Find.
- If there is a zip code missing, you will need to add the zip code by selecting Add new zip code:
- Enter the Zip Code.
- Enter the City for the zip code.
- Select a state from the State drop-down.
- Enter the County of the tax code.
- Enter an existing Tax code for the zip code.
- Click Save & Close.
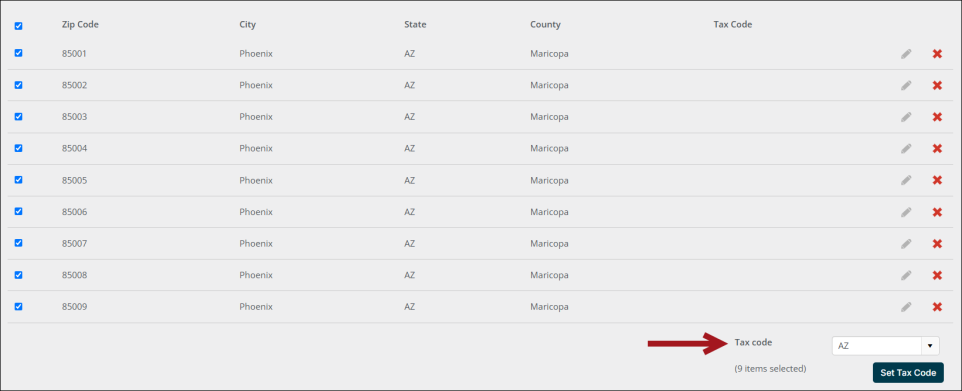
- Enable the select all checkbox.
- From the Tax code drop-down in the bottom-right, choose the tax code you want to associate with the chosen zip codes.
- Click Set Tax Code.
Note: To add a tax code to an individual zip code instead, click the edit icon next to zip code and make the changes in Edit zip code.
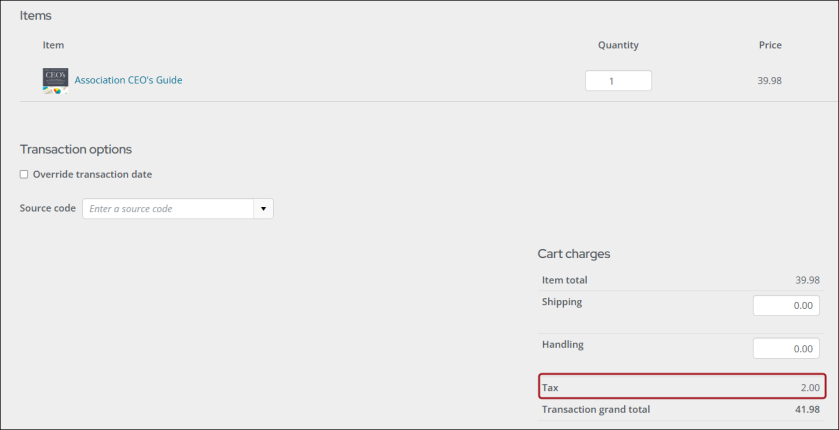
When a customer adds an item to their cart, the cart will reflect the appropriate tax applied based on their default billing address.
Importing zip codes and tax codes
Zip codes are imported in the form of a tab-delimited file. System administrators can import files containing the missing zip codes that can then be added to tax codes.
To import zip codes, you must enter the data in a tab-delimited file that contains columns. Most spreadsheet applications, such as Microsoft Excel, can create tab-delimited files (.txt). You must arrange the columns in the tab-delimited file in the same order as they are listed in the table:
Important! Remove the column header row before importing.
| Column | Description |
|---|---|
| A. Zip codes
(required) |
Zip codes can contain only the first five digits. Extended zip codes are not supported. |
| B. City
(optional |
There is a 40-character maximum for cities. |
| C. State
(optional) |
Must use state abbreviations. State must also match a value already defined in iMIS. |
|
D. County (optional) |
There is a 30-character maximum for counties. |
| E. Chapter
(optional) |
There is a 15-character maximum for chapters. Must match a chapter already defined in iMIS. |
| F. Tax code
(optional) |
There is a 15-character maximum for tax codes. Must match a tax code already defined in iMIS. |
Note: Unused columns must still be included and left blank. Blank values will not overwrite existing values for that zip code.
Warning! You will receive warnings at the top of the page if the file contains errors (e.g., file is not tab delimited or there are extended zip code entries).
Do the following to import zip codes:
- Go to Settings > Finance > Tax by zip code.
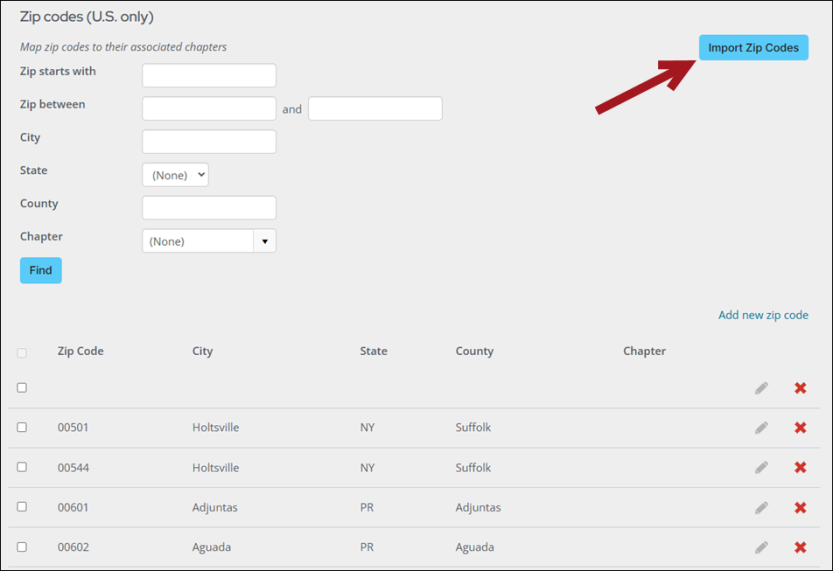
- Click Import Zip Codes.
- Select Chapter Zip Codes in the File format drop-down.
- Click Browse and select the text file containing the zip codes.
- Click Upload.
- Once the text file loads below Process import files, select Process.
- You will receive the following message:
- Select the Click here to refresh link.
Note: Chapter Zip Codes is the same option for taxes or chapters.
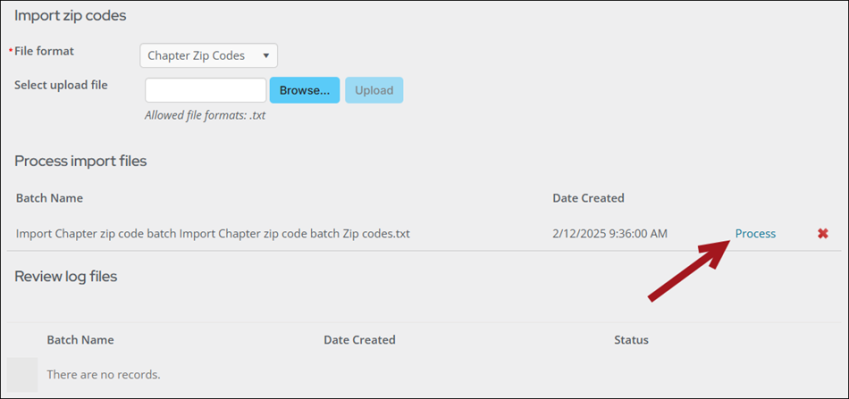

If there are warnings associated with the import, they are recorded in the Review log files section with a description. There will be errors if the state/chapter/tax authority are invalid or if they do not exist in iMIS. The rows where the errors are found are not processed and the zip codes are skipped.