Last updated on: June 30, 2026
System administrators (SysAdmin) can grant access to certain areas of content for different users. System administrators are super users with access to everything in the system, including the following:
- Assign logon credentials and user type (Public or Full)
- Add roles and groups
- Assign access for staff users
- Assign the System Administrator role to other users
- Disable user accounts
Note: Staff users do not have the access levels and permissions necessary to assign staff access. See Overview of security throughout iMIS for more information.
To perform any of the above, navigate directly to the contact’s account page, then click the Security tab. Alternatively, go to Community > Security > Users and search for the desired user.
In This Article
- User credentials
User information
Security roles
Security groups
Assigning the system administrator role
Assigning someone as a staff user
User credentials
If the contact listed in the Contact information area is not an iMIS user, the fields in the User credentials area are empty. Click the red icon (X) to delete or change the username.

The following fields appear in the User credentials area:
- Logon – Displays this authentication record's logon name (user name). No user selected displays when the authentication record is not linked to a user record. Click the add icon (+) to create user logon credentials.
- Password/Confirm password – Input fields for changing an existing password. By default, passwords must contain at least seven characters with at least one numeric character and at least one alphabetic character.
- Email – When you create a new authentication record, if the iMIS contact record includes an email address, iMIS populates the Create User Logon window with that address. However, the value that is displayed in this area of the Users window is always the value that is stored in the ASP.NET authentication store.
- Locked out – Indicates whether this authentication record is temporarily blocked from gaining access to iMIS. By default, iMIS locks out an authentication record after five failed attempts to log on.
- User Class – Specifies the license to apply to this user, which controls all subsequent authorization.
- Password Reset – System administrators can send the user an email with a link to reset their password. At least one active public site with Everyone Full Control access is required to use this feature. For more information, see Resetting passwords.
Note: iMIS provides enhanced password hashing to secure all user login passwords. This enhanced password security complies with PCI 3.2 guidelines.
Note: Only those contacts with the user class of Full staff user or Casual staff user are able to see the Staff Access areas. Only Full staff users can be assigned to the On behalf of role.
User information
Note: Staff users do not have access to update any of the areas under User information.
The User information area displays after user credentials are entered.
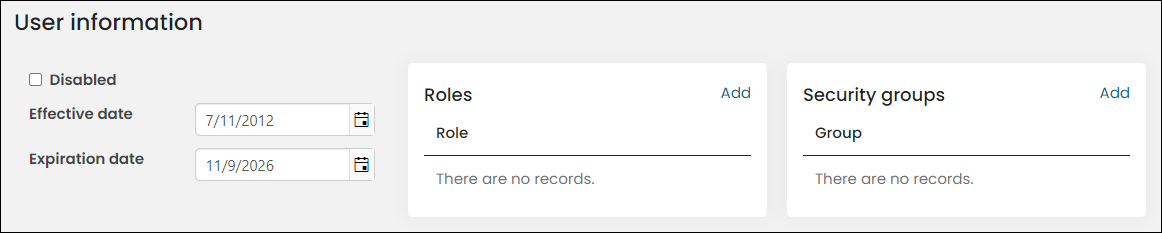
The following fields are displayed in the User information area:
- Disabled – Select this option if you do not want the selected user account to be used immediately.
- Effective date – Enter the date when these credentials become valid.
- Expiration date – In iMIS, the Expiration date for an account is a rolling date based on the last login (sign-in) date. By default, the expiration date is five years from the last login date, and this date is reset after every login.
- Go to Settings > Contacts > Account Management.
- Specify a new value in the Default expiration date, in years from last login field. Whenever a user signs in, their account expiration date is reset to that login date plus the number of years specified in the Default expiration date, in years from last login field. For example, if this value is 3, and a user signs in on January 1, 2018, their account expiration date is set to January 1, 2021.
Changing the Expiration date
Do the following to configure the account expiration date based on the last login date:
Note: The value entered into the Default expiration date, in years from last login field must be greater than 0.
Security roles
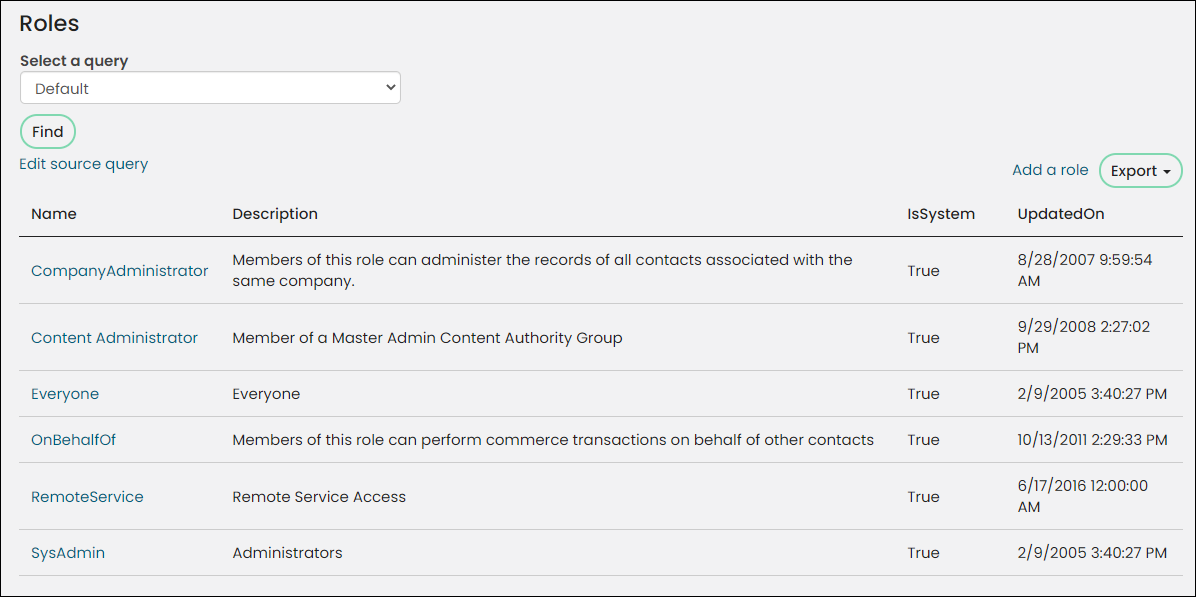
Security roles (Community > Security > Roles) grant specific administrative privileges to user records. There are system roles that cannot be deleted:
- SysAdmin - Requires a valid email address. System administrators can expect to receive emails requiring their attention in order to maintain the security and performance of their iMIS systems. System administrators have access to all areas of the staff site. See Overview of security throughout iMIS and Module authorization levels.
- CompanyAdministrator -Do not use this role; instead, assign someone a company administrator through the organization account page. See Assigning the company administrator role for one or more companies.
- OnBehalfOf - Can only be assigned to a Full User. See On Behalf Of.
- RemoteService - Allows users to remotely access the REST API. If external API calls are missing the RemoteService role on the service account, the API calls will fail until it is added. The RemoteService role is not required for client-side iParts, only for B2B (an application requiring its own username and password) access.
- Everyone - Dynamically assigned to authenticated and guest users. This role is hidden and cannot be added to a user's account.
- Content Administrator - Dynamically assigned to members of any Master Admin Content Authority Group. This role is hidden and cannot be added to a user's account.
Assigning a role to a contact
Do the following to assign a role to a contact:
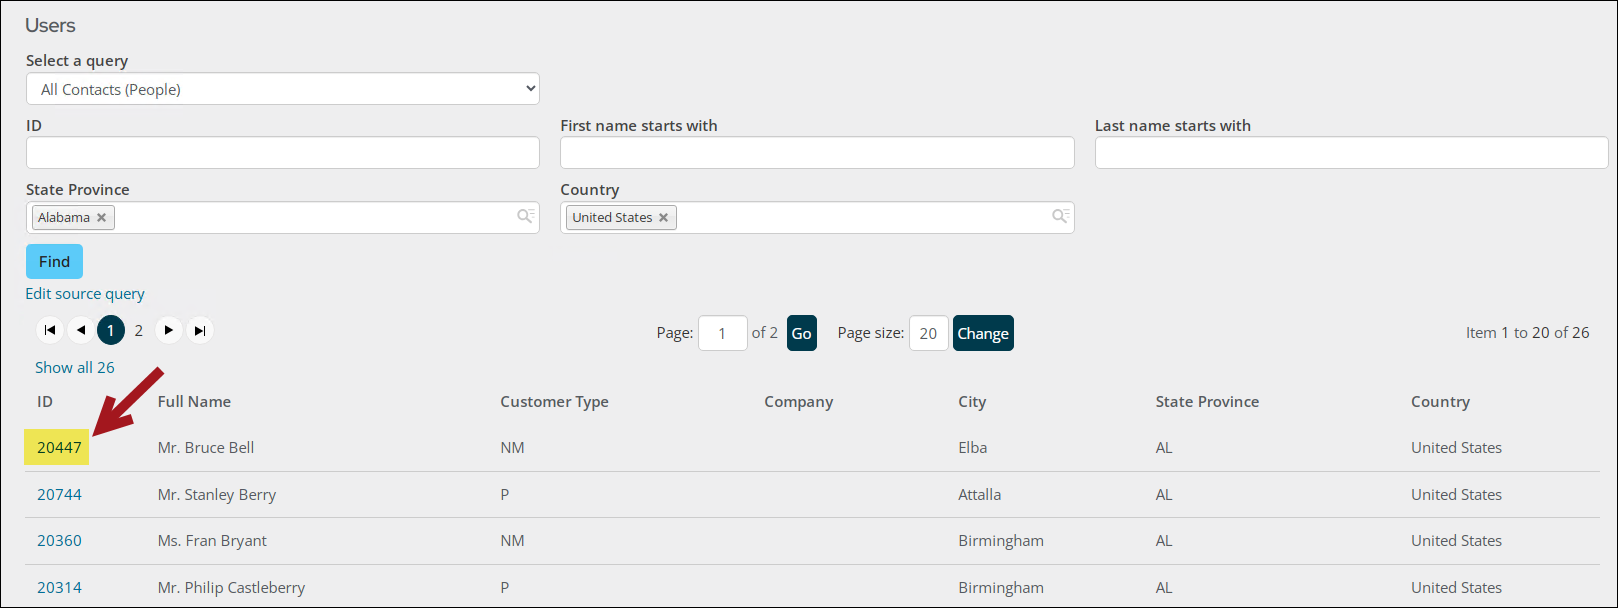
- Go to Community > Security > Users.
- Search for the user, then select their ID.
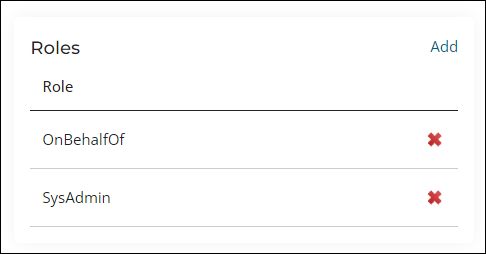
- From the Roles section, select Add.
- Select the available role, then click OK.
- Save the changes.
Note: It is not recommended to use the CompanyAdministrator security role. The Company Administrator role should be assigned to users through the user's organization (Managing organizations).
Creating and editing security roles
Do the following to add or edit security roles:
- Go to Community > Security > Roles.
- Select Add a role or select an existing one.
- Enter a Name and Description.
Warning! Do not remove a user's SysAdmin role without also lowering the System authorization level (see Assigning staff access). If the levels and roles do not agree, the system will have access conflicts.
Security groups
Security groups grant specific access to all individuals who are members of the group. The following security groups affect user privileges.
|
Group |
Description |
|---|---|
|
CampaignAdmin |
Enables full-control access to the Campaign functionality and its objects |
|
CampaignMgr |
Enables read/add/edit/delete access to the Campaign functionality, and read/edit access to its objects |
|
CampaignUser |
Enables read-only access to the Campaign functionality and its objects |
|
Certification Admin |
Used to send emails to the appropriate contacts when certification enrollees complete program stages |
|
Certification Manager |
Used to send emails to the appropriate contacts when certification enrollees complete program stages |
|
Certification User |
Used to send emails to the appropriate contacts when certification enrollees complete program stages |
|
EventUser |
Controls security for IQA integration |
|
FRUser |
Controls security for IQA integration |
|
OpportunityAdmin |
Enables full-control access to Process Manager and its objects |
|
OpportunityCreator |
Enables add access to projects in Process Manager, and read/edit/delete access to created projects, but read-only access to projects created by others |
|
OpportunityMgr |
Enables read/add/edit/delete access to Process Manager, and read/edit access to its objects |
|
OpportunityOwners |
Enables add access to a project's Owner or Contact group |
|
OpportunityUser |
Enables read-only access to Process Manager and its objects |
|
OrderUser |
Controls security for IQA integration |
|
Reporting |
Enables access to the Reports navigation item and is required to access the Reports sub navigation items. See Reporting Users Full Control. |
|
RFMAdmin |
Enables full-control access to the RFM application and its objects |
|
RFMMgr |
Enables read/add/edit/delete access to the RFM application, and read/edit access to its objects |
|
RFMUser |
Enables read-only access to the RFM functionality and its objects |
|
SegAdmin |
Enables full-control access to the Segmentation functionality and its objects |
|
SegMgr |
Enables read/add/edit/delete access to the Segmentation functionality, and read/edit access to its objects |
|
SegUser |
Enables read-only access to the Segmentation functionality and its objects |
Assigning a user to a security group
Do the following to assign a user to a security group:
- Navigate to the contact’s account page.
- Click the Security tab.
- From the User information section, locate Security groups then select Add.
- Select a group, or multiple groups, to which you want to assign the user. Click OK.
- Save your changes.
Assigning the system administrator role
To assign someone as a system administrator, do the following:
- Navigate to the contact’s account page.
- Click the Security tab.
- From the User class field, select Full staff user.
- From the Roles section, select Add.
- Enable SysAdmin, then click OK.
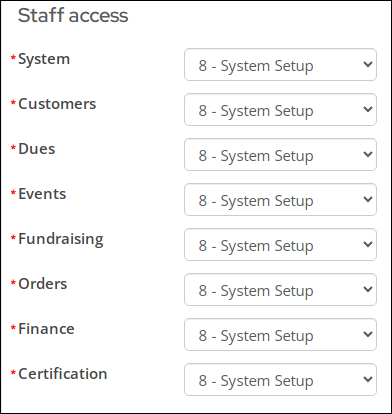
- Expand the Staff access section and update each drop-down to level 8.
- Click Save.
Assigning someone as a staff user
The Staff access area includes settings for user-specific correspondence and Module authorization levels. This section only appears if the User class is Full staff user or Casual staff user.
Note: By default, this section is collapsed. Simply click on the arrow next to Staff access to expand this section.
To assign someone as a staff user, do the following:
- Navigate to the contact’s account page.
- Click the Security tab.
- From the User class field, select one of the following:
- Full staff user - Assigning someone as a Full staff user grants them access to the Staff site. Although the user has the Full staff user role, they will not have access to all areas of the Staff site. You must update the module authorization levels to determine what specific areas of the Staff site they will have access to.
- Casual staff user – Assigning someone as a Casual staff user grants them access to the Staff site but they are unable to act On Behalf Of another contact or to act as a system administrator. A Casual staff user’s access to all areas of the Staff site is determined by the module authorization levels.
- Expand the Staff access section, and select the appropriate levels for the user. For more information, see Module authorization levels.