Last updated on: May 26, 2026
Forms provide valuable information to your organization. Currently, there are no out-of-the-box reports to view submitted forms; to access the information that your form collects, you must create an IQA query to report on your form. The way that you construct your query depends on the Form Elements that are added to the form. The Form Elements must correspond to the Business objects displayed in the query.
Note: In order to view information regarding the form submitter and time submitted, enable Requires approval from the Form library. See Approvals for more information.
In This Article
- Forms Business Objects
Example: Reporting on the Create Account form
Creating the query
Creating the navigation
Forms Business Objects
The following table details which Business objects to add to your query depending on the Form Elements used in your form.
| Form Element | Business Object |
|---|---|
| Contact fields | NetContactData
Note: It is recommended to use NetContactData. If you need to report on financial properties, use CsContact. See Comparing the contact business objects. |
| Address fields | CsAddress |
| Activity fields | CsActivity |
| Single instance |
|
| Multi instance |
|
| Signup fields |
UserData Note: Only the Username property can be reported on. |
| Documents | ProfileDocuments |
Example: Reporting on the Create Account form
Let’s say that you use the out-of-the-box Create Account form to allow your contacts to create accounts with your organization. Because the Create Account form uses the CsContact and UserData business objects, they each need to be included in your IQA query. You can additionally add a new website navigation to more easily review the data that your form collects.
Important! This example uses the CsContact business object as it is the business object used in the original form. ASI recommends to use NetContactData to report on Contact fields, except when reporting on financial properties. See Comparing the contact business objects for more information.

Creating the query
Do the following to create the source query:
- Go to RiSE > Intelligent Query Architect > New > Folder.
- Name the folder. Add any future queries designed for Form reporting to this folder.
- From the new folder, select New > Query.
- (Summary tab) Enter a Name.
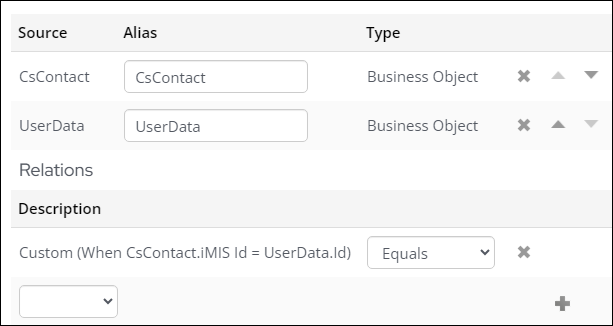
- (Sources tab) Select All sources:
- Select CsContact and UserData.
- Click OK.
- From the Relations area, open the drop-down and select Custom.
- Create the relation CsContact.iMIS Id = UserData.Id and click the plus (+) icon.
- (Display tab) Select the same properties used in the form:
- [CsContact] First Name
- [CsContact] Last Name
- [CsContact] Email
- [UserData] Username
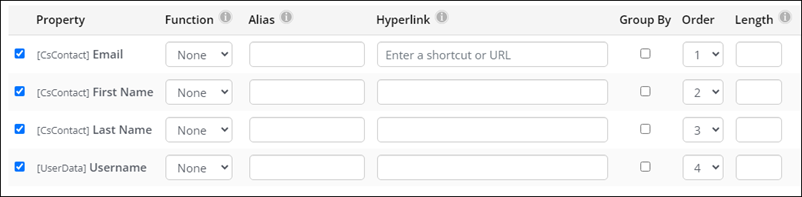
- Click Apply.
- Click Run to see the final query and results.
Note: Adding custom queries to system folders is not recommended.
Creating the navigation
Do the following to create a new navigation item to easily access the query results:
- Add the query content to a content record:
- Go to RiSE > Page Builder > Manage content.
- Select the desired folder, then click New > Website Content.
- Enter a Title.
- Select Add content.
- Select the Utility folder.
- Select the Query Menu content item.
- From the Source query or folder field, select the designated Forms Data folder and click OK.
- Click Save & Publish.
- Create the navigation item:
- Go to RiSE > Site Builder > Manage sitemaps.
- Select Staff from the sitemap tree.
- Select the RiSE > Form Builder folder.
- Click New > Website Navigation Item.
- Enter a name in the Navigation link text field.
- In the Content or URL to link to field, choose the content record you created.
- Click Save.
- Click Publish.
Now you can use the navigation item to easily review the data that your forms collect. Continue adding queries to the same folder to add even more form results to this new navigation item.