Last updated on: April 23, 2026
There are a few specialized forms located in the Form Library that can simplify your workflow when joining new members or organizations. Additionally, each out-of-the-box form is customizable, giving you the ability to tailor your members’ sign-up experience.
In This Article
- Organization Demographic Form
Volunteer Sign-up Form
Contact demographics
Example: Using an out-of-the-box form in the membership join process
Organization Demographic Form
The Organization Demographic form collects demographic information to use in the organization membership join process. This form can be found in the General group of the Form Library, and at @/iCore/Membership/Organization-Demographics-Form.
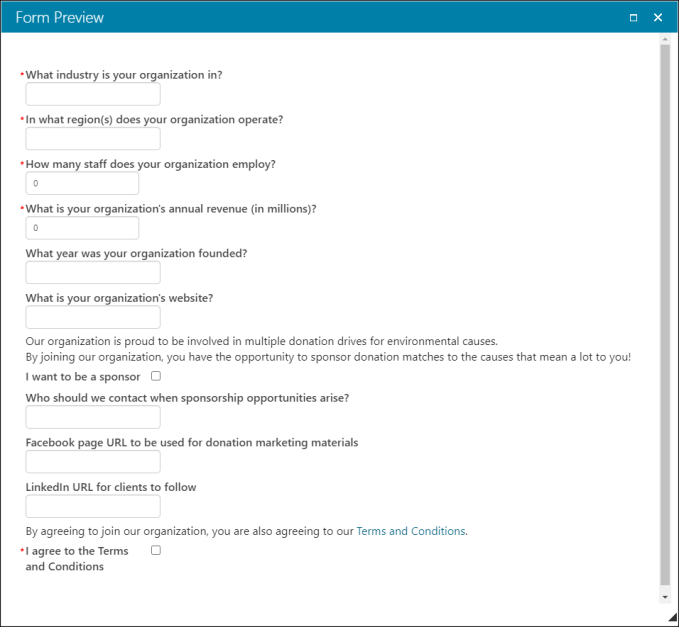
Out-of-the-box, this form is deployed on the Organization Join page of the Member Responsive site.
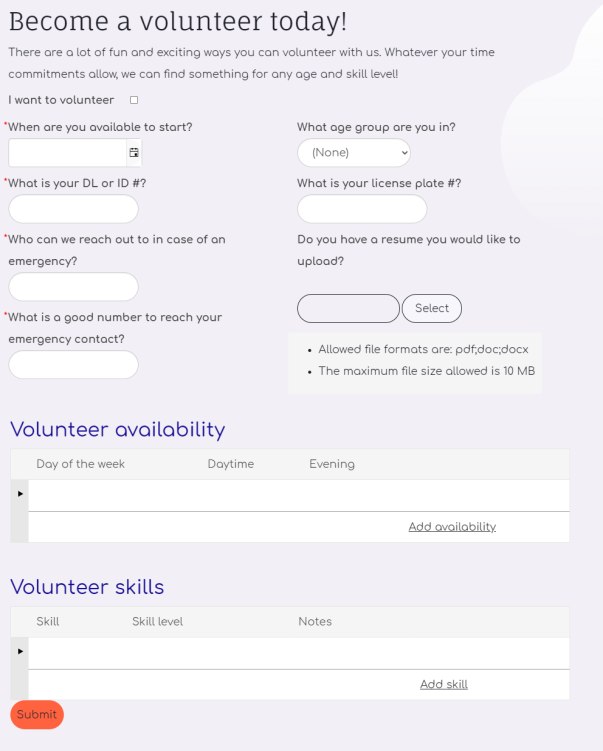
Volunteer Sign-up Form
The Volunteer Sign-up form collects information about members signing up to volunteer for your organization. This form can be found in the General group of the Form Library, and at @/iCore/Contacts/Volunteering/Volunteer-sign-up-form.
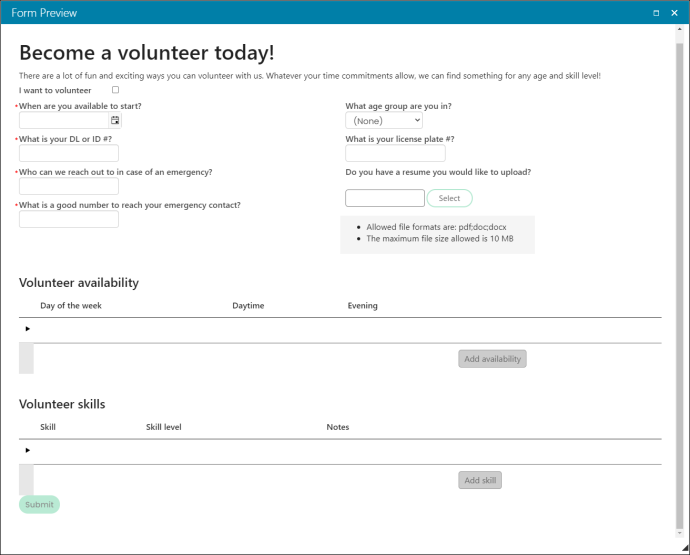
Out-of-the-box, this form is deployed on the Volunteer page of the Member Responsive site.

Contact demographics
The Contact demographics form can be used to gather demographic data about individual contacts or members in your database.
Example: Using an out-of-the-box form in the membership join process
The out-of-the-box forms can be added to any member-facing page, giving you the ability to collect valuable information about your members. The following example outlines this process.
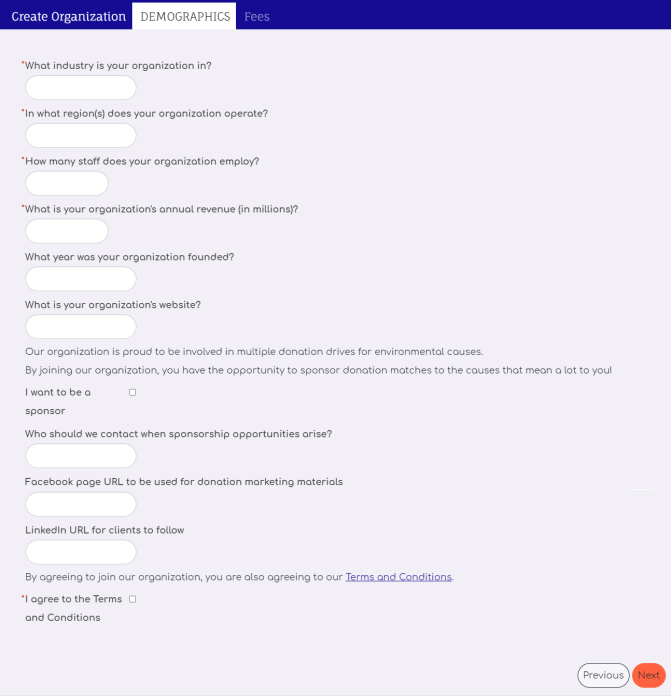
To add an out-of-the-box form to a membership join page, do the following:
- Navigate to RiSE > Page Builder > Manage content.
- From the @/iCore/Membership folder, make a copy of the Organization Join content record.
- Paste the copied content record into a Shared Content folder.
- Open the content record and provide a new Title and Publish file name.
- Open the Content Collection Organizer content item by clicking Configure.
- (optional) Change the name of the content item.
- Enable the Function as a step-by-step wizard, Steps are sequential, Redirect on finish, and Include ID as a URL parameter options.
- In the Content or URL to redirect to field under Finish button redirect, enter ~/Cart?ID=LoggedInUserID.
- Under the Create Organization tab, make sure the create organization with administrator content record (@/iCore/Membership/CreateOrganizationWithAdministrator) is selected in the Content to display field.
- Under the Demographics tab, make sure the organization demographic form (@/iCore/Membership/ Organization-Demographics-Form) is selected in the Content to display field.
- Under the Fees tab, make sure the general product display content record (@/iCore/Membership/General_product_display_without_cart_button) is selected in the Content to display field.
- Click OK.
- Click Save & Publish.
- Make sure to update any shortcuts to point to the new content record.