Last updated on: April 23, 2026
Related videos Training course
Note: The following information requires a Forms - Premium license. For more information, contact your AiSP or ASI Technical Support.
When creating forms, there are important differences between what authenticated (logged in) and unauthenticated (not logged in) users can do when interacting with forms. For more information, review the Accessing forms based on authentication documentation.
Important! To use Approvals, do not add Document, Multi-layout, or Sign-up fields to the form.
In This Article
Contact creation forms
Contact creation forms are forms that create a new contact upon submission. This form type can be selected on the Form content item configuration page when a form is displayed on a public facing page.
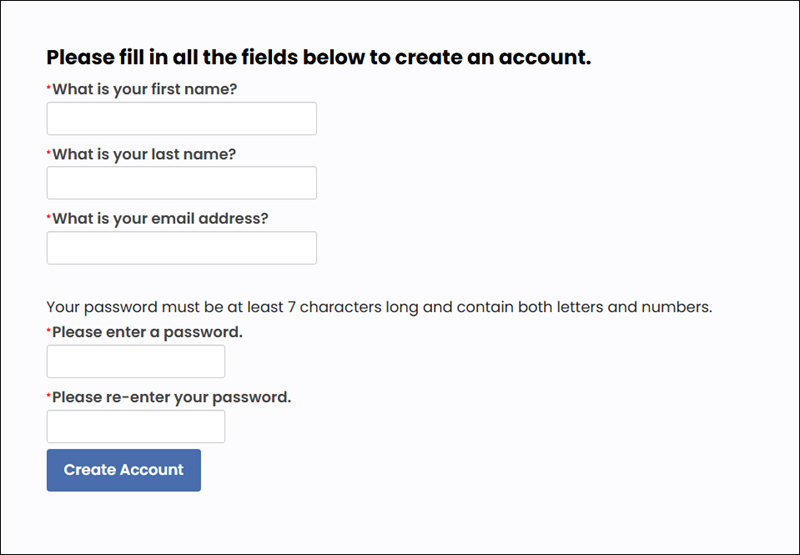
Important! Any contact creation form is required to include the CsContact.FirstName, CsContact.LastName, and CsContact.Email fields.
To create a contact creation form, do the following:
- Go to RiSE > Form Builder > Form library.
- Select + Add new form.
- Give the form a Name, and then select the Form group from the drop-down menu. Define the following optional properties:
- Provide a Description for the form. The description displays in the Form library.
- Enable Requires approval to allow approvals for the form. See Approvals for more information.
- Enable Advanced mode to design the form in Advanced mode. See Using Advanced mode for more information.
- Click Add.
- (Optional) Click Change Form Layout to change the layout of the form. The one column layout is used by default.
- Add the required form elements:
- Contact fields
- FirstName
- LastName
- Signup fields
- Username
- Password
- Confirm password
- Contact fields
- (optional) Add any text or header fields to improve the look-and-feel of your form.
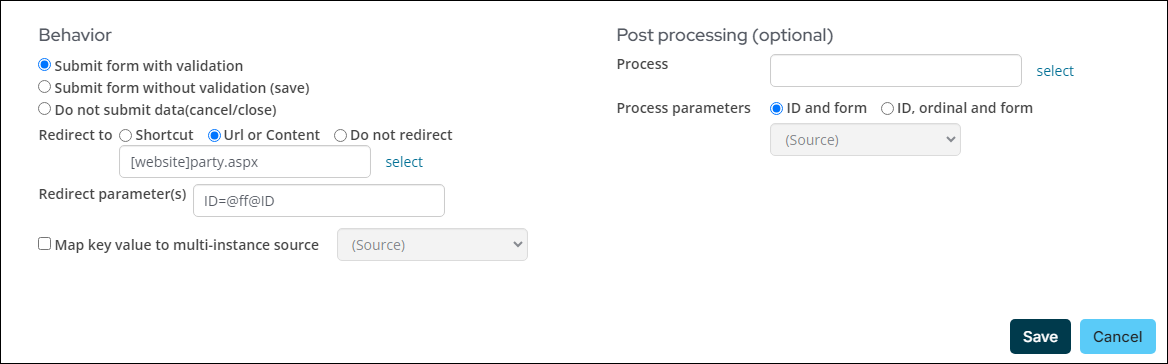
- (optional) If you would like your form to automatically redirect to the newly created contact, add a Submit button from Actions with the following settings enabled:
- Behavior:
- Submit form with validation
- Redirect to:
- Url or Content – enter [website]party.aspx
- Redirect parameter(s) – enter ID=@ff@ID
- Post processing (optional)
- Process parameters – select ID and form
- Click Save.
- Click Save or Save As.
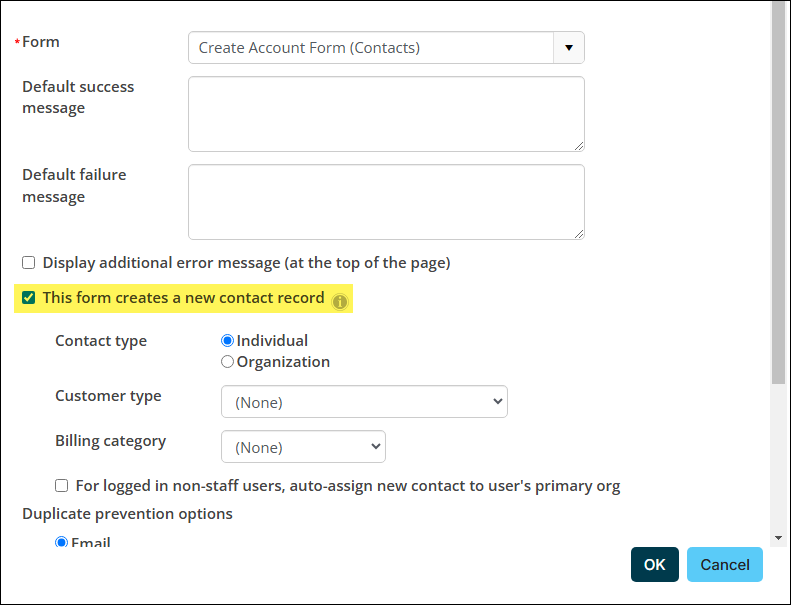
After you have created your form and are ready to display it on a page for user access, add the Form content item and enable the This form creates a new contact account configuration option. See Displaying a form for more information.
Important! When an unauthenticated user creates a new contact and does not create an account, only the first name, last name, and email are saved; additional information is not stored. If the user creates an account while filling out the form, all information entered, including additional details, is saved. For contact creation forms that do not contain Signup fields, include only the first name, last name, and email to prevent data loss upon submission.
Anonymous forms
Forms can be made anonymous; however, iMIS still requires one contact to attribute the submissions to. This allows the submissions to remain anonymous while a system administrator approves the submissions. These forms must use a multi-instance table data source so multiple responses can be associated with the same user.
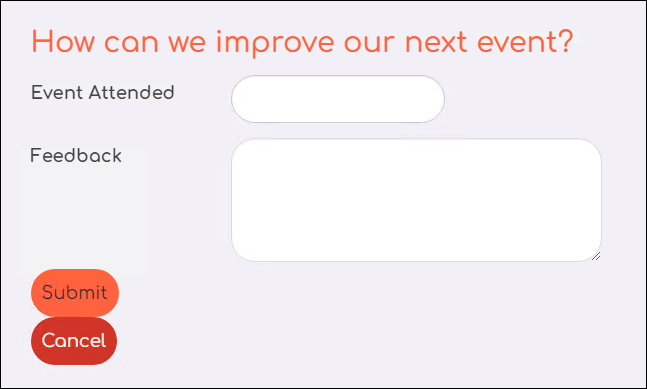
This example outlines how to create an anonymous post-event survey and require administrative approval for each submission. Responses will be locked to a non-member account called Event Feedback.
To create an anonymous form that requires approval, do the following:
- Create a multi-instance panel for the form to reference:
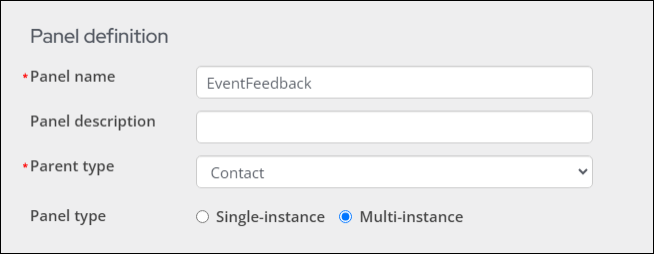
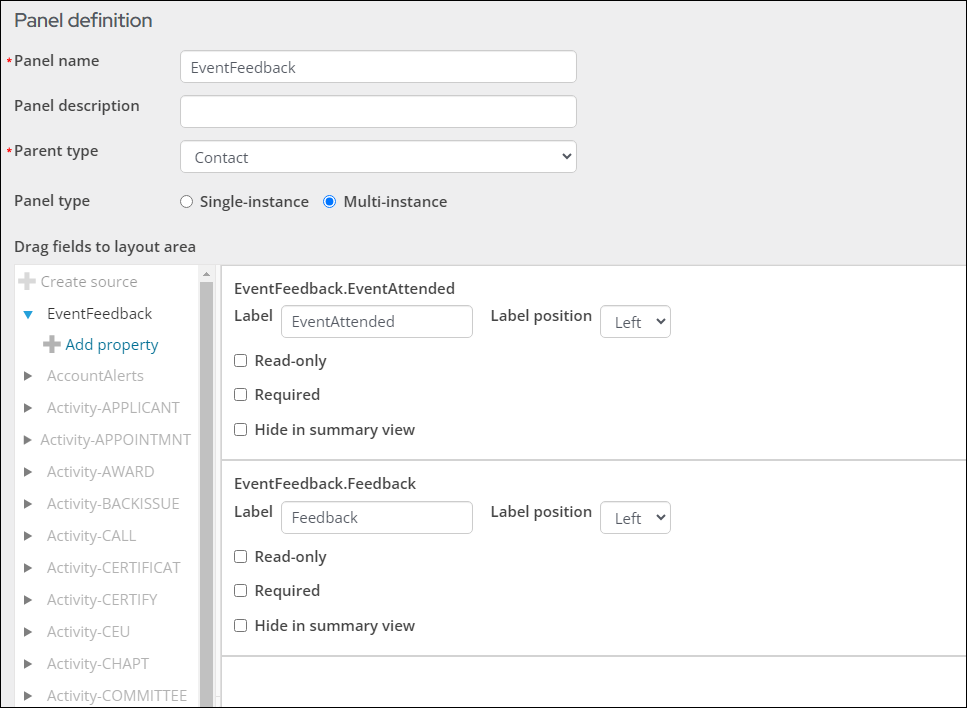
- Name the panel EventFeedback, select Contact as the Parent type, and select Multi instance as the Panel type.
- Create a source with the following properties:
- Property name = EventAttended and Property type = Text.
- Property name = Feedback and Property type = Text.
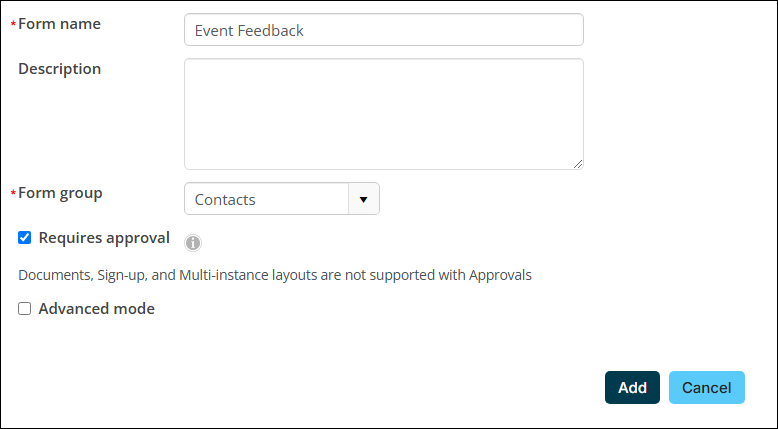
- Create the event feedback form:
- Go to RiSE > Form Builder > Form library.
- Select + Add new form.
- Name the form Event Feedback and enable Requires approval.
- Drag-and-drop the following Form elements onto the form canvas:
- Multi instance fields:
- EventFeedback.EventAttended
- Eventfeedback.EventFeedback
- Actions fields:
- Submit.yes
- Cancel.no
- Multi instance fields:
- (Optional) Add any text or header fields to improve the look and feel of your form.
- When you are finished creating the form, click Save or Save As.
- Add the Forms content item to your public-facing site:
- From the Form drop-down, select Event Feedback.
- Enable Lock form to update specific contact.
- From Contact to update, choose select.
- Click Add New.
- Create a new contact with a First name of Event and a Last name of Feedback.
- Click Save.
- Click Ok, then click Save & Publish.
Important! To use the Approvals feature with the form, do not add Document, Multi-layout, or Sign-up fields to the form. These fields are not supported with Approvals. The following error displays to inform the form creator of the error: " Multi-instance layouts cannot be added to forms requiring approval. Please removeXXXXX or remove the approval requirement."