Last updated on: June 23, 2026
You can add a language in iMIS. For example, you can add Dutch to the list of languages in iMIS, and then simply import a translated phrase dictionary. To modify an existing iMIS dictionary, you will first need to export the dictionary.
Spanish, French, German, and Dutch are available in iMIS by default.
In This Article
Adding a language culture
Do the following to add a new language:
- Go to Settings > Language translation > Translation cultures.
- Click Add new culture.
- Enter a Culture Id and a Name for the new language.
- Enter a Display name. This is the name that will appear in the translation drop-down. This name will not display in the translation drop-down until there is an active version for the culture and an iisreset has been done. Please contact ASI Hosting to perform an iisreset once you have added a new culture.
- Click Save to save your new language. You will need to create a dictionary version and then import the language dictionary.
Note: The Culture Id must conform to the ISO-639-1 two-letter language-name codes, for example, en (English) or fr (French).
Note: It is recommended that the Display name be entered in the language the name represents, for example, enter Deutsch for a German culture.
Importing dictionaries
You can easily import a new translated phrase dictionary into iMIS, or create a new dictionary based on an existing one. You can either import a new spreadsheet that contains translated phrases, or you can export an existing version into an Excel spreadsheet, then edit the phrases in that spreadsheet and import the modified spreadsheet to create a new dictionary.
Note: If a phrase dictionary contains blank Phrase cells, then that row is silently ignored during a dictionary import process. If the phrase dictionary contains a blank TranslatedPhrase cell, and DoNotLocalize is set to False, then that row is silently ignored during a dictionary import process, as well.
When importing an Excel spreadsheet, use the native format of the spreadsheet. An extension of .xlsx is acceptable, so do not change the format of the workbook.
Note: You might need to download Access drivers to be able to import the Excel spreadsheet. Go to the Microsoft Download Center to download the Microsoft Access Database Engine Redistributable that is compatible with the 64-bit version of Microsoft Windows. All systems used for importing and exporting dictionaries must use the Office 64-bit versioned apps. The 32-bit version of Windows can only be used after finishing the import or export process for all other tasks. Be sure to read all System Requirements before downloading. You must install the Microsoft Access Database Engine Redistributable on your application server.
![]()
Note: You must ensure the header row is not removed or modified in the spreadsheet before import. The only columns in the spreadsheet should be Phrase, TranslatedPhrase, DoNotLocalize, ControlType, and Description. If the header row is modified or removed, the import will fail.
You must be careful when naming custom dictionaries. Any dictionary that is named with the prefix ASI_ will be overwritten on an upgrade. You must rename any dictionary that you do not want overwritten on upgrade.
Importing a dictionary spreadsheet
Note: If a phrase dictionary contains blank Phrase cells, then that row is silently ignored during a dictionary import process. If the phrase dictionary contains a blank TranslatedPhrase cell, and DoNotLocalize is set to False, then that row is silently ignored during a dictionary import process, as well.
Before importing a spreadsheet, it is good to remove any custom formatting that may exist in the spreadsheet. This can be done by creating a new worksheet in the spreadsheet, copying all entries and headings from the original worksheet, and clicking Paste > Values into the new worksheet. Delete the original worksheet afterwards.
Keep in mind that Excel may truncate phrases longer than 255 characters when importing or exporting. You can keep track of truncated phrases by adding the LEN(<cell>) formula to blank columns in a copy of the spreadsheet and sorting the spreadsheet by largest to smallest.
After sorting, either copy the sorted entries to a clean spreadsheet or delete the columns with the formulas before using the spreadsheet as an import source. Making sure the cell with your longest Phrase and one with your longest TranslatedPhrase are in the top few rows of the spreadsheet will allow the import engine to retain all characters. Refer to Excel help for more details on how to work with formulas.
Do the following to import a new translated phrase dictionary into iMIS that contains translated phrases:
- Go to Settings > Language translation > Translation cultures and click Versions for the language for which you want to import a dictionary spreadsheet.
- If the version into which you want to import is active, click Deactivate. If you do not already have an existing version for this language, create one. See Creating new dictionary versions for a language.
- Click Phrases for the version into which you want to import a phrase spreadsheet.
- On the Import/Export tab, click Import Phrases from Excel.
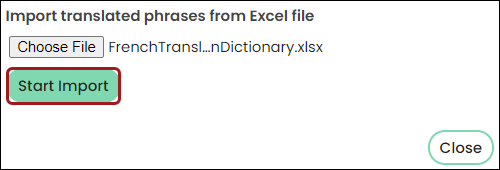
- Browse to find your Excel file. Click Open to select the Excel file you want to import. When importing an Excel spreadsheet, use the native format of the spreadsheet. An extension of .xlsx is acceptable, so do not change the format of the workbook.
- Click Start Import. A results screen will be displayed when the import is completed.
- Click Close.
- Click Back to Versions List.
- Click Activate to activate your new dictionary. The culture Display Name will display in the language drop-down list. If it does not, refresh or navigate to a different page.