Last updated on: June 23, 2026
Organizations can grant or restrict access to content available in iMIS based on a group membership, for example, downloadable and online products. Staff users can do the following:
- Define content, then restrict access to that content to a particular group.
- Define a product, and assign purchasers of that product to the group, which controls access to certain content.
Important! Product purchase groups as dynamic groups driven entirely by purchase activity. Administrators cannot manually add members to these groups. If a member needs to be added outside of a self-service purchase, a staff user must process a purchase on behalf of that member. Additionally, term spans cannot be edited by an administrator on the group record. Changes to the term require editing the product itself.
Creating products that offer group-based access
To create create product purchase groups, do the following:
- Add a new product, or edit an existing product:
- Go to Commerce > Add product.
- Fill out the required information (and any additional applicable information) for your product.
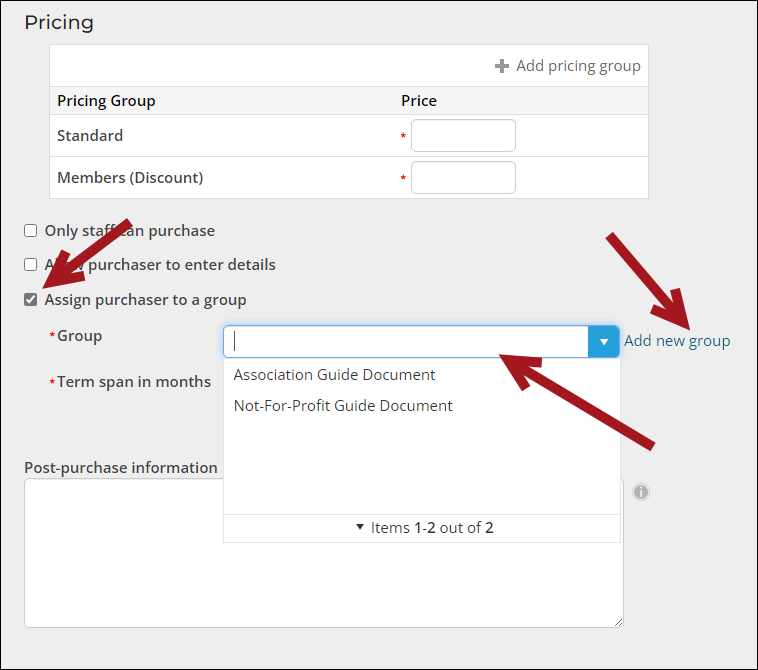
- Select Assign purchaser to a group. New group-definition options are displayed:
- Do one of the following:
- Select an existing Group from the drop-down.
- Select Add new group to specify a new group to which you can assign purchasers. You must have Customers: 5 module-level authorization to enable this setting.
Note: Click the Save icon (checkmark) to save the new group. The group is created regardless of whether you finished creating the product.
- Enter the Term span in months. This is the term for which the purchaser can remain a member of the group.
Note: You can create more than one group through this interface, but you can assign only one group to this product. Each group will have a role of Member and a type of Purchased Products. You can also associate multiple products to the same group once the group is created.
Important! The term span is set at the product level and cannot be modified directly by an administrator on the group record. To change the term length, edit the product definition. Members are added to the group automatically upon purchase and removed automatically when their term expires.
- Do one of the following:
- Fill out the Post-purchase information. This is information available to the purchaser. Whatever is entered in this field (for example, instructions, a link or a simple message) is available as soon as the product is purchased.
Important! The product must be a simple item. The Post-purchase information field is not available when the product is a collection/kit.
Note: If you want to provide a link to content, the content must already exist before you finalize the Post-purchase information. You can create the content before you create the product.
- Create the content you want to provide to purchasers.
- Configure group access to the content:
- From the content record (RiSE > Page builder > Manage content), click the Access settings tab.
- (Access settings tab) Select Make this available to.
- Deselect Everyone under Specific roles.
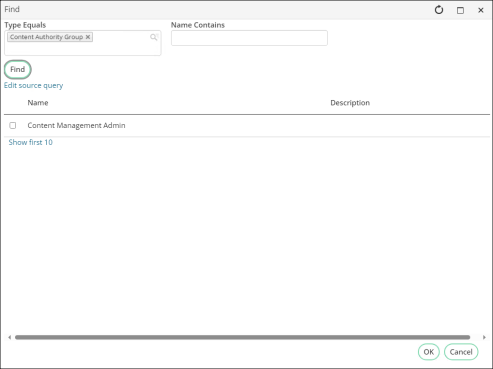
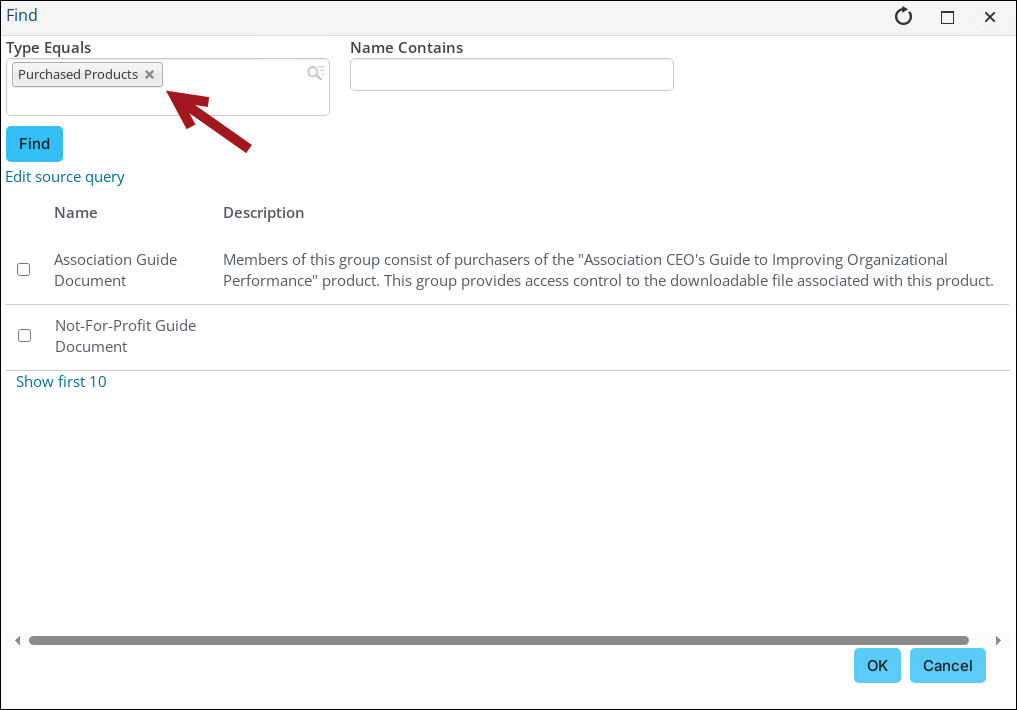
- Select Add group under Specific groups. If you created a new group when you created the product, search for that group.
- Click OK.
- Select Read permission only for this group.

Note: Access is granted to current group members only; that is, members whose term has not yet expired. Users who previously belonged to the group (past members) are not included in the security settings once their term has expired. Expired members lose access at 12:00 a.m. on their expiration date and will no longer be able to view or download the secured content.

- Click Save & Publish. Everyone who purchases any product associated with this group will become members of the group and have access to content restricted to members of this group.
Defining downloadable products
You can use this feature to provide downloadable content for purchase. Do the following to define a downloadable product:
- Add a new product or edit an existing product to offer your post-purchase information and content. See Adding products for more information.
- Do not prorate - Same dues regardless of when customer joins.
- Standard monthly prorating - Prorating for the current year (depends on the billing interval). For example, if a customer joins in month 7 and annual dues are $200, the calculated dues would be one half of the total dues, or $100 (six months out of twelve).
- Use a custom schedule - User-defined prorating rules, depending upon the needs of the organization. If the Use a custom schedule option is enabled, proration rules are created from defining schedules on the Staff site.
-
Create a downloadable product:
- (optional) Create a contact record or edit an existing record. You can describe the product, provide information about the product, and so forth.
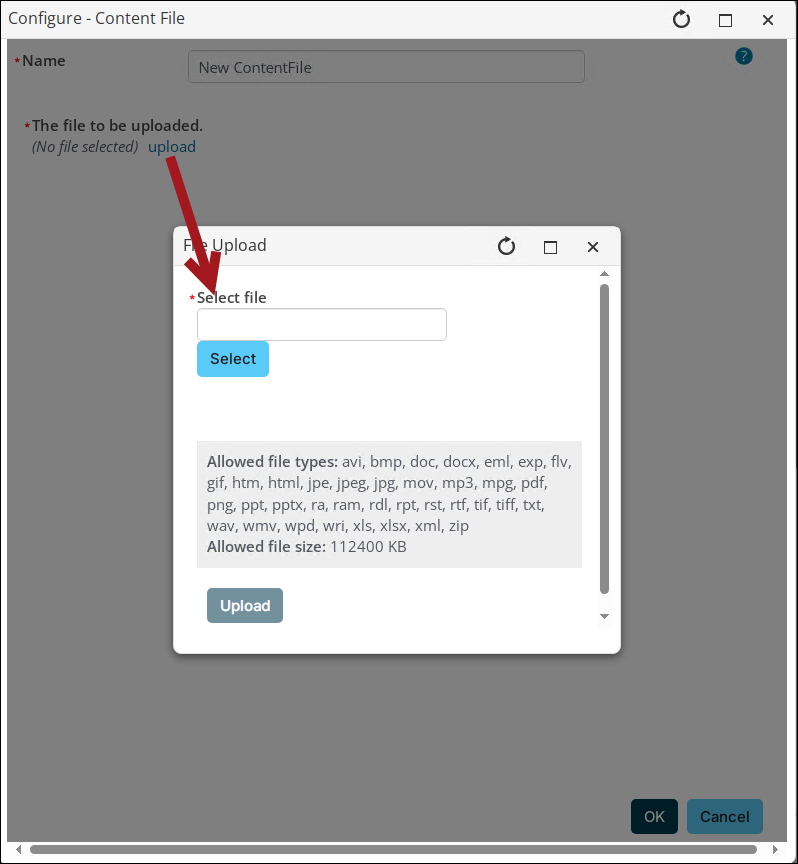
- Add a Content File content item.
- Enter a Name. This is the displayed name of the downloadable content.
- Click upload to select the file you want to upload and offer as downloadable content. Browse to find the file you want to offer, then click Upload. You can upload a new file to replace a previous file, or you can delete the file you have uploaded.
- Click OK.
Note: Shipping and handling charges will occur for downloadable products unless shipping minimum values are set to 0 or the shipping method calculation is set to ship by weight.
-
Configure group access to the content. Select the Access settings tab:
- Select Make this available to.
- Deselect Everyone under Specific roles.
- Click Add group under Specific groups. If you created a new group when you created the product, search for that group.
- Click OK.
- Select Read permission only for this group.
Note: The group Type must be Purchased Products.
- Click Save & Publish.
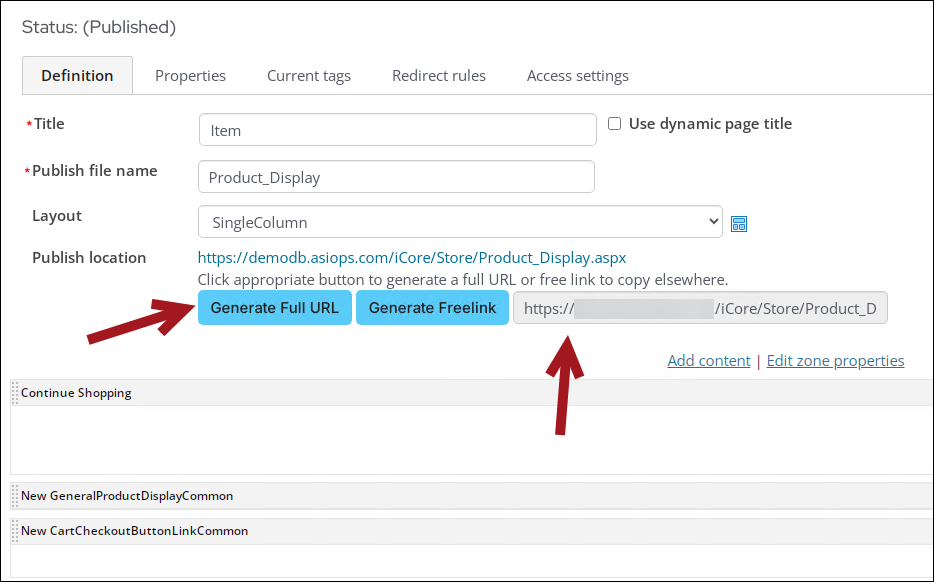
- Open the content record once it is published, and click Generate Full URL. Make a note of this URL; you will use this to help define your product and post-purchase information.
- Edit your Post-purchase Information.
- Finish defining your product and click Save.
- In an on-screen order confirmation upon successful order submission.
- In an order confirmation email.
Note: You must enter the generated full URL. You can add HTML tagging to make this a live link for a purchaser, for example:Congratulations! You have purchased the Sample Guide to Examples! You can download your copy by clicking <a href="http://example.com/contentpath/contentname.aspx"> here </a> at any time.
where yourwebsite.com is the actual name of your website, and contentpath/contentname is the path and name of the content item containing the purchased content.
You can also use the [website] variable in place of your actual website name if your customers can purchase content from multiple websites, for example, Donor. This link takes the customer back to the website from which they made their purchase. For example:
Congratulations! You have purchased the Sample Guide to Examples! You can download your copy by clicking <a href=[website]contentpath/contentname.aspx"> here </a> at any time.
The information you added in the Post-purchase Information field, including a link to the purchased content, is delivered to the purchaser:
You can also create a query and display it on an individual's account page using the Query Menu content item. This query can allow individuals access to the links for the products they have purchased. To create the query, refer to Building IQA queries: Tutorials.
Finding and reviewing product purchase groups
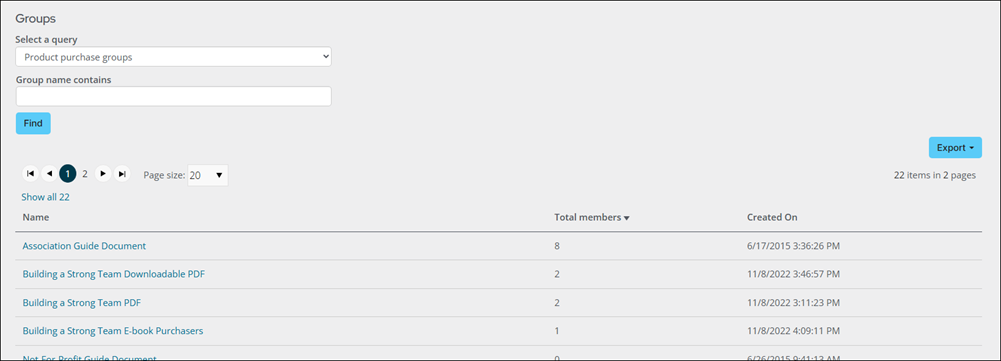
Product purchase groups are a type of dynamic group in iMIS. To locate and review the groups, do the following:
- Go to Community > Groups.
- From Select a query, choose Product purchase groups.
- Search for the group, then select the group name.
- Review the following information:
- Group Term span (months)
- Qualifying products available for download
- Post-purchase information
- Members of the group
- Effective and expiration dates for members
- (optional) Click Email to send a communication to group members. Filter the list of members using the Find members and Member name contains options.

Note: Group members remain in the group until 12:00 a.m. on their expiration date. At that point, they are automatically removed and lose access to any secured content associated with the group. Past members are not included in the group's security settings, since access is restricted to active members only.
Member management notes
- Adding members: Administrators cannot manually add members to a product purchase group. Membership is granted automatically when a qualifying product is purchased. If a staff member needs to add someone to the group without a self-service purchase, they must process a purchase on behalf of that individual through the commerce workflow.
- Term spans: The term span is defined at the product level and cannot be changed on the group record directly. To modify the term, edit the relevant product.
- Expired members re-purchasing: If a member's term expires and they subsequently purchase a qualifying product again, they are re-added to the group with a new effective date and expiration date calculated from the new purchase. Their access to secured content is restored immediately upon completion of the new purchase.