Last updated on: June 08, 2026
Provide an online shopping experience for your customers by creating products. Easily define product details, such as the item Category, pricing information, tax configuration, whether or not the product has inventory, and the GL account.
Provide digital products as well using the post-purchase information feature. After purchasing a product, purchasers receive post-purchase information or content in the following:
- On-screen order confirmation upon successful order submission.
- Order confirmation email.
Note: If you upgraded from the iMIS Desktop with product special pricing defined, the pricing details are honored but they cannot be edited. The Uses pricing rules message appears below prices with existing special pricing rules.
In This Article
Adding products
Do the following to add products:
- Go to Commerce > Add product.
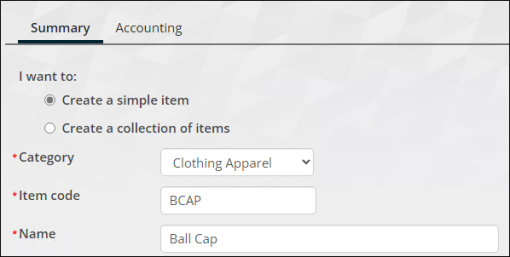
- Select Create a simple item. To create a collection of items, see Defining a collection of items.
- Select a product Category. For more information, see Defining product categories.
- Enter an Item code. For example, if you are adding a new coffee mug, the code could be MUG123.
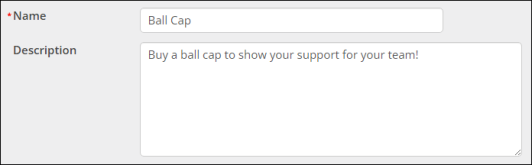
- Enter a Name. This field has a limit of 120 characters and supports special characters, including Māori macrons.
- Add a brief Description for the item. This field supports special characters, including Māori macrons.
- Select an image for the product.
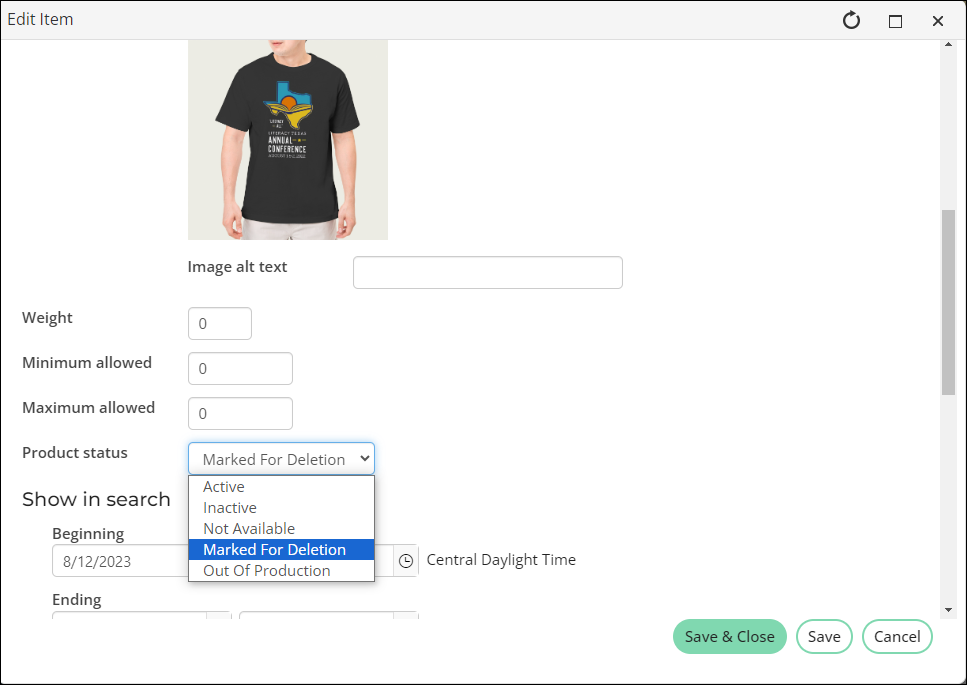
- (optional) Enter the Weight to help calculate shipping costs.
- (optional) Enter the Minimum allowed. Users cannot purchase less than the specified number of items.
- (optional) Enter the Maximum allowed. Users cannot purchase more than the specified number of items.
- Select a Product status.
- Active (A) - The default status for all new products is Active.
- Inactive (I) - Products that have an Inactive status are temporarily unavailable for sale to customers; however, you still can maintain inventory for an Inactive product.
- Not Available (N) - Products that have a status of Not Available are no longer available for sale to your customers and can include discontinued and recalled items. The entire product inventory has been sold, returned, or destroyed.
- Marked For Deletion (D) - Products that have a status of Marked For Deletion are no longer available for sale to your customers, and the inventory has been sold, returned, or destroyed.
- Out Of Production (O) - Products that have an Out Of Production status cannot be reordered from suppliers and are available for sale to your customers only up to the current inventory level.
- (optional) Specify start and end dates (Show in search) to control when the product appears in search results and is available for purchase on the web:
- No dates specified - The product will always appear in search results and remain available for purchase.
- Begin and end dates set - The product becomes available to purchase on the start date and is no longer available to purchase after the end date.
- Begin date only - The product appears in search results and becomes available for purchase starting on the specified date, with no set end date.
- End date only - The product is immediately available for purchase and remains so until the specified end date, after which it will no longer be available.
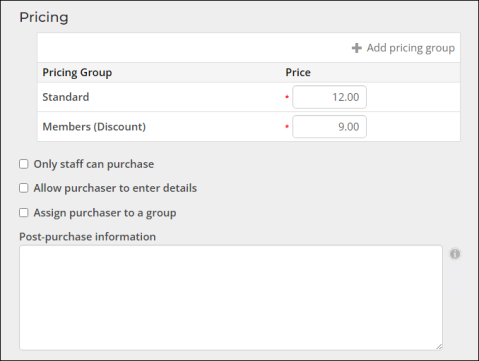
- Enter the Standard price (non-member) and Member (Discount) price. Once pricing is added, staff users viewing the price of products will see a message that details where the price is coming from. The price display indicates whether it’s based on a pricing group, standard product pricing, or member discount pricing.
- The Add pricing group option is available once the product is saved. To add pricing groups, see Adding pricing groups to products.
- (optional) Only staff can purchase - Select this option to restrict the ability of public users to select this item:
- If enabled, public users can view the product but not add the product to the cart. The Show in search dates still determine whether the item can be found in search.
- If disabled, public users can add the item to their cart. The Show in search dates still determine whether the item can be found in search.
-
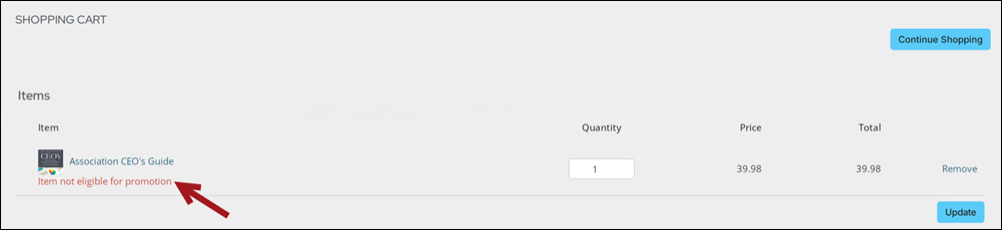
(optional) Item is eligible for promotions – Select this option to make the product eligible for promotions. This setting is enabled by default. To exclude the product from promotions, disable this option.
- (optional) Allow purchaser to enter details - Select this option to enable adding specific details about an item at the time the order is being placed. For example, when a charity accepts merchandise or services as In-Kind gifts, a staff user can specify details about the items or services received from the donor. These details are entered prior to adding the item to the cart, and will be displayed in the Shopping cart .This option uses the Note field property of the CsOrderLines business object.
- (optional) Assign purchaser to a group - Select this option to automatically add all purchasers of this item to a group. You can create products that offer group-based access to post-purchase information or content based on a group membership. For more information, see Granting access to secure website content.
- Group - Staff users with Customers: 5module authorization must select an existing group or add a new group to which purchasers will be assigned. For new groups, enter the New group name and Save.
- Term span in months - In months, specify the term span of the group membership. This is the term for which the purchaser can remain a member of the group.
- (optional) Post-purchase information - Information to be displayed to a user following purchase of this item. Post-purchase information is included in the order confirmation message and can be used to indicate how to retrieve downloadable content.
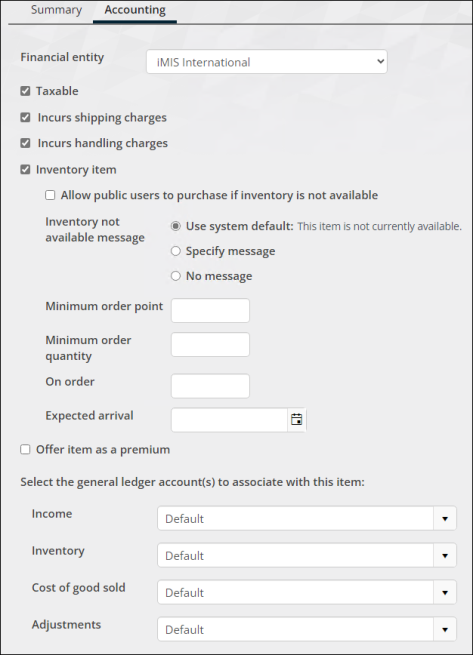
- (Accounting tab) Review the default settings and make any required changes for the item. The options available depend on the taxation method set up for your default organization:
- Financial entity - Select a Financial entity to which the product purchase amount is deposited. If this option is left blank, the product purchase amount is deposited to the Default financial entity (Default organization).
- Taxable:
- If your organization uses the default taxation method, select Taxable.
- If the product is non-taxable, deselect Taxable.
- If your organization uses the VAT taxation method and the product is taxable, select Taxable and enter the VAT Tax Code you want to apply.
- Incurs shipping charges - Select this option to add shipping charges when the user checks out.
- Incurs handling charges - Select this option to add handling charges when the user checks out.
- Inventory item - Enable Inventory item if this product is stored in inventory. If the selected Category is defined as an Inventory item, this option is automatically enabled. When enabled, the following options are displayed:
- Allow public users to purchase if inventory is not available (disabled by default):
- If enabled, public users can add any quantity of the product to the cart. The Inventory not available message defined for that product is displayed in the cart.
- If disabled, public users cannot add the item to the cart.
- If an out-of-stock item was added to a public user’s cart before going out-of-stock, the Inventory not available message is displayed in the cart. Public users cannot submit the cart.
- If enabled, public users can add any quantity of the item to the cart.
- If disabled, public users cannot exceed the available quantity when adding items to the cart. They are informed how many items are available to add to the cart.
- If an item was added to a public user’s cart with a quantity exceeding the quantity available, the public user is informed of quantity available, enabling the user to adjust the quantity in the cart.
- Inventory not available message - Select the message that is to be displayed to users if there is no available inventory:
- Use system default – iMIS will use the default out of stock message.
- Specify message - You can add a product-specific message if inventory is not available. This value will be cleared if you decide not to specify a message. This field allows a maximum of 150 characters.
- No message - No message is displayed.
- Minimum order point - Enter a reorder point for a product's inventory. The Product Reorder List report notifies you when the product has dropped to the reorder point. The quantity on hand is compared to the Minimum order point to determine if the product should be printed on the report.
- Minimum order quantity - Enter a minimum amount of a product to reorder. Often, the quantity entered depends on the order quantity required for receiving a vendor discount.
- On order - Enter the number of products currently on order. The value entered in the On order field is the value that appears in the product display. As products are ordered and invoiced, this number is automatically updated.
- Expected arrival - Enter the date a reordered product is expected to arrive.
Note: If the product you are creating is a non-inventory (virtual) item or is an inventory item without shipping or handling charges, then public users will not see line items for shipping or handling.
When the product is out-of-stock:
Staff users can add any quantity of the product to the cart. The Inventory not available message defined for that product is displayed in the cart.
When the inventory for a product is decreasing:
Staff users can specify in the cart a quantity greater than the quantity of the product available. Staff users are informed of the available quantity when viewing the product or the cart.
If an item is added to the cart for which the quantity ordered exceeds the quantity available, a message is displayed indicating the entire order is placed on backorder.
- Offer item as a premium - Enable to offer this product as a premium gift that donors are eligible to receive after donating to a gift item:
- Enter a Listed minimum gift amount. This is the minimum gift amount a donor must give in order to be eligible for this premium.
- Provide a Fair market value. This is the price that the donor must pay if the donor is not receiving the product in exchange for their donation. For premiums, the tax-deductible amount is often calculated as the amount of your donation minus the Fair market value of any premium you receive for that donation. Currently, this value is not included in any of the receipting logic.
- From Include in premium sets, select an existing premium set to which the product will belong. Click Add new to create a new premium set to which the product will be added.
Note: If you are creating a collection of items (kit), you must define the components of the collection.
- Select the general ledger account(s) to associate with this item - To override the default general ledger accounts specified for the product Category, start entering the desired account name or code to select from a filtered list.
See Taxation for more information on setting up Canadian and European (VAT) taxation methods in iMIS.
Note: Shipping and handling charges do not apply to renewals.
Note: The general ledger accounts do not appear unless a product Category is selected on the Summary tab. The Inventory, Cost of goods sold, and Adjustments accounts do not appear unless Generate transactions for cost of goods sold is enabled.
- Click Save. The item detail page is displayed as it will appear to users. In addition, the item will display in the list of product items. The user can click the item name to view details.
Note: To create a kit, you must select a category that is defined as a Product kit.
Note: It is not recommended to create a Gift product from Commerce > Add product. To create a gift, go to Fundraising > Add gift item. See Defining gift items.
Note: Event product images support 100 characters.

Active products are always available for sale to your customers except during periodic fluctuations in inventory. When an Active product has insufficient inventory in stock to fill an order, the product is backordered until sufficient inventory exists for delivery.
Possible reasons for assigning an Inactive status to a product include an interruption of supply (for example, a supplier has gone out of business, or the product is part of an embargoed shipment), you are awaiting regulatory approval to sell the product, or the product is a seasonal item.
Reasons to keep products that have a Marked For Deletion status in your system are for historical reporting and to prevent reusing a previously assigned product code. Products with a Marked For Deletion status have the same functional characteristics as Inactive products.
You can sell an Out Of Production product only if the product's quantity-on-hand is greater than zero. Once you deplete an Out Of Production product's current inventory, iMIS treats any additional sales of the product as if the product's status is Not Available.
Note: Prices cannot exceed 1,000,000.00 for single products.
Note: If a promotion has already been applied and the promotional product is in the user's cart, disabling the promotion setting will trigger a message in the cart, notifying the user that the item is no longer eligible for promotions.
Note: You must have a Customers: 5 module authorization to enable this setting.
When Assign purchaser to a group is selected, the following configuration options are displayed:
Note: You can create more than one group through this interface, but you can assign only one group to this product. Each group will have a role of Member and a type of Purchased Products. You can also associate multiple products to the same group once the group is created.
Note: When a product is configured as a kit or collection, the Post-purchase information field is hidden. See Defining a collection of items.
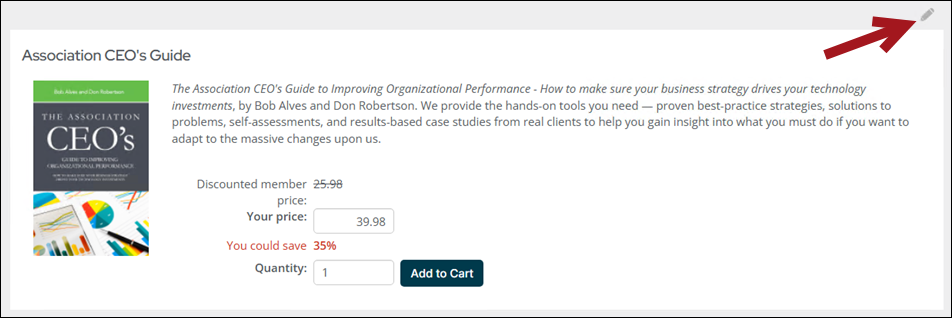
Editing products
Do the following to edit products:
- Go to Commerce > Find products.
- Select the product you want to edit.
- Click Edit.
Note: The Edit link will not be displayed if the product is currently in the cart, a Product Kit, or a product with a negative standard price.
Troubleshooting
If you encounter an error when editing a product, consider the following potential issues:
- Turn off Easy Edit: If Easy Edit is enabled, disable it, then try editing the product again.
- Empty the Manager's Cart: Make sure the Manager account Cart is empty. See Clearing or deleting customer carts.
- Purge the iMIS Cache: Go to Settings > About iMIS, then click Purge System Cache. Try editing the product again.
- Republish site content: Republish the website's content, then try again.
- Log out/in: Log out of iMIS, and wait a few minutes. Log back in and try editing again.
Deleting products
Products cannot be deleted; however they can be marked for deletion. To mark a product for deletion, edit the product and select Marked For Deletion as the status. Products marked for deletion are not deleted and remain in the database but are no longer available for sale to customers.