Last updated on: June 23, 2026
eCheck
The eCheck page allows Chapter Officers to submit payment via ACH or Credit Card for items that are outstanding on their iMIS record.
Important! ACH transactions require a Telecheck account if using PayFlowPro as your iMIS payment processor. Ensure PayPal enables Telecheck on your account after creation. If your iMIS payment processor is BluePay, Telecheck is not required because BluePay can process both credit card and ACH transactions. However, ACH must be enabled on your BluePay account.
Updating eCheck settings
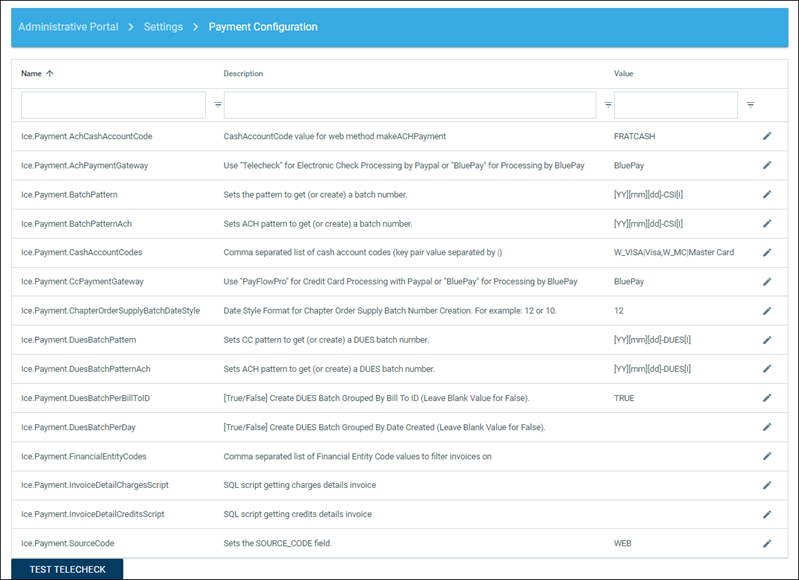
The following settings should be updated when using ICE eCheck:
- ACH Cash Account Code – A cash account for ACH should be set up in iMIS and configured to use the credit card gateway.
- ACH Payment Gateway – This should reflect your current iMIS payment processor.
- Enter Telecheck if using PayFlowPro.
- Enter BluePay if using BluePay.
- Batch Pattern (fee payments only) – Update the batch pattern code to your preferred batch pattern in iMIS. It is recommended to include "ICE" in the batch pattern so you can easily identify that the batch was created by ICE.
- Batch Pattern ACH (fee payments only) – If you want ACH transactions to be in a separate batch, specify the batch pattern for ACH here.
- Cash Account Codes – Add the credit card payment options to be available in ICE. Use the format: cash account code in iMIS + " | " + credit card description (visible to the user). If you do not want to allow credit card payments, leave this value blank.
- CC Payment Gateway – This should reflect your current iMIS payment processor. If you do not want to allow credit card payments via ICE eCheck, delete the CC Payment Gateway value and the credit card option will not appear.
- Enter PayFlowPro if using PayFlowPro.
- Enter BluePay if using BluePay.
- Dues Batch Pattern (member dues payments only) – If you want to separate credit card and ACH transactions into separate batches, specify the batch pattern for Credit Card (CC) here. If not, match the Batch Pattern value above.
- Dues Batch Pattern ACH (member dues payments only) – If you want to separate credit card and ACH transactions into separate batches, specify the batch pattern for ACH here. If not, match the Batch Pattern ACH value above.
- Dues Batch Per Bill To ID (member dues payments only) – Set to TRUE if you want a separate batch created for each BT ID.
- Dues Batch Per Day (member dues payments only) – Set to TRUE if you want a separate batch created per day.
Note: A batch number should not exceed 15 characters.
Batch pattern keywords supported:
- [YYYY] or [YY] – Replaced with current year as 4 or 2 digits.
- [MM] or [M] – Replaced with current month as 2 or 1 digit(s).
- [DD] or [D] – Replaced with current day as 2 or 1 digit(s).
- [I] – Incremental index starting at 1.
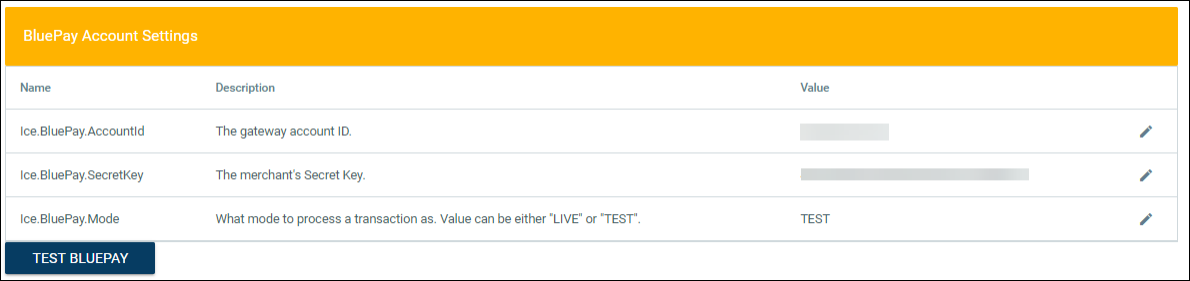
If using BluePay, enter your account information as provided in your BluePay account. Use the Test BluePay link to confirm the connection.
Authorization process
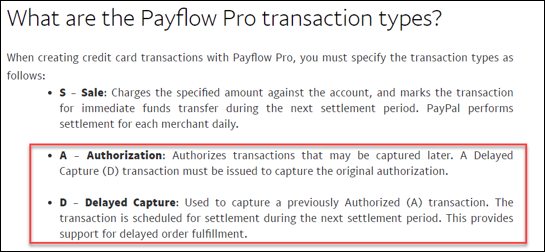
The level of authorization and required fields may vary per payment processor. ICE uses the payment processor API to first request authorization and then perform a delayed capture for payment.
What are the Payflow Pro transaction types? (paypal.com)
RESULT Values for Transaction Declines or Errors (paypalobjects.com)
iMIS retains data about transaction status and response codes from the payment processor:
csi_ice_payments_logretains transactions from the SubmitPayment.aspx page (open invoice payments).csi_ice_memberdues_cart_paymentlogretains transactions from the ManageDues.aspx page (member dues payments).
Each of these tables includes a PNREF field, which contains the reference code from the payment processor. Search by this PNREF number in your processor’s management site for transaction details.
Adding to a sitemap
Do the following to add the payment options to a sitemap:
- In ICE admin, edit the sitemap.
- Add a new menu item in the desired location.
- In the URL field, select one of the following:
- ~/ICE/Actions/SubmitPayment.aspx – for payments on charges that appear on the chapter/company record.
- ~/ICE/Actions/ManageDues.aspx – for payments on dues subscriptions on member records.
- Set the appropriate security roles.
- Save properties.
Configuration options
The following configuration options are available:
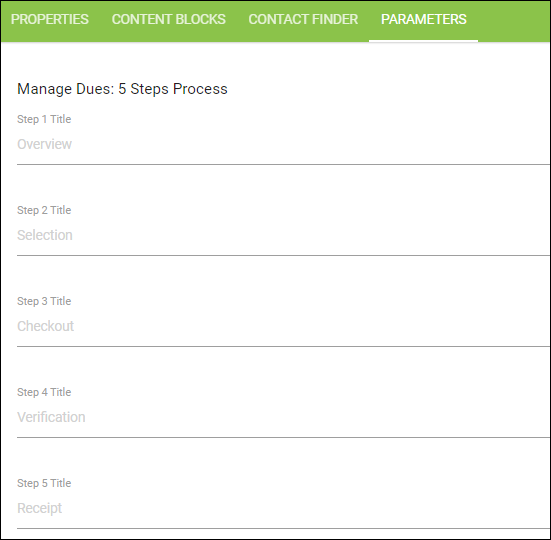
- 5 Step Process (Manage Dues control) – The step headings can be modified.
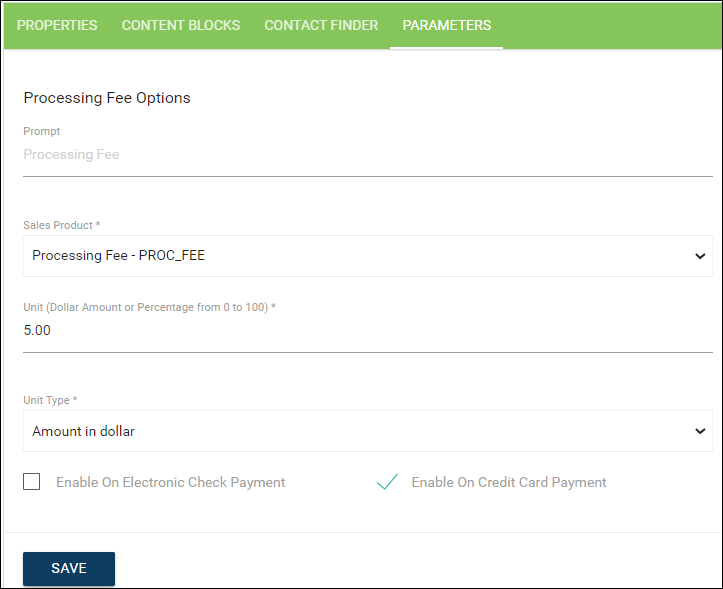
- Processing Fee – Available for both Submit Payment and Manage Dues pages. Enable this on the Sitemap > Parameters tab.
- Prompt – Text shown to users for the fee.
- Sales Product – A SALES product in iMIS used for the fee (must have a GL account code).
- Unit – Dollar amount or percentage of total payment.
- Unit Type – Select "Amount in dollars" or "Percentage of total amount."
- Apply the processing fee to specific transaction types by selecting the applicable checkboxes.
- Customizable Step Labels – Available on the Manage Dues page via the Sitemap > Parameters tab.
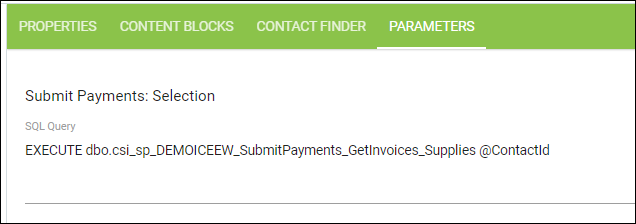
- Submit Payments Selection SQL Query – Specify a SQL query to identify items for payment (default:
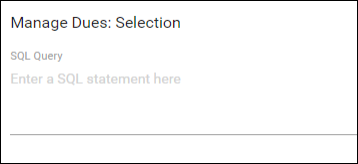
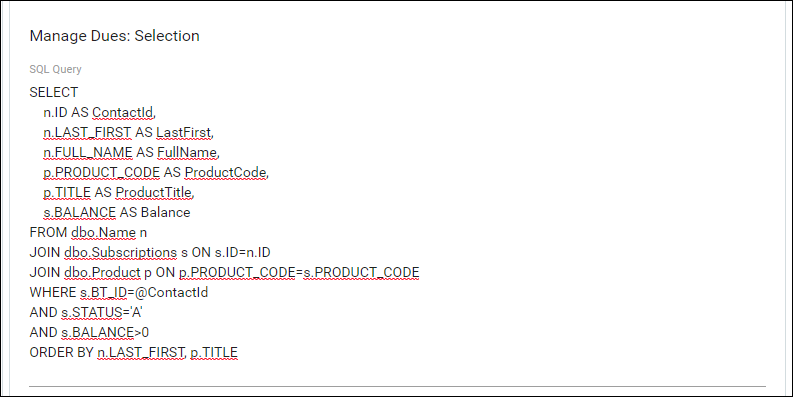
csi_sp_ICE_SubmitPayments_GetInvoices). You can insert a new query or create a new stored procedure. - Manage Dues Selection SQL Query – Specify a query to manage dues items (default:
csi_sp_ICE_MemberDues_GetDuesItems). You can insert a new query or create a new stored procedure. - Dues Items Selection Control (Manage Dues) – Specify if all dues items for a member should be selected/deselected together.This is helpful if you have multiple subscriptions for each member to pay and you want all items due to be paid.
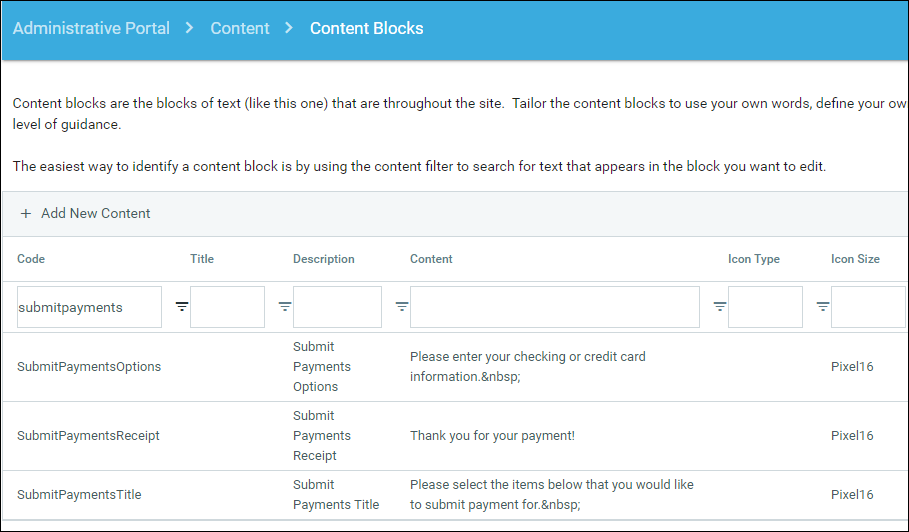
- Content Blocks for Instructional Text:
- On the Submit Payment page (updated under ICE Admin > Content Blocks):
- SubmitPaymentsTitle – page header.
- SubmitPaymentsOptions – instructions above payment fields.
- SubmitPaymentsReceipt – text shown on the receipt page after payment.
- On the Manage Dues page (updated under Sitemap > Content Blocks).

- On the Submit Payment page (updated under ICE Admin > Content Blocks):

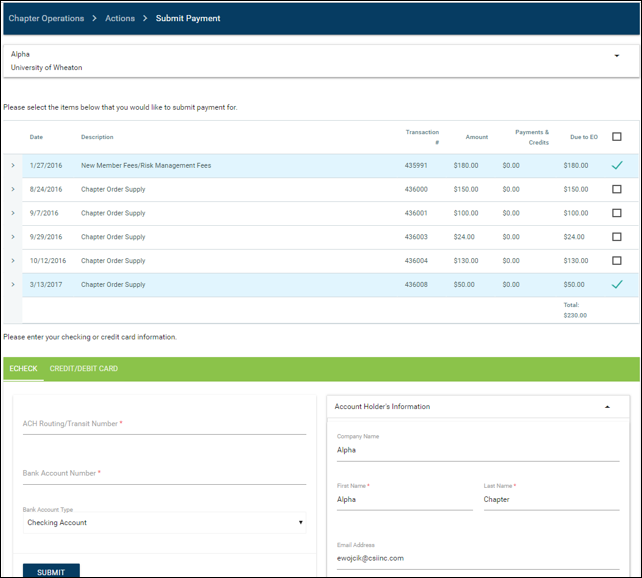
Submitting payments in ICE
Do the following to submit payments in ICE:
- Select the menu option and choose outstanding items to pay.
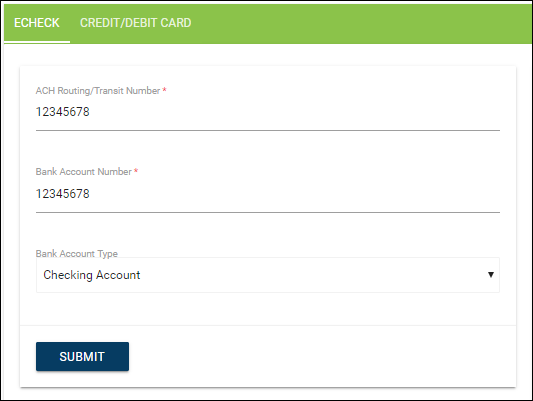
- Enter Checking or Credit Card information.
- Click Submit to proceed to the receipt page.
Payments will display in iMIS on the chapter's record. Normal batch processing and reconciliation apply.