Last updated on: January 27, 2026
Event invoices can be automatically generated upon checkout, or manually generated later by a staff user.
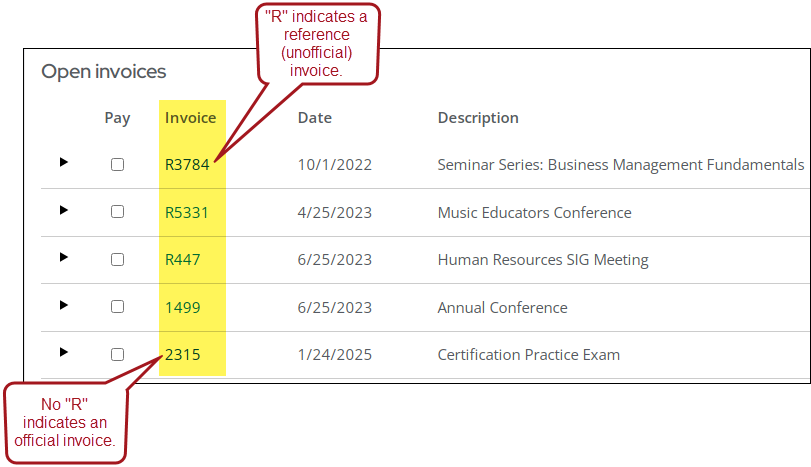
When the Automatically generate invoices for registrations and adjustments upon checkout setting (Settings > Events > General) is enabled, event invoices are automatically generated and assigned an invoice number upon checkout. When the setting is disabled, the invoice is assigned a reference invoice number until the invoice is manually generated. To know if an invoice is a reference or an official invoice, review the invoice number.
In This Article
- Automatically generating event invoices
Manually generating event invoices
Viewing invoices for a specific event
Printing invoices for a specific event
Searching for a specific invoice to print
Members printing their own event invoices
Emailing event invoices
Adjusting the Bill to contact for unpaid event invoices
Paying an event invoice for a registrant
Automatically generating event invoices
To always automatically generate event invoices and adjustments (including cancellations), do the following:
- Go to Settings > Events > General.
- Enable Automatically generate invoices for registrations and adjustments upon checkout.
- To only automatically issue invoices for registrations and adjustments that have an open balance, then also enable Registrations and adjustments with a non-zero balance only. Registrations and adjustments without an open balance must be manually invoiced.
- Click Save.
Any new registration or adjustment, including cancellations, are automatically invoiced.
Manually generating event invoices
When the Automatically generate invoices for registrations and adjustments upon checkout setting (Settings > Events > General) is disabled, event invoices are assigned a reference number until the invoice is manually generated. After the invoice is manually generated, the invoice is assigned an official invoice number.
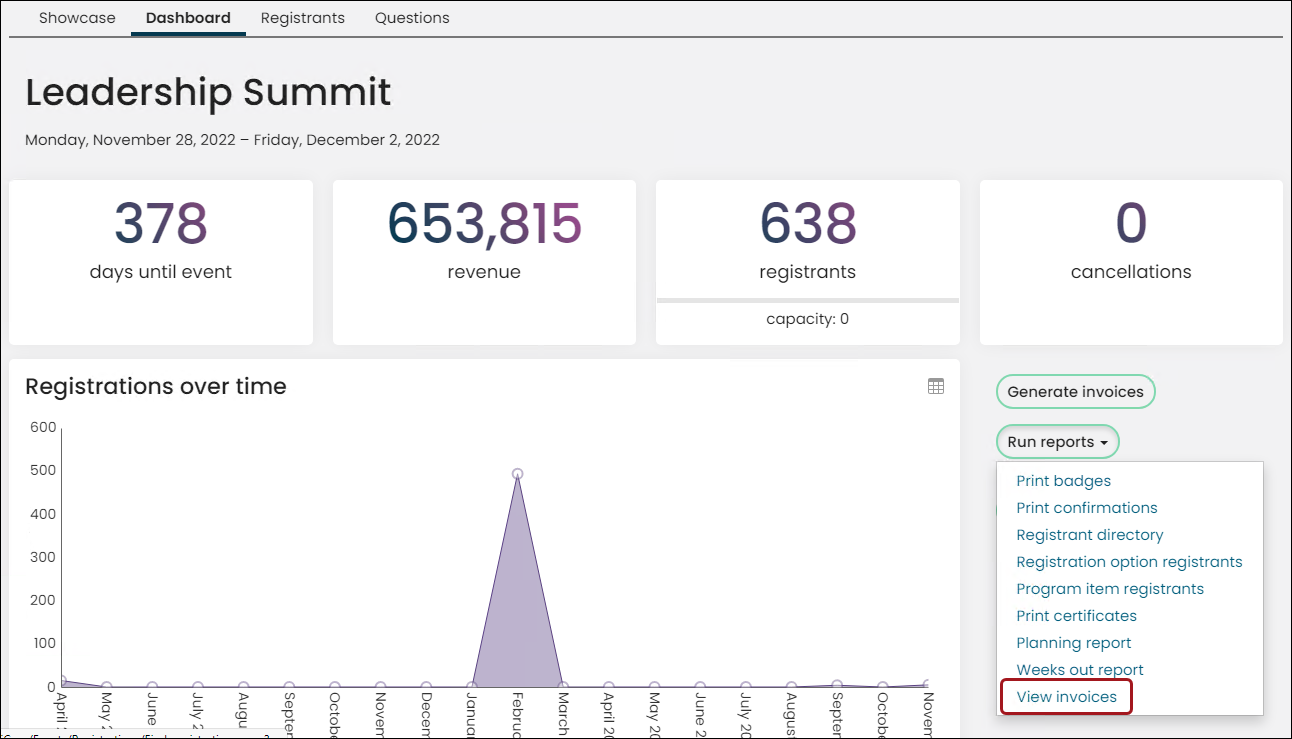
Reference invoices appear in Finance > Invoices and on user profile pages, and you are able to pay off these invoices; however, it is a best practice to generate invoices when you begin managing invoices for a specific event. After official and unofficial invoices are generated, you can view the invoices from Reports > Event reports > Event invoice and from Event-specific dashboard > Run reports > View invoices.
Note: To manually generate event invoices, you must be a system administrator, or a staff user with an Events: 2 module authorization level.
Do the following to manually generate invoices for a particular event:
- Go to Events > Find events.
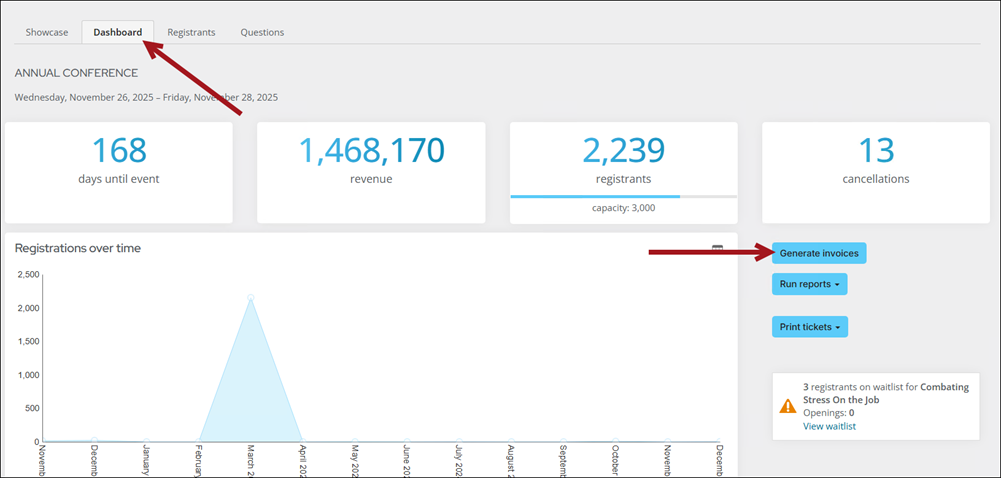
- Open the event, then click the Dashboard tab.
- Click Generate invoices.
- By default, Registrations with an outstanding balance is automatically enabled. Leave this option enabled to only generate invoices for registrants that have an outstanding balance. Disable this option if you need to generate invoices for all registrants. If Registrations with an outstanding balance only option is enabled, then invoices for registrations with no outstanding balance are not assigned an invoice number. The invoice date is updated to the date you generate the invoice.
- Staff can also add cancelled registrations to the event invoice by selecting Include cancelled registrations.
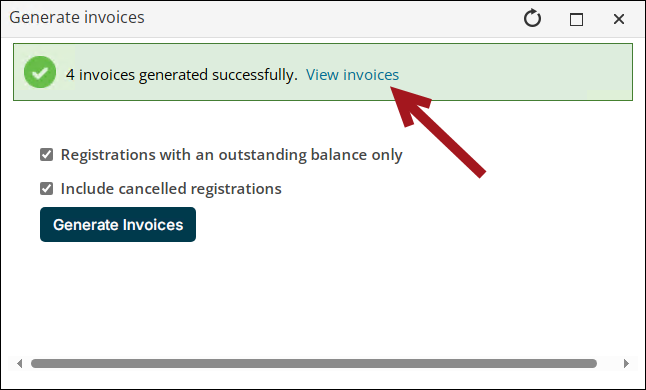
- Click Generate Invoices. Depending on the number of invoices being generated, the processing time will vary.
- Select View invoices to review the invoices you just generated.
Note: If a separate invoice is preferred for cancelled registrations, the setting Create separate invoices for event adjustments needs to be enabled. In addition, the original registration needs to be posted and invoiced before cancellation. Otherwise, both the registration and the cancellation will appear on the same invoice even if the setting is enabled.
Viewing invoices for a specific event
After official and unofficial invoices are generated, view the invoices in one of the following ways:
- View invoices from the Event Invoice report in Reports:
- Go to Reports > Event reports.
- Double-click the Event Invoice report.
- Select the Event and whether the report should include all invoices or only open invoices.
- Click Run Report.
- View invoices from the event-specific dashboard:
- Go to Events > Find events.
- Open the event, then click the Dashboard tab.
- Click Run reports, then click View invoices.
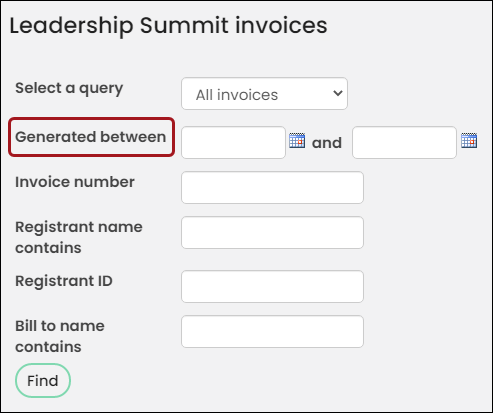
Note: To only view generated invoices and exclude reference invoices, enter a date range in the Generated between fields.
Printing invoices for a specific event
Staff users can print event invoices directly from the event-specific dashboard:
- Go to Events > Find events.
- Open the event, then click the Dashboard tab.
- Click Run reports, then click View invoices.
- Search for a specific invoice, or click Print Invoices.
- Click the PDF icon to export the invoices to PDF for printing.
Customizing the invoice used for printing
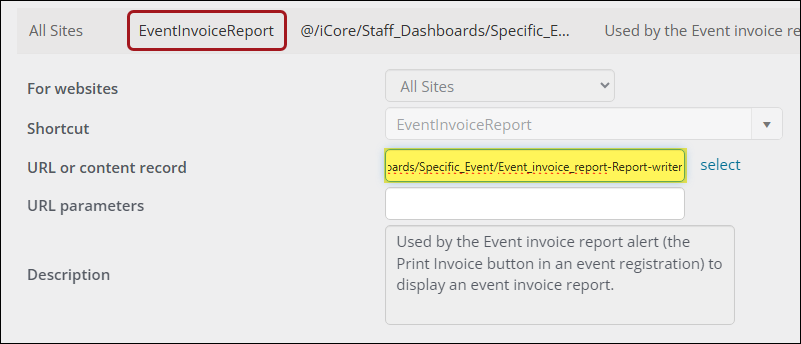
vent registration invoices can be printed from the event registration details page by clicking Print Invoice. This button will only display when an invoice has been created for the registrant. The EventInvoiceReport shortcut can be used to change what report prints when using the Print Invoice button by modifying where the shortcut points to. To use the Report Writer version of the event invoice report, do the following:
- Use the following content record:@/iCore/Staff_Dashboards/Specific_Event/Event_invoice_report-Report-writer
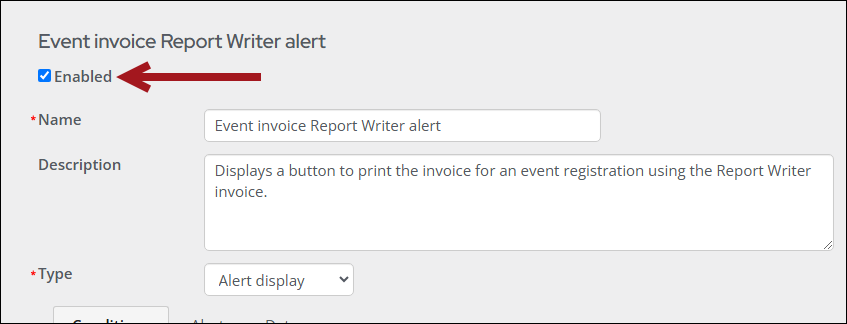
- Ensure the Event invoice Report Writer alert is enabled.
Searching for a specific invoice to print
Do the following to print an event invoice from Reports:
- Go to Reports > Event reports.
- Open the Event Invoice report.
- From here, you can filter invoices based on the following criteria:
- Event name
- All invoices or open invoices only
- Dates
- Registrant ID
- Bill To ID
- Invoice Number
- Order Number
- Logo display or not
- Click Run Report.
- Click the PDF icon to export the invoices to PDF for printing.
Members printing their own event invoices
Members are able to print their own invoices:
- From the registrant's profile page, click the My Participation tab.
- Find one of the following panels, then perform the following:
- Upcoming events - Select View registration. Scroll down to the Invoices section, then select the Invoice Number.
- Recent transactions - Select the Order Number. Scroll down to the Invoices section, then select the Invoice Number.
- Invoices - Select the Invoice Number.
- Click the Print tab, then click the PDF button.
- After the PDF downloads, choose to print the invoice to your local printer.
Emailing event invoices
Event invoices can be emailed to event registrants by adding the Event Invoice or Event Invoice Report Writer report as an attachment to a communication.
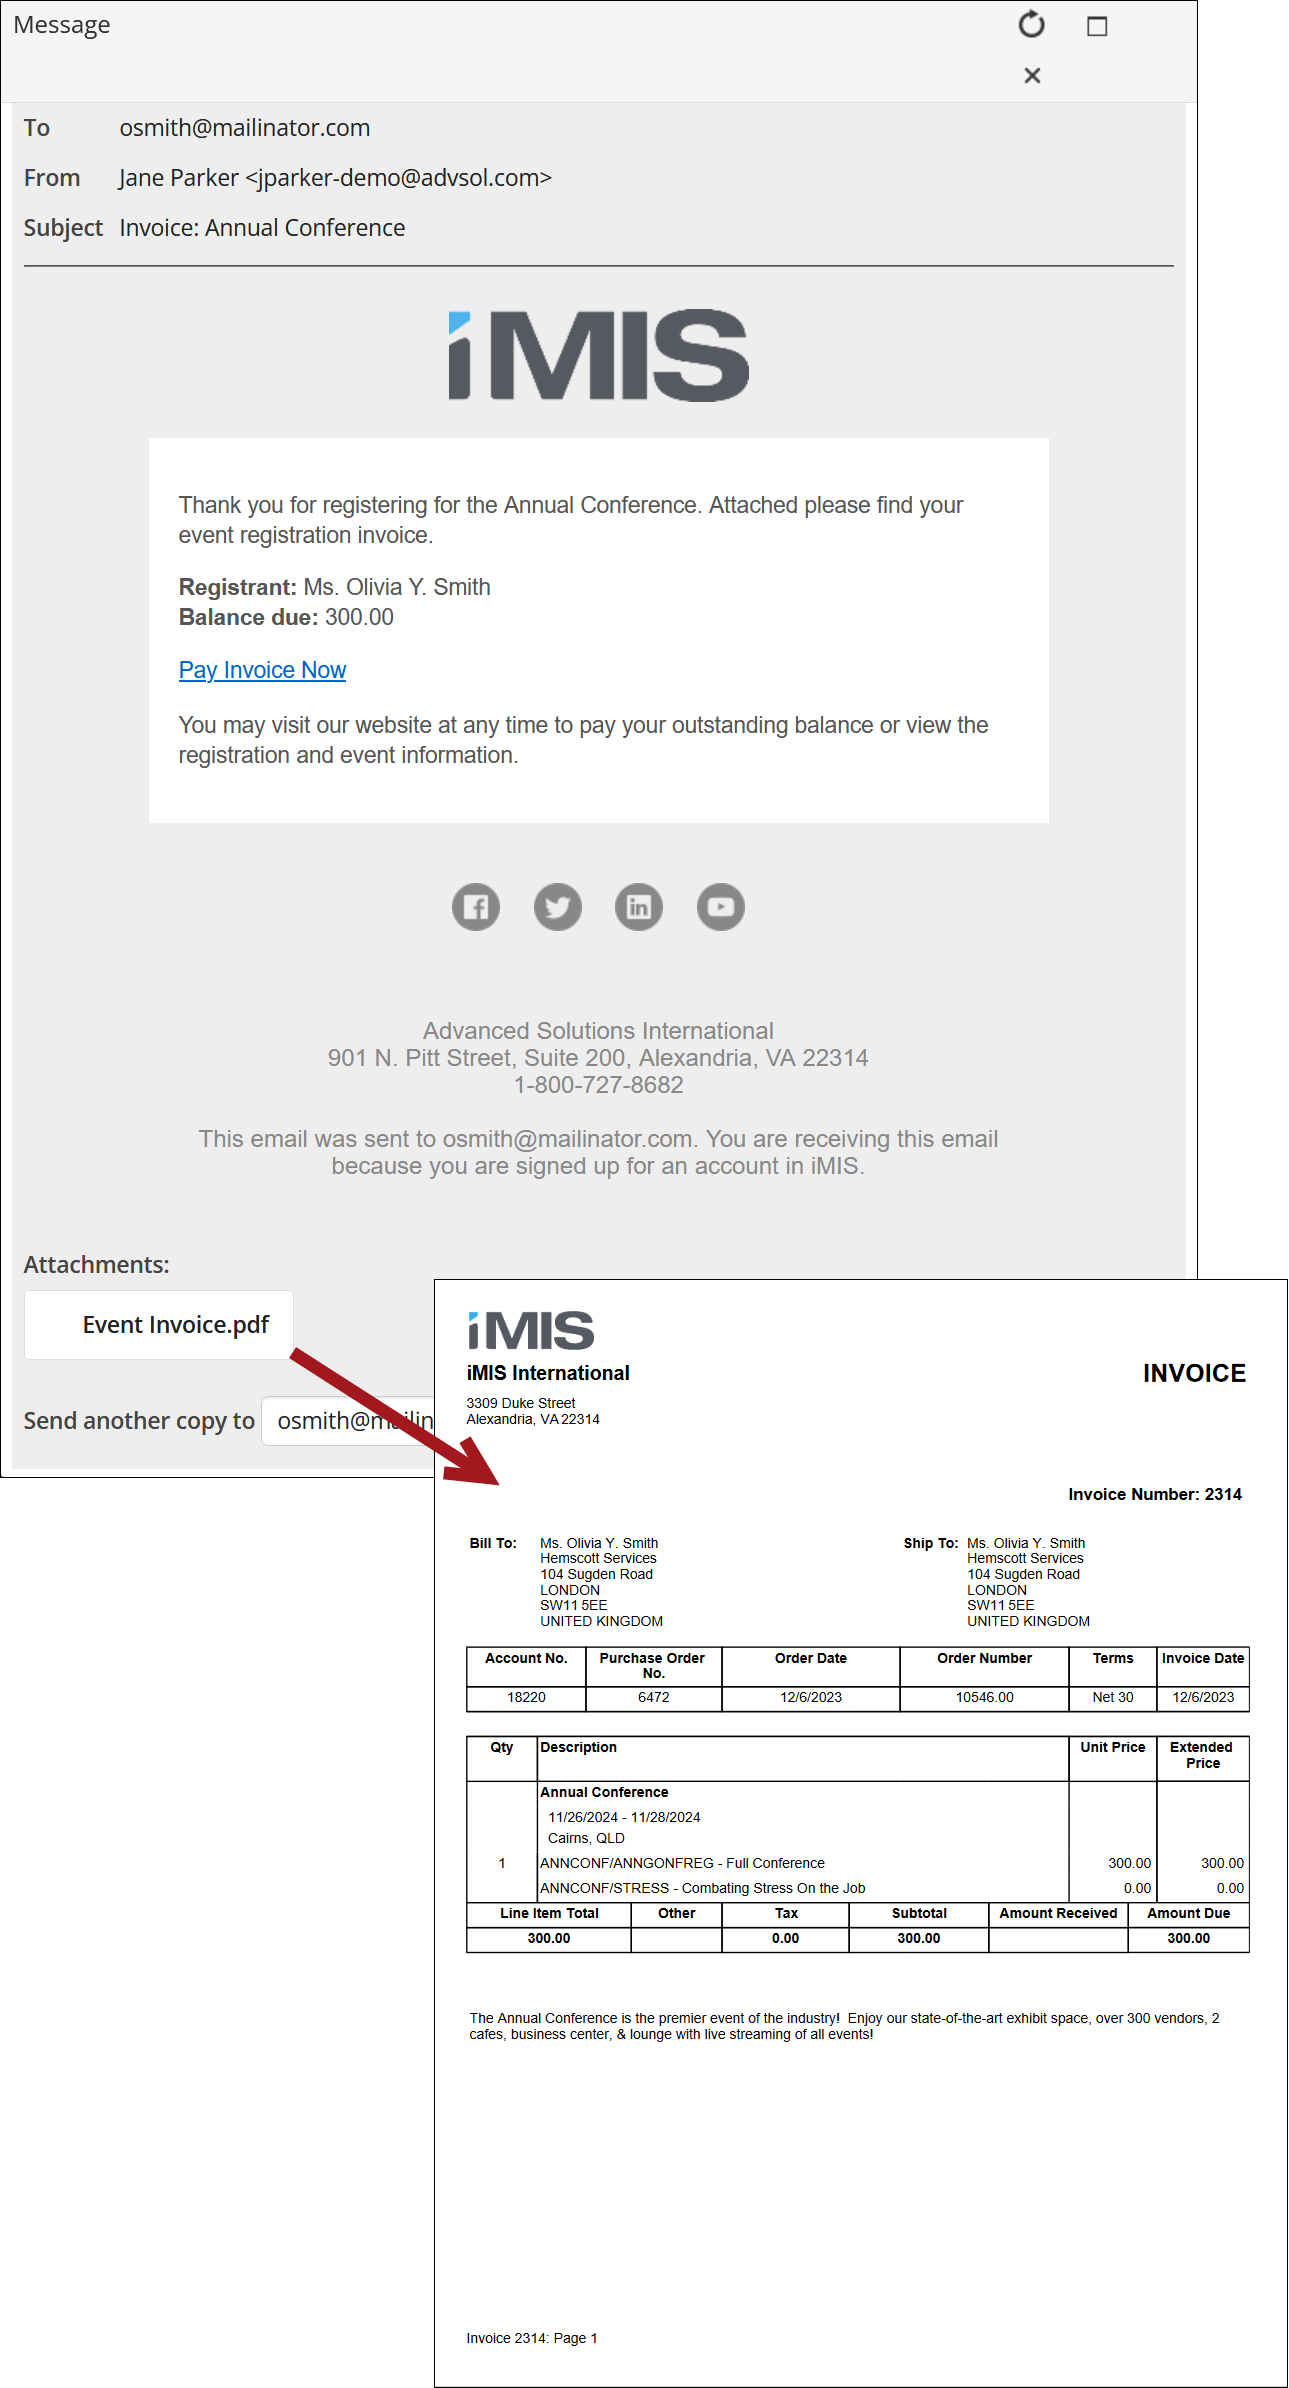
Out-of-the-box, the Event invoice and Event Invoice Attachment communication templates come preconfigured with the Event Invoice or Event Invoice Report Writer report attached, respectively. Before emailing event invoices, you must create your own event invoice template.
Creating the communication template
Do the following to create your own event invoice communication with an attached event invoice report:
- Go to Marketing > Communication templates > Templates > Samples.
- Select the Event Invoice or Event Invoice Attachment template.
- Select Organize > Copy.
- Open the Templates folder, then Paste the template.
- Open the new template, and make the desired edits, such as removing and updating all of the ASI and iMIS sample information.
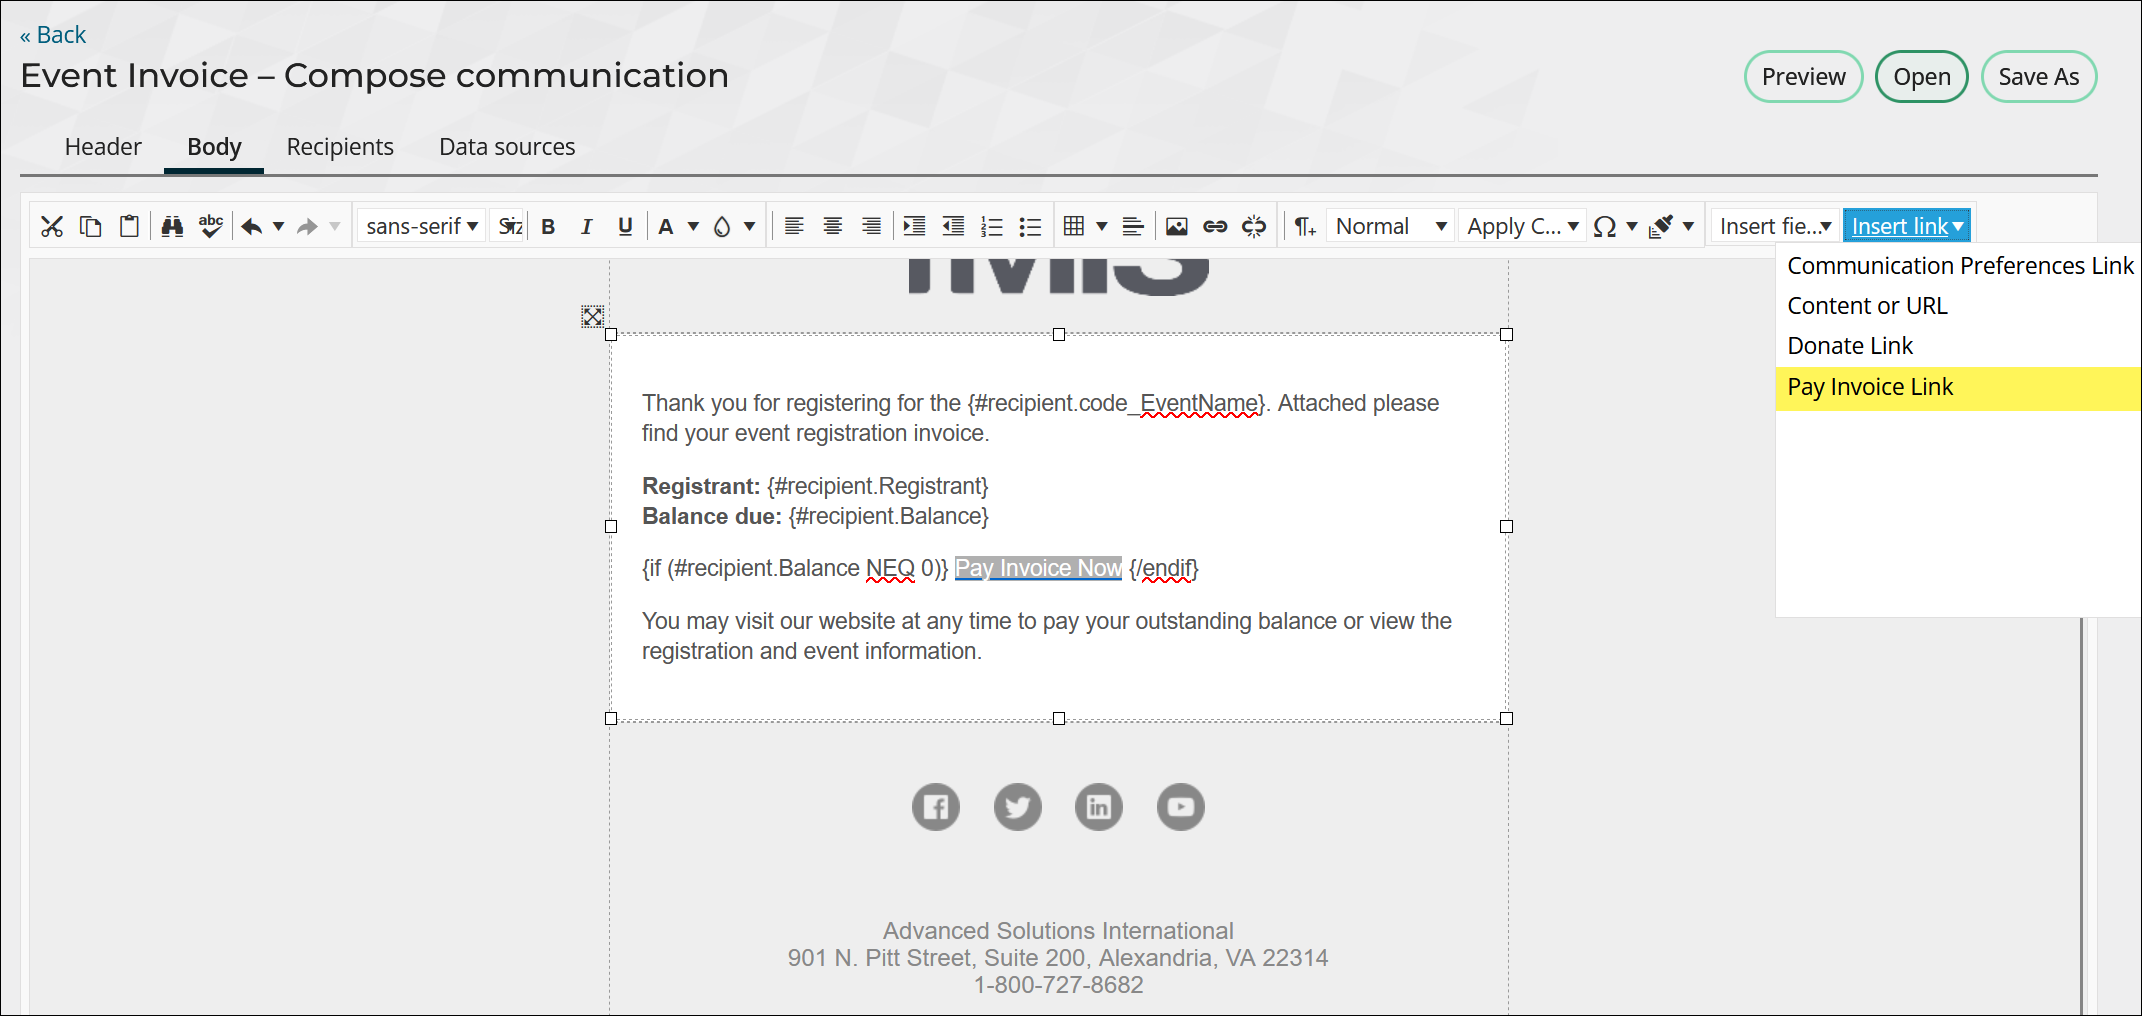
- Update the Pay Invoice Now link to point to your public website.
- Highlight the Pay Invoice Now link, then, from the Insert link drop-down, select Pay Invoice Link.
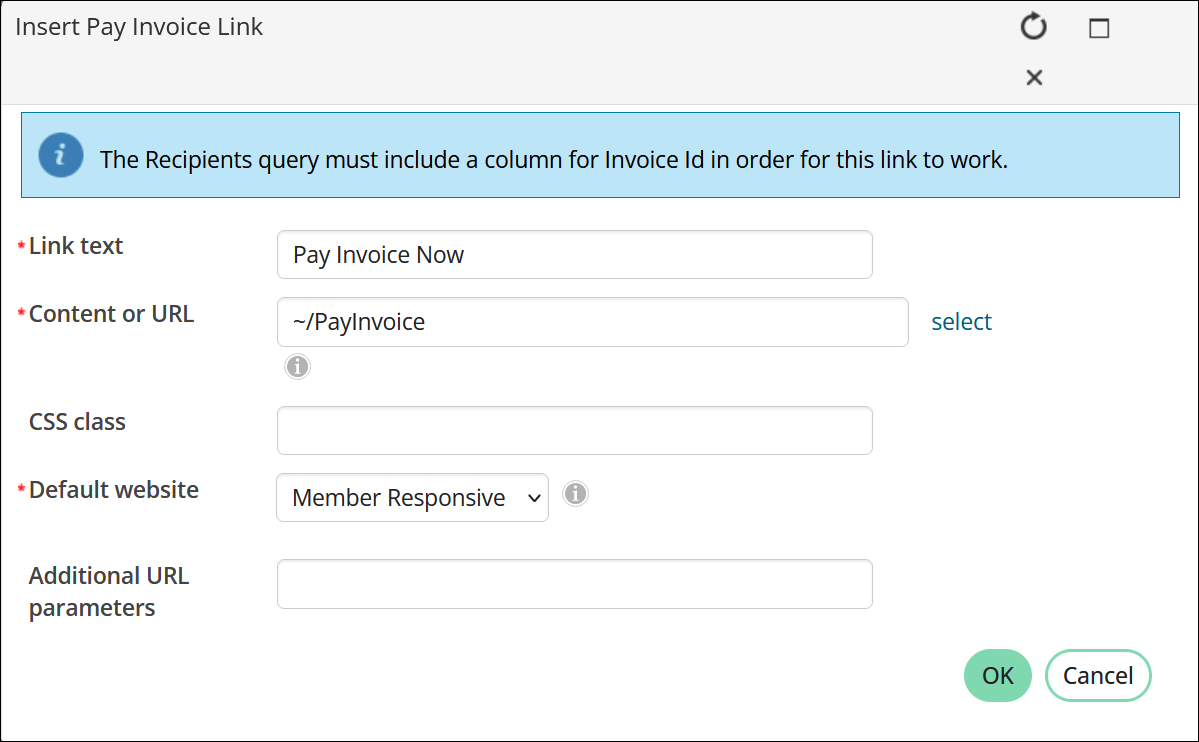
- Select the Content or URL and the Default website.
Tip: Out-of-the-box, the ~/PayInvoice shortcut points to the invoice payment content record.
Alternatively, you can delete this link from the template as needed. For more information on the Pay Invoice Link, see Paying invoices using a direct link.
- Save the template.
Emailing the invoice
Do the following to email event invoices for specific events:
- Go to Events > Find events.
- Open the event, then click the Dashboard tab.
- Click Run reports, then click View invoices.
- Enter search parameters to locate specific recipients, or click Email to email the entire list.
- Click Open, then select the modified event invoice template you just created.
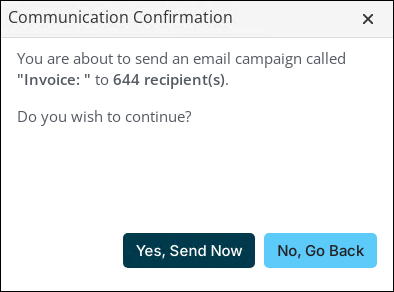
- Review the communication, then click Send. Review the Communication Confirmation, then click Yes, Send Now or No, Go Back to make additional changes.
Adjusting the Bill to contact for unpaid event invoices
System administrators or staff users with Finance: 4 and Events: 4 module authorization levels can adjust the Bill to contact for unpaid event invoices with an open balance. Once adjusted, the original invoice is reversed, and a new invoice is issued to the designated contact. The attendees remain registered for the event; only the billing contact is changed.
Important! Adjusting the Bill to contact is unavailable for invoices that are paid, cancelled, refunded, or reversed. Additionally, this adjustment cannot be made for registrations subject to non-US taxation.
To adjust the Bill to contact for an event invoice, navigate directly to the invoice and make the adjustments:
- Go to Finance > Invoices.
- Locate the invoice using the available search parameters.
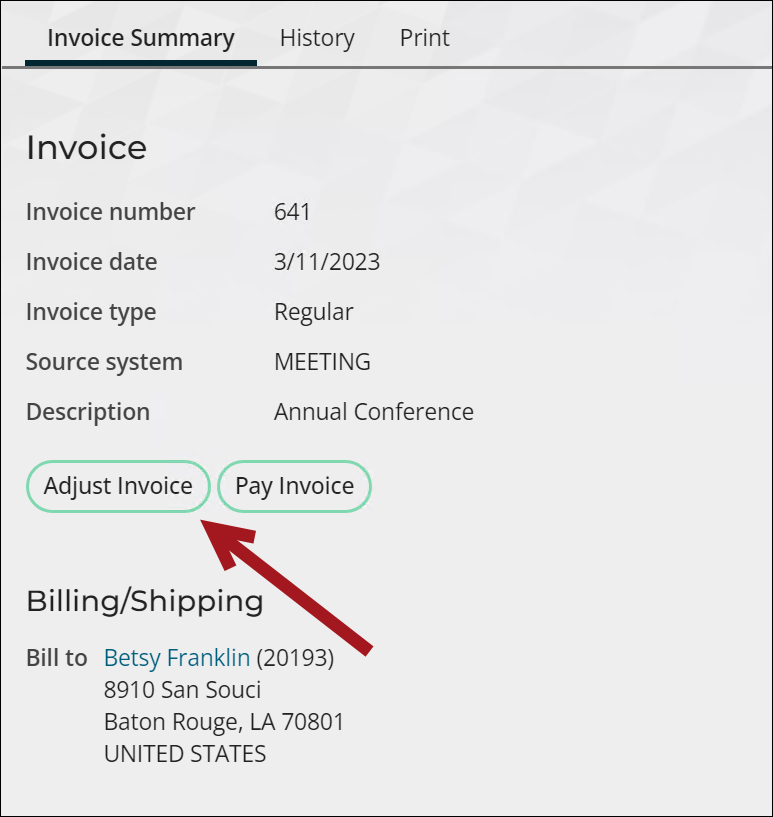
- Select the Invoice Number to open the invoice.
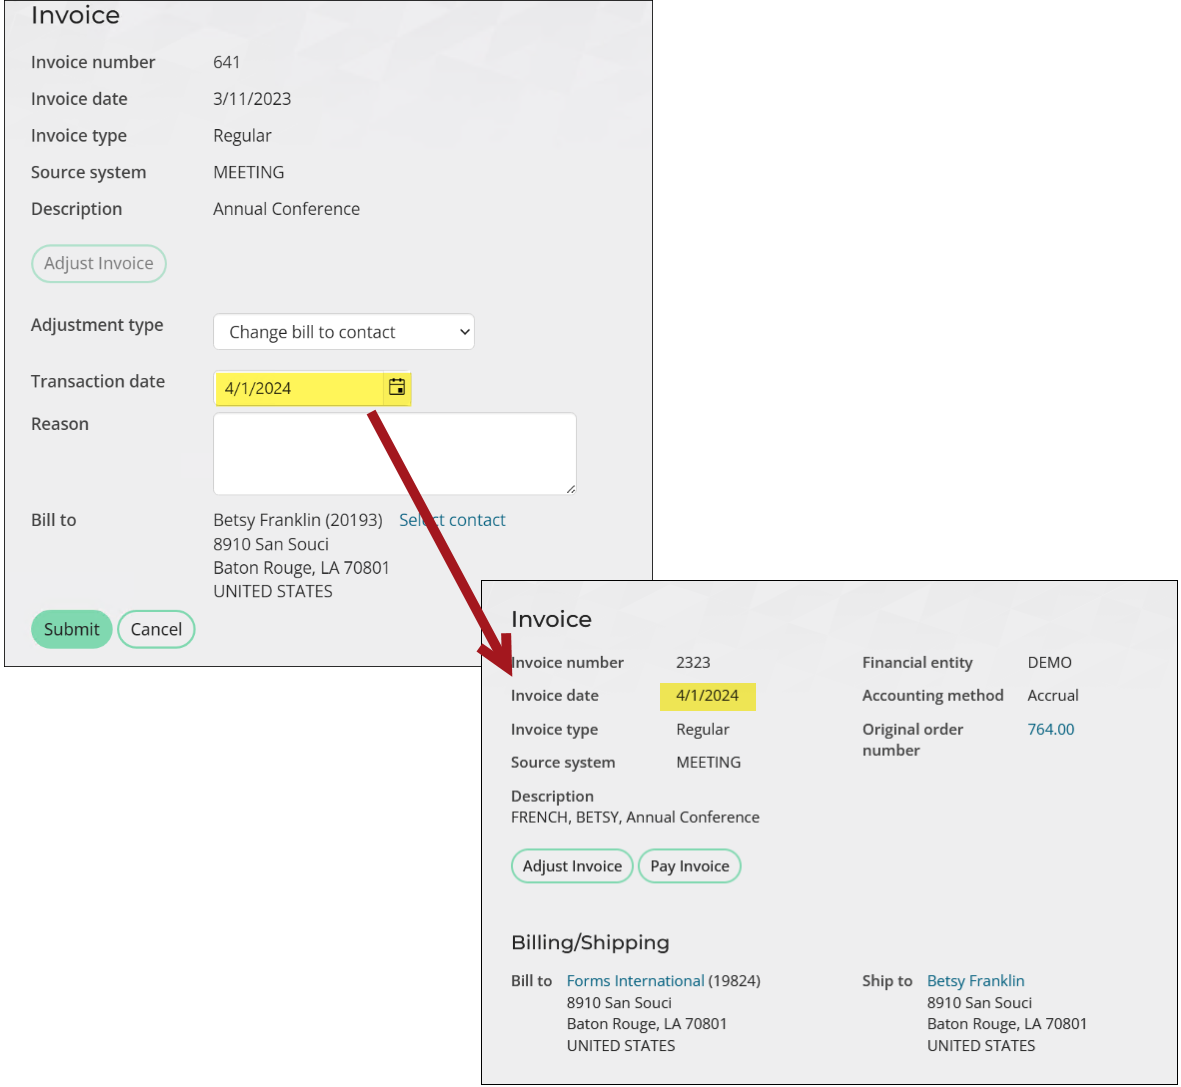
- Click Adjust Invoice.
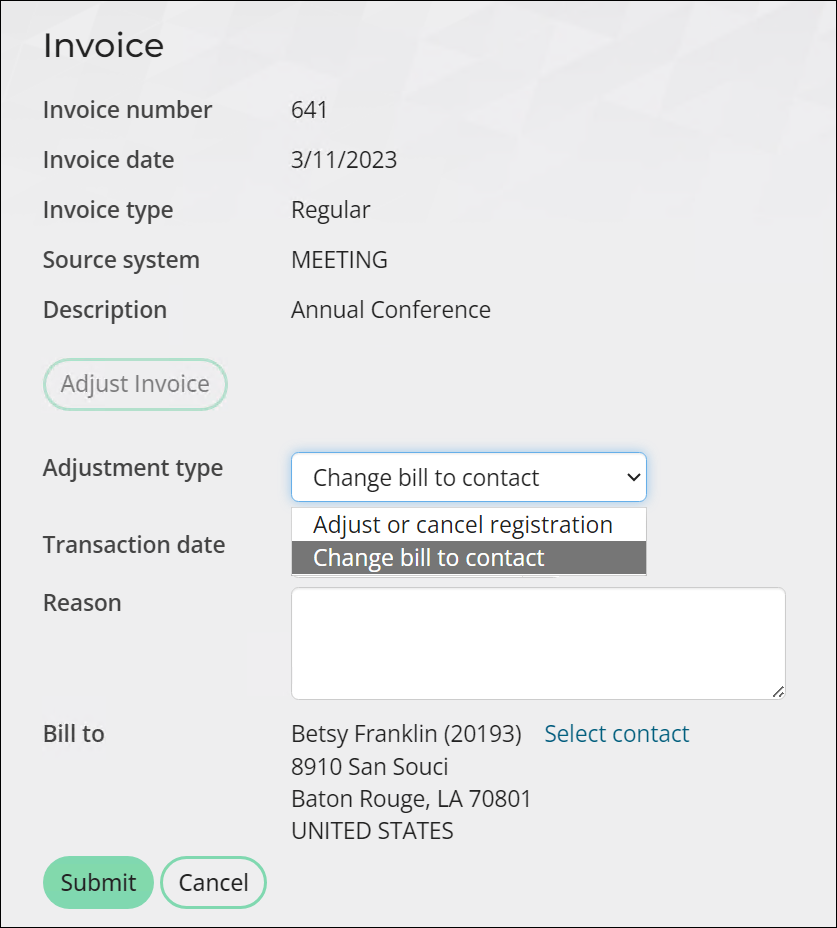
- Select Change Bill to contact as the Adjustment type.
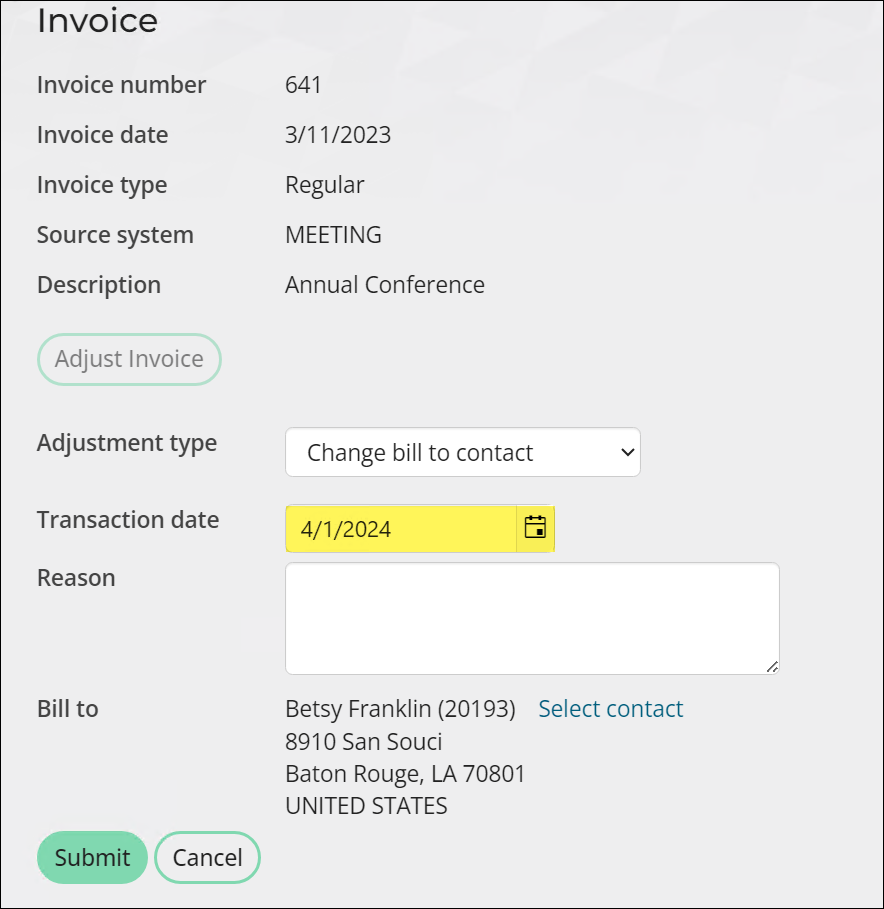
- Enter a Transaction date. This date will be used as the Invoice date for the invoice with the updated Bill to contact. The Transaction date defaults to today's date or the date selected in Override transaction date, but you can select any date between the original Invoice date and today's date.
- (optional) Enter an adjustment Reason.
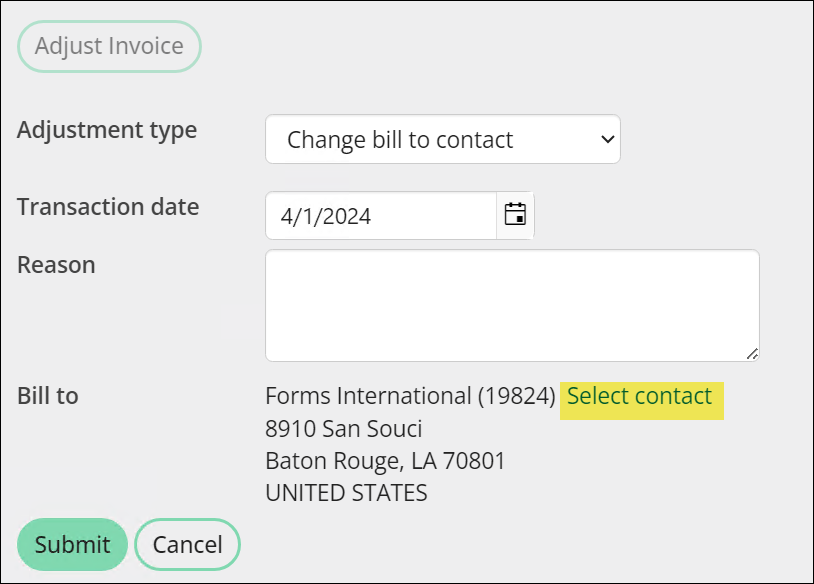
- Select a new Bill to contact. Use the available search parameters to find an existing contact or add a new contact.
- Click Submit. The following financial updates occur:
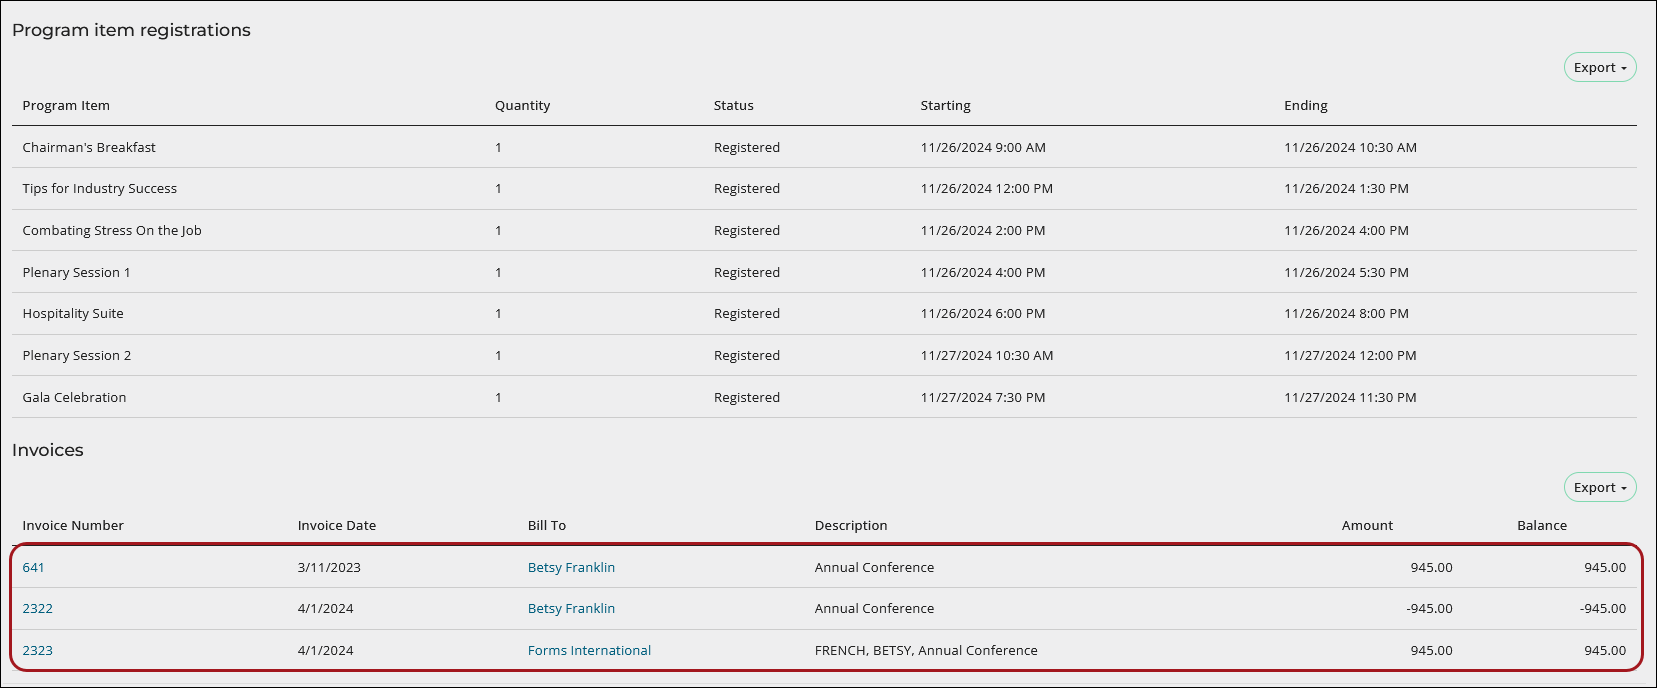
- The original invoice is reversed, and a new invoice is issued to the updated Bill to contact. The new Invoice date matches the Transaction date for the adjustment.
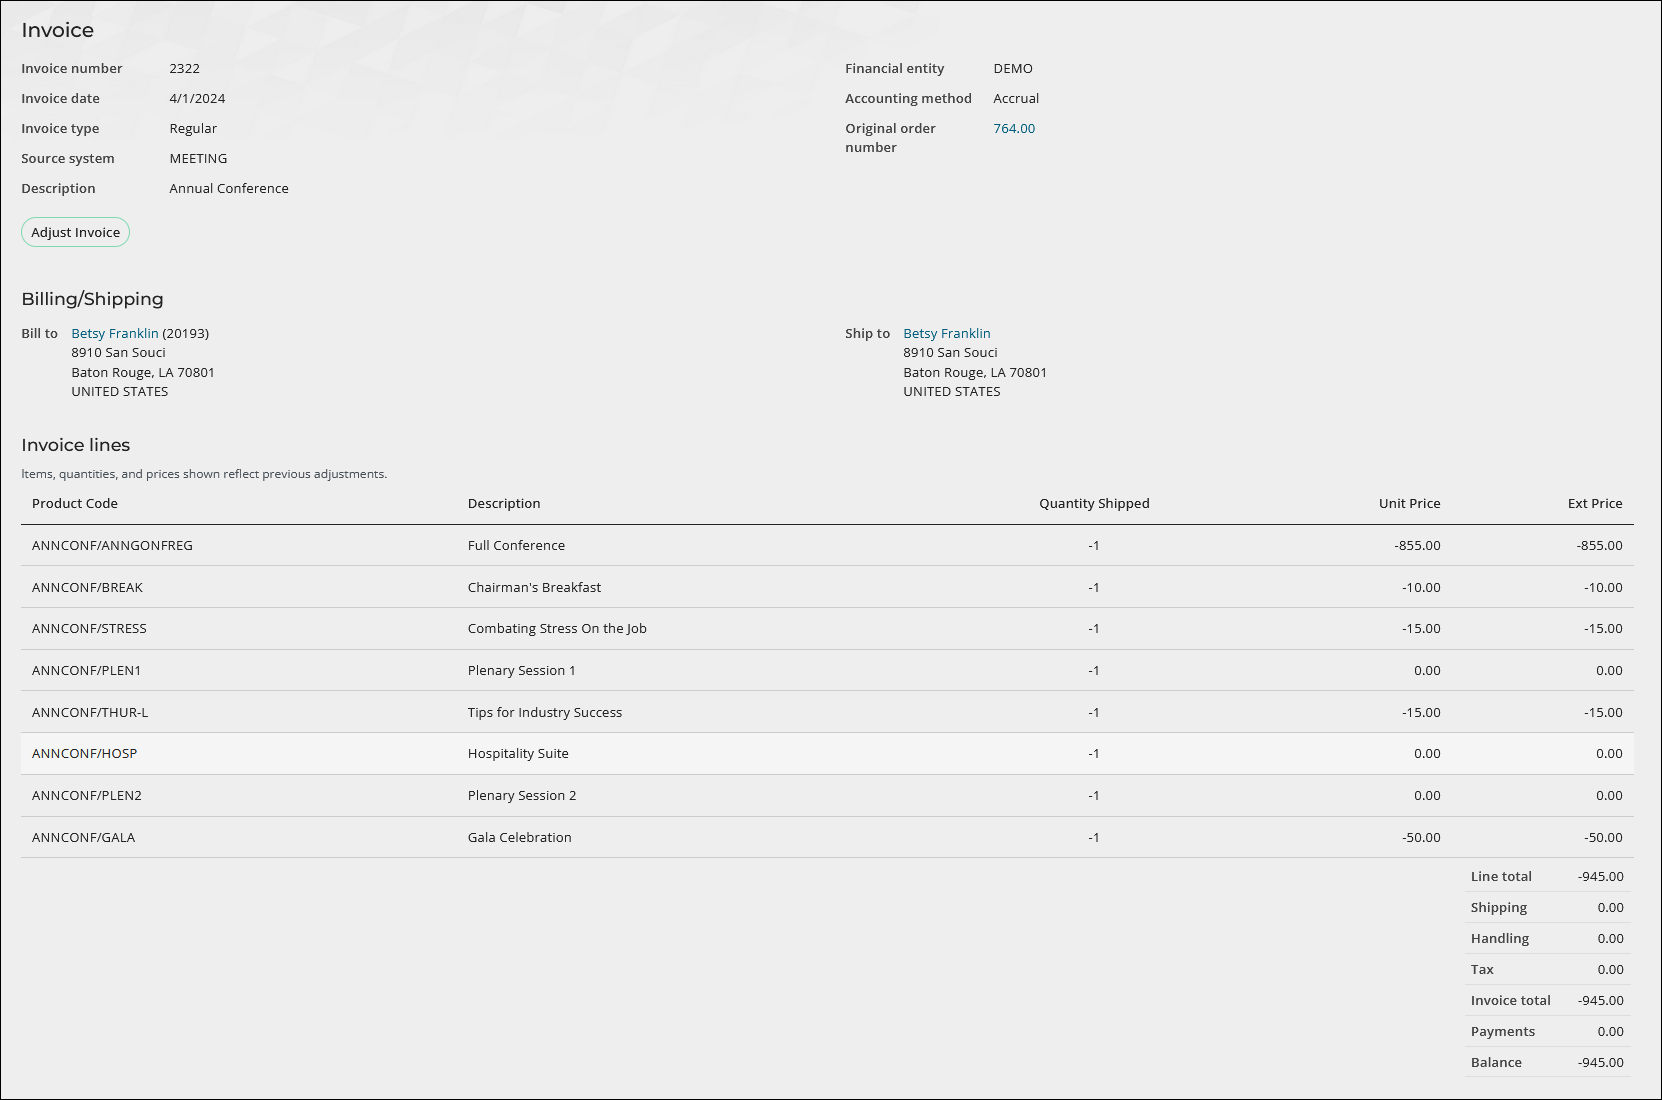
- If the setting to Create separate invoices for event adjustments is enabled (Settings > Events > General) and the original invoice is not a reference invoice (lacking an “R” before the invoice number), an additional adjustment invoice is generated to reverse the original invoice. The date of this invoice aligns with the transaction date of the adjustment, and the Bill to contact matches the original invoice.
- The original order is updated to refer to invoice for the new Bill to contact and the adjustment invoice if applicable.
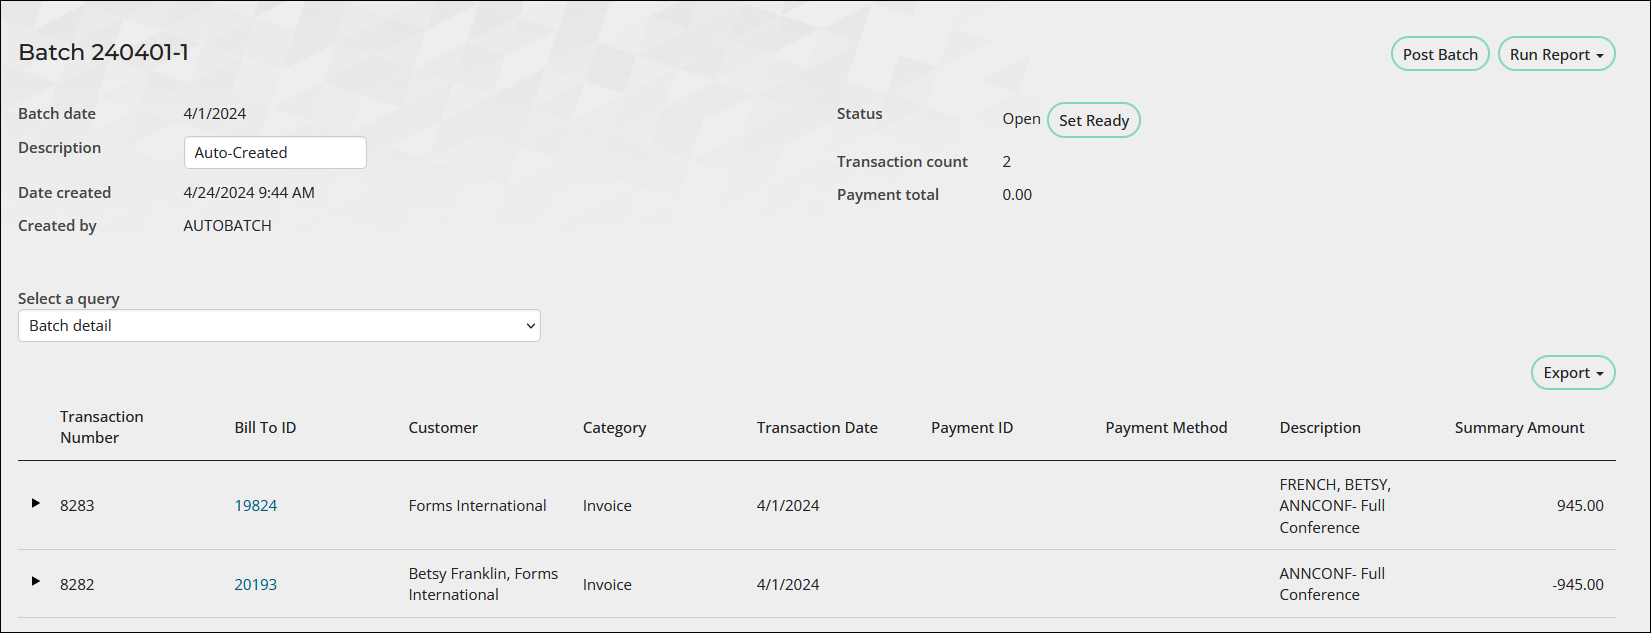
- Two invoice transactions are placed in an accounting batch correlating with the Transaction date. For, example, the transactions pictured below represent the following:
- 8296 – The transaction associated with the original Bill to contact reverses the original invoice and creates the adjustment invoice if applicable.
- 8297 - The transaction associated with the updated Bill to contact creates the new invoice.
Paying an event invoice for a registrant
An event invoice will appear on the Transactions tab of a registrant's profile page in the Open invoices section. A member or a staff person can pay the invoices that appear in this section. Staff people can also pay for event invoices from the invoice detail page.
From the user profile page
To pay an invoice from a registrant's profile page, do the following:
- Navigate to the registrant's profile page.
- Click Pay/View Invoice or choose the Transaction tab from the profile menu.
- Enable the Pay checkbox for the invoice.
- Click Add To Cart.
- Fill out the Payment details, then click Submit Order.
From the invoice detail page
To search for an invoice and then pay it, do the following:
- Go to Finance > Invoices.
- Search for the desired invoice.
- Select the Invoice Number to open the invoice.
- Click Pay Invoice.
- Fill out the Payment details, then click Submit Order.
