Last updated on: June 18, 2026
You can view and register for events either for yourself or on behalf of another contact. Users can also register other contacts from the same company, as well as guests—if the event allows it.
If a staff user has set a registration date range for the event, attendees can only register during that time. However, staff users and system administrators can register themselves or others at any time.
Event registration is only available for events with an Active status. Registrations appear in your cart along with any other items, such as products or donations.
Do the following to register for an event:
- Go to Events > Find events.
- Search for and open the event.
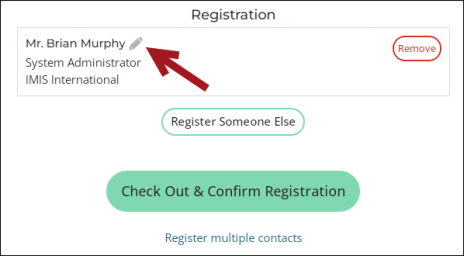
- Click Register Myself. If you would also like to register someone else, or register On behalf of someone, see Registering Someone Else.
-
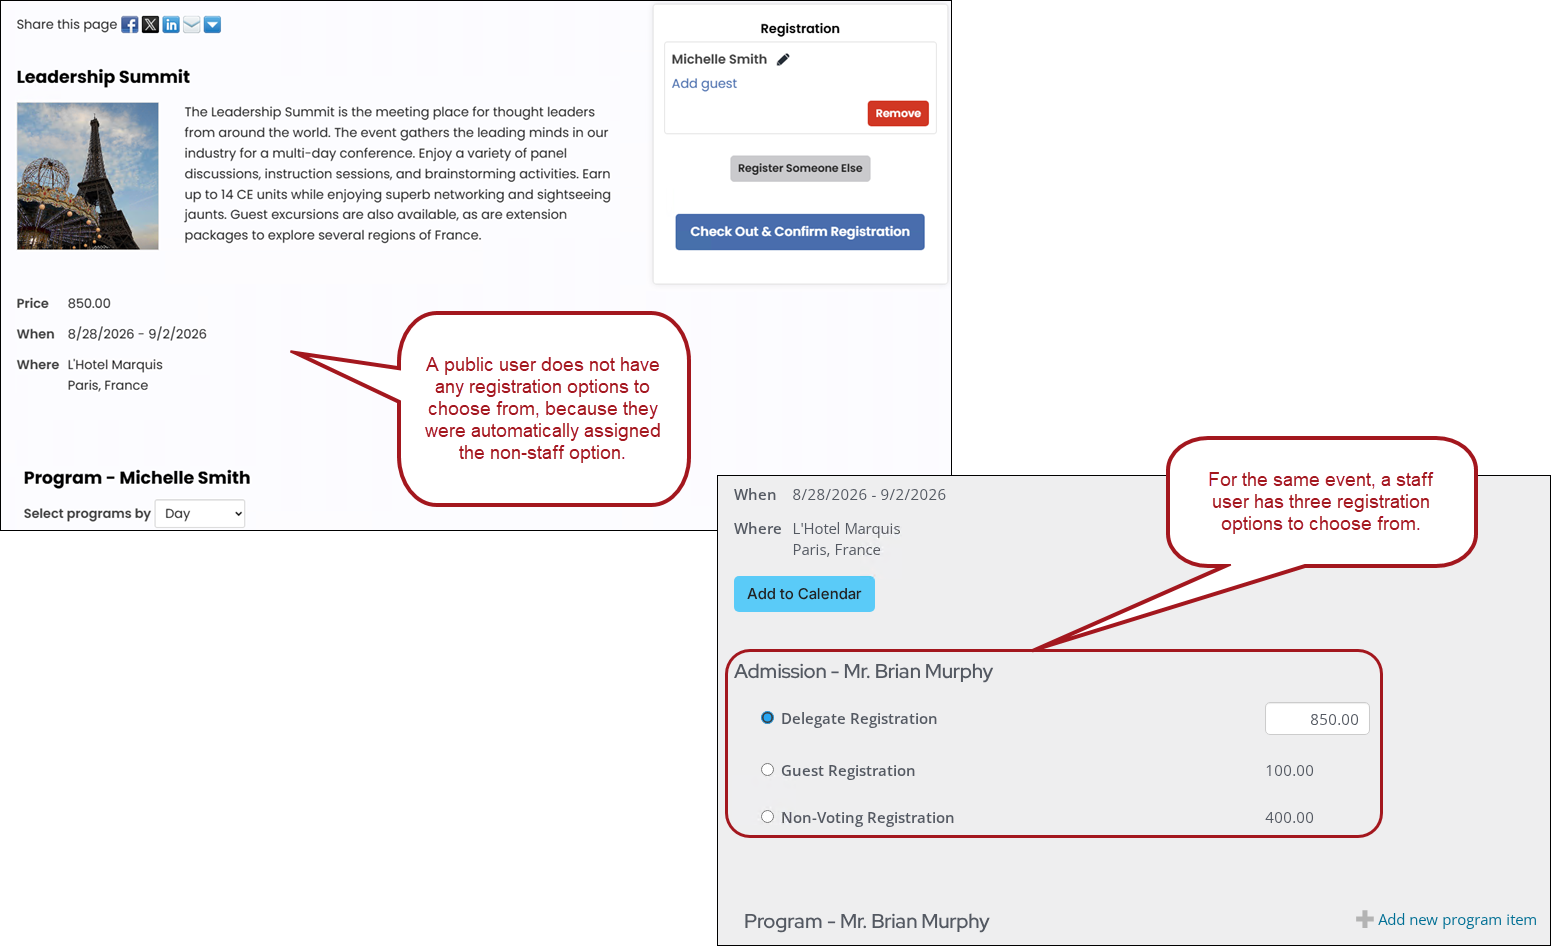
Select an Admission option. If there is only one admission option defined for the event, then there are no admission options to choose from.
- Answer any questions that appear below your registration status and click Save Responses.
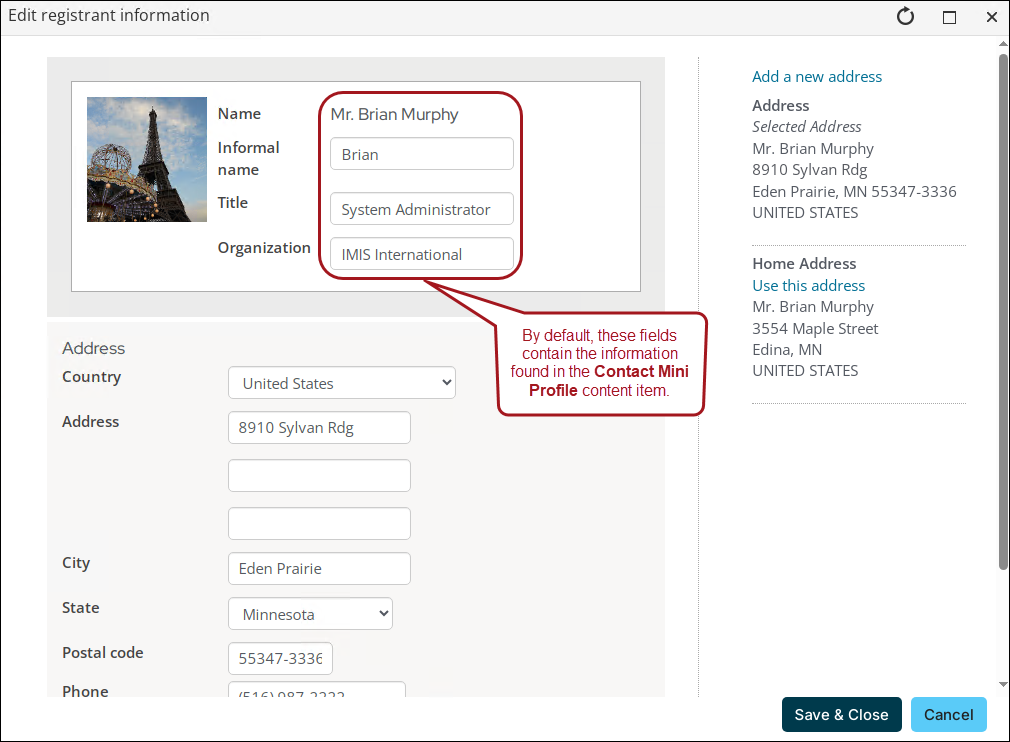
- Click the Edit icon to manage the registrant details. Changes to the address in the Edit registrant information window are automatically reflected on the contact's account page.
- To override the default Address, select a different address or add one to the user’s account.
- The information shown in the Edit registrant information window is used in any badge reports created for this event.
- If the event offers more than one registration option, select one. For each option, staff users will see a brief description that explains how the price is determined in a tooltip that appears when a cursor hovers over the option. The tooltip indicates whether it’s based on a pricing group, regular event pricing (member, standard, or complimentary), or timing (early, standard, or late). Keep in mind the following:
- If multiple options are configured but none appear, it means you—or the contact you’re registering—only qualify for one. In that case, the eligible option is selected automatically.
- If the event has only one registration option, you won’t see a selection screen. The option will be automatically applied and shown in your cart when you expand the event during checkout.
Note: If no registration button appears, registration is currently disabled because of the registration time range. When a registration period is defined, notification messages are displayed. The messages inform the user when a registration period begins or ends. The time noted in these messages is populated by the system Time zone setting.

Note: The registrant details displayed above the Register Myself button are populated with default values from the Contact Mini Profile content item.
Note: The first option is selected by default. To change this, go to the Info tab of the admission option and enter a Sort sequence. See Defining event pricing and registration options.
This information is used for badges and other event-related reports. Registrants can edit this information or add a new address.
Note: Edits made to the Informal name, Title, and Organization in the Edit registrant information window during registration will apply only to the current event and any related reports generated afterward.
Example: The Leadership Summit offers three registration options, but two are configured for staff only. A public user clicks Register Myself and they do not have any admission options to choose from, because by default they are assigned the non-staff only admission option.
Capacity
An event's capacity is updated after registrations are purchased. For example, your Annual Conference event only has two more available spots before being at-capacity. Someone is currently registering for the conference and is purchasing three tickets. That person will successfully purchase the three tickets, and the event will be over booked by one person. The next person who goes to register for the Annual Conference will see that the event is at its capacity.
Waitlisting
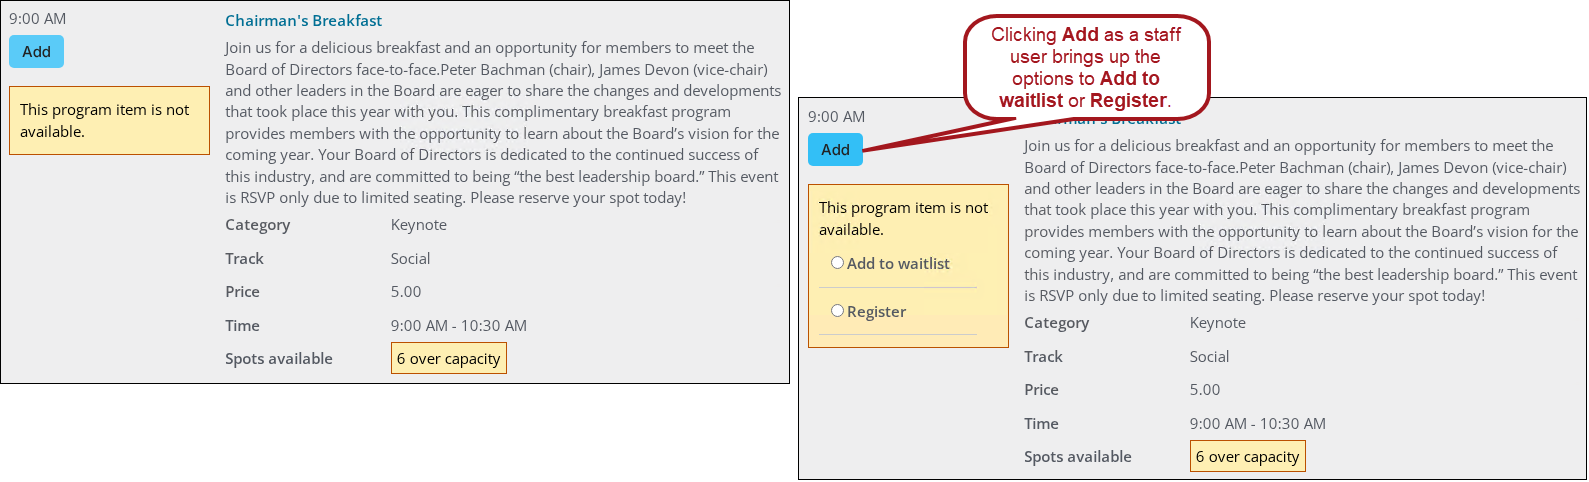
Staff users can add registrants to a waitlist for an at-capacity registration option. iMIS alerts staff users that the capacity for a registration option is full, and the staff user can opt to either add the registrant to the registration option, causing the registration option to be overbooked, or add the registrant to the waitlist. Non-staff users cannot add themselves to a waitlist for a registration option.
Capacity for an event function takes the number of registrants on the waitlist into account. For example, if a registration option on an event has a capacity of 10, and there are 8 registrants and 2 waitlisted users, this registration option is at capacity. For more information, refer to Waitlisting with iMIS.
When a registrant is registered from the waitlist for a registration option, the Event registered from waitlist notification system task (when enabled) sends a notification email to the registrant.
Note: If items in the itinerary are no longer available based on the selected registration option, they are removed from the itinerary. A message is displayed indicating which items have been removed. Hidden program items are not included in the displayed message.
Note: If a registration is removed from the cart, the selected program items are still in the itinerary. They can be removed on the event page.
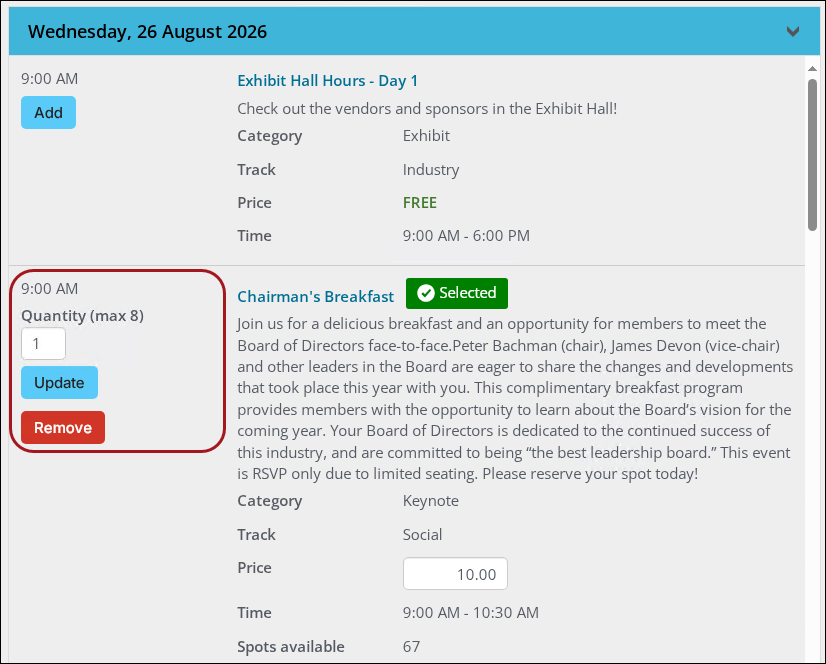
- Select the program items the registrant will attend.
-
Click on the program item group headings to expand and collapse the group sections.
-
(optional) If the Maximum Registrations per Registrant attribute for this event was set to greater than 1, you can add a number of guests to your registration. For example, if the attribute was set to 4, you can specify up to a maximum of four (yourself and three guests) in the Quantity field on the program item. If you specify a number greater than the maximum value for this attribute, you will see an error message, and the quantity will not update.
-
Click Add.
-
For each program item added, the text In Itinerary appears next to the program item name.
-
If there are any conflicting program items in the itinerary, such as two program items at the same time, you will receive a conflict message and will not be able to complete the registration process. You can easily clear up the conflict by removing one of the conflicting items
-
If the added program item has questions, complete the question form and click Save Responses.
-
(optional) Staff users can add registrants to a waitlist for an at-capacity program item. iMIS alerts staff users that the capacity for a program item is full, and the staff user can opt to either add the registrant to the program item, causing the program item to be overbooked, or add the registrant to the waitlist. Non-staff users cannot add themselves to a waitlist for a program item.
Capacity for an event function takes the number of registrants on the waitlist into account. For example, if a program item on an event has a capacity of 10, and there are 8 registrants and 2 waitlisted users, this program item is at capacity. For more information, refer to Waitlisting with iMIS.
When a registrant is registered from the waitlist for a program item, the Event registered from waitlist notification system task (when enabled) sends a notification email to the registrant.
- The Cart will contain your registration checkout details.
- If you have registered for an event that contains required questions, a reminder message displays in the shopping cart alerting you to return to the event and answer any missed required questions.
- If a contact adds an event to the cart on a date outside the registration period, a message notifies them that registration for the event is unavailable and to remove the event from the cart.
- Cancel the pending registration by removing it.
- Click back to the event showcase (the page with both event details and the program items).
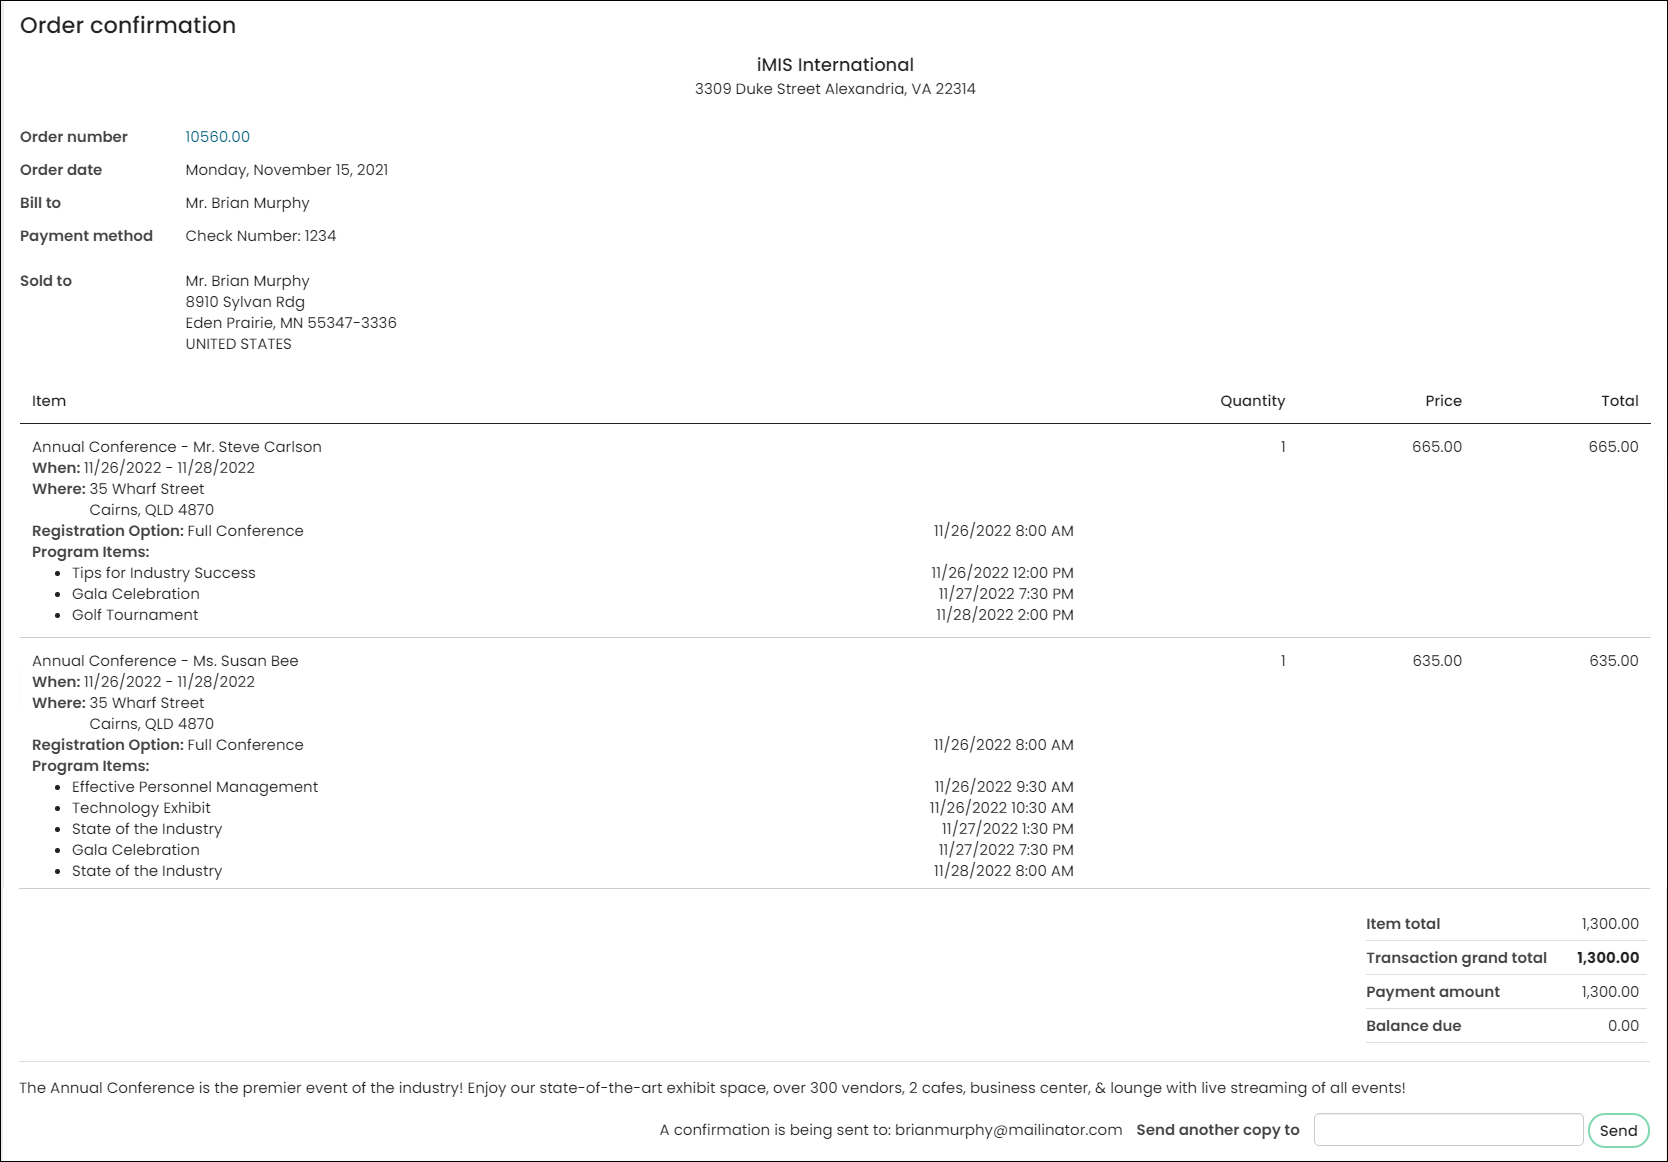
- After checking out from the Cart, an Order Confirmation page is displayed. The Order Confirmation page reflects all registration details, including additional registrants and program item details.
- After you have completed a registration for yourself or someone else, you can return to the event and view registration details. Select the desired registrant from the Registrants carousel. You can add and remove program items if the event permits it, or add a guest for yourself or others you have registered. You can also edit the registrant information for anyone you have registered.
Note: Functions set up for automatic enrollment do not have an Add link.
iMIS guides you through the payment process.
Event and program item registrations appear in the shopping cart. Registrants can continue shopping or proceed to checkout. The pending registration is noted in the cart counter at the top of the page, and it shows up in the cart along with any other items selected for purchase.
Note: Any modification to responses to event-level and function-level questions will not be retained until the cart is submitted.
For example, register for RegOption1 and provide responses to related questions. If we change the registration to RegOption2 and provide responses to related questions for RegOption2 then all responses related to RegOption1 are deleted as the cart is not yet submitted.
Submit the cart for RegOption2 and then view the registration. We can edit and change the responses to related questions from RegOption2 to RegOption1. We can provide responses to related questions for RegOption1 but the answers for RegOption2 will remain in the database until the cart is submitted again.
Links in the cart let users:
Note: When you have submitted the order, iMIS sends an email confirmation. This online confirmation serves only as an acknowledgment of registration from the web. It does not update the registration record for a confirmation. The message, "This registration has been confirmed," does not appear in the Register a customer window.