Last updated on: June 08, 2026
There are three different ways to register someone other than yourself.
In This Article
- Ways to register
Adding guests to event registrations
Registering someone else
Primary and guest registrant relationships
Ways to register
| Registration | Payment | Example | |
|---|---|---|---|
| On behalf of |
Note: For staff users, this is the preferred way of registering contacts. |
|
The Annual Conference registration deadline is today. Sarah Smith wants to register for the event, but cannot make it to a computer before the event registration closes. Sarah calls a Staff member, and asks if they can register her. The staff user begins working On behalf of Sarah, navigates to the Annual Conference event showcase page, and clicks Register Sarah. |
| Register Someone Else |
|
|
Amanda is going to the Annual Conference and she wants her friend, Sarah, to go with her. So Amanda navigates to the Annual Conference event showcase page. She doesn’t want Sarah to be excluded from any event programs, so she doesn’t register Sarah as a guest, and instead clicks Register Someone Else. |
| Add a Guest |
|
|
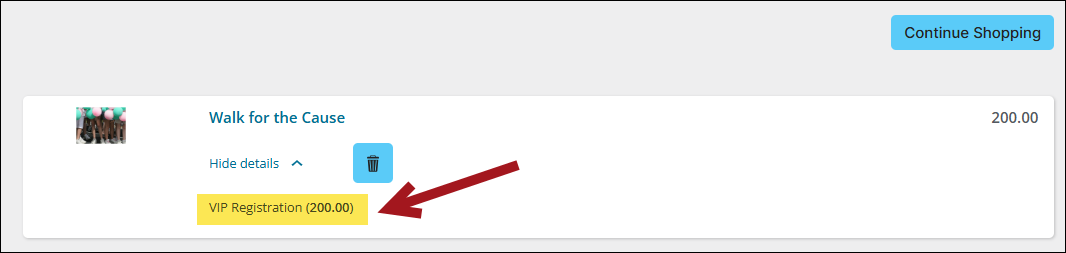
Cindy is registering for the Summer Fun Run. Her best friend, Robby, says he would like to participate in the run, but cannot attend the Celebration Lunch held after the race, and doesn’t want to have to pay for it. Cindy notices the Guest Registration option only includes the Fun Run and is $20 less. So Cindy selects Register Myself, and then selects Add a guest for Robby. |
Adding guests to event registrations
If an event is configured to Allow adding guests, you can add a guest to a registration. When you register someone as a guest, their registration is dependent upon the registration of the primary registrant. The primary registrant can be the person you are working On behalf of, an individual registered using Register Someone Else, or yourself. If the primary registrant cancels their registration, all guests’ registrations are cancelled as well. Your guest registrants will appear in the Event-specific dashboard and will be listed with the primary registrant.
You can configure the Customer Type assigned to your newly created guest contacts based on the membership status of the primary registrant. These Customer Types are configured in the system settings in the Staff site at Settings > Organization. See Organization to learn more about configuring customer types.
Staff users have the option to define a registration time range when creating events. If the event is not open for registration, the registration buttons are disabled for non-staff users. When a registration time range is defined, the user will see a message stating when registration begins or ends. The registration time range is based on the system Time zone setting.
Do the following to add a guest to an event registration:
- Select an event.
- Click Register Myself or Register Someone Else.
-
Select an Admission option:
- If one admission option is defined, that option is automatically selected and will not appear on the event page. Go to the cart to see the option upon checkout.
- If more than one guest admission option is defined, choose the desired option.
Note: The first option is selected by default. To change which option is first, go to the Info tab of each admission option and enter a Sort sequence. See Defining event pricing and registration options for further details.
- Click + Add a guest:
If you have not previously registered a guest, a Register Guest window is displayed. You must create a contact account for your guest. Only First name and Last name are required, but you can include other values.
- If you have previously added a guest, a Register Guest window is displayed with the following options:
- Select an existing contact: Select an existing contact from the drop-down. You can edit some of the contact information for the existing contact, including Informal name, Organization, and Address.
- Add a new contact.
- Complete the guest registration form and click Save & Close.
- (optional) Answer any event questions, then select the desired program items.
- Click Check Out & Confirm Registration to complete the registration process.
Note: You must select a registration option to make Add a guest available.
Note: Add a guest will not appear if there are no defined guest registration options.
Note: All available program items will display unless the guest registration option has been configured to only show specific program items available to guests. For more information, see Adding program items to an event.
Note: By default, the primary registrant's information populates the address field for a new contact. If the primary registrant has no default address selected, new guest information will remain blank. You can change or remove your guest's address as needed.
Registering someone else
When you Register Someone Else, Staff and authorized members are able to search for an existing contact to register or add a new contact from a single screen. Staff can also complete bulk registrations using Register Someone Else when they work On behalf of.
Note: It is recommended that staff members use the On behalf of feature and click Register to enroll contacts. This ensures that the registration is linked to the intended contact, not to the staff member. If the same on behalf of registrant needs to register coworkers or company associates along with their own registration, the staff user should select Register Someone Else while still using the On behalf of feature. This maintains the correct association for all registered individuals and ensures no registration is tied to the staff user.
Ensuring Register Someone Else is available to public users
When registering someone else, users have the option to create new contacts, which may result in creating duplicate contact records. To prevent duplicate contact creation during event registrations, there are several settings to enable:
- (recommended) Enable Permit public users to register existing contacts (Settings > Events > General) to allow public users to register existing contacts they do not have read access to. When enabled, if a public user attempts to add a new contact and a duplicate is detected, the existing contact is selected for registration, and a new contact is not created. For more information, see Settings: Events.
- (recommended) Staff users may configure the Event Display content item to prevent users from creating new contacts altogether when registering someone else, reducing the likelihood of duplicate entries.
- (not recommended for security purposes) Ensure all contacts from the Register Someone Else query (configured in the Event Display content item) are included in the Authenticated users Contact security query. This grants public users read access to the contact, which is required for duplicate checks unless the Permit public users to register existing contacts setting is enabled.
| Method | Description | Duplicate check behavior | Recommended? |
|---|---|---|---|
| Permit public users to register existing contacts |
Allows public users to register existing contacts they do not have read access to. This setting is configured at Settings > Events > General. |
Allows duplicate check for all existing contacts. If a public user attempts to add a new contact and a duplicate is detected, the existing contact is selected for registration, and a new contact is not created. |
Yes. More secure: users see existing contacts only when registering someone else, without access to personal information. |
| Do no allow adding new contacts | Enable the Do not allow adding new contacts setting in the Event Display, so that registrants cannot create new contacts when registering someone else. They may only select from existing contacts that they have access to. | No duplicate check is required. | Yes, if you do not want registrants to have access to creating new contacts. |
| Authenticated users access query |
Grants public users read access to the contact. Contacts in the Authenticated users access query are visible to all logged-in users throughout iMIS, allowing public users to register these contacts for events. |
Allows duplicate check if contacts are included in the query. Duplicate records may still be created for contacts not in the query. |
No. Less secure: contacts added to the query are visible to all public users, including personal information. |
Review the following scenarios:
| Is Permit public users to register existing contacts enabled? | Does the registering contact have read access to the registrant? | Is duplicate check performed? |
|---|---|---|
| Yes | No | Yes |
| Yes | Yes | Yes |
| No | Yes | Yes |
| No | No | No |
Registering someone else
Example: John Tan is already registered for an event, but he needs to add three of his co-workers to his registration so they are all tied together. The staff user should work on behalf of John Tan, then use the Register Someone Else feature to connect the new registrations to John Tan.
Do the following to register his co-workers:
- Select an event.
- Begin working On behalf of John Tan.
- Click Register Someone Else.
- Select an existing contact: Select an existing contact from the drop-down. Public users can edit the contact's Informal name, Title, and Organization. Additionally, staff users and company administrators with edit access to the contact can view the addresses on the screen. The drop-down contact list is generated by a system query which returns a list of contacts who belong to the same organization as the registrant ($/EventManagement/DefaultSystem/Queries/Advanced/Event/Registrant Search). To customize this query, see Customizing the register someone else query.
- Add a new contact: Only First name and Last name are required unless you specify that Email, Organization, Phone, or Address are also required by configuring these options in the Event Display content item. This option may be disabled in the Event Display content item. To learn how to edit the Event Display, see Modifying the event-specific console.
- Click Save & Close. The registration will appear in the Event Showcase.
- Continue the registration process as you would for any other event, answering questions and selecting the appropriate admission options and program items as desired. You can also add a guest. The guest registration will appear in the showcase as Full Name Guest of selected registrant.
- Click Check Out & Confirm Registration to complete the registration process.
- You can cancel or edit the registration information of any registrant in your Event Showcase before you checkout. Simply select the registration you would like to edit and click Edit Registrant Name registrant information. You can also click the pencil icon next to the registrant's name to edit their registration.
- Public users can edit the badge information for any registrant, but only staff users and company administrators with edit access to the contact can view the contact’s addresses.
- Edits made to the Informal name, Title, and Organization in the Edit registrant information window during registration will apply only to the current event.
Note: Staff users have the option to define a registration time range when creating events. If an event is not available for registration then the registration buttons are disabled for the general public. When a registration period is defined, notification messages display. The messages inform the user when a registration period begins or ends. The time noted in these messages is populated by the system Time zone setting.
You will have two options:
Note: iMIS checks for duplicate records when adding a new contact if Permit public users to register existing contacts (Settings > Events > General) is enabled or the registering contact has read access to the existing contact. If a duplicate is found, the existing contact is selected for registration, and the new contacts is not created. However, if Permit public users to register existing contacts is not enabled and the registering contact does not have read access to the identified duplicate contact, a new contact is created. For more information, see Ensuring Register Someone Else is available to public users.
Customizing the register someone else query
By default, Register Someone Else uses this query: $/EventManagement/DefaultSystem/Queries/Advanced/Event/Registrant Search
You can create a custom query to be used when registering someone else. Once your custom query is ready, select Configure on the Event Display content item. From the field IQA query used when registering someone else, select the custom query.
The custom query must include the following:
- Display tab:
- [CsContactBasic] Full Name
- [CsContactBasic] IMIS ID:
- Order: 1
- Alias: code_ID
- Filters tab:
- [CsContactBasic] Full Name:
- Comparison: Contains
- In Search?: Optional
- [CsContactBasic] Full Name:
Note: Without this filter, the query generated drop-down will only return the first 100 contact records. Adding this filter will also allow users to search on any portion of the full name while searching through all contact records.
Primary and guest registrant relationships
Guest registrants are connected to primary registrants, even if the registrations are cancelled before checkout. The Add a guest registration procedure creates contact relationships through the iMIS relationship module.
These relationships can be edited:
- Navigate to the primary registrant's profile page.
- Scroll down to the Relationships section.
- Select the guest that was registered with the primary registrant. Here you will notice the relationship Role is Event Guest.
- From the Group member detail window, select edit.
- Make desired changes, then click Save & Close.