Last updated on: June 08, 2026
The Stripe gateway allows SEPA (Single Euro Payments Area) direct debit recurring payments for clients in the European Union.
In This Article
- Before you begin: Required configuration
Configuring the EU SEPA direct debit payment method and connecting it to the Stripe gateway
Create the payment method
Add the payment method to the staff & public payment method sets
Testing SEPA direct debit transactions
Additional resources
Before you begin: Required configuration
Before you configure the SEPA direct debit payment method, ensure the following required items are configured:
- The Stripe gateway is configured, which includes the onboarding process. See Stripe: Getting Started Guide.
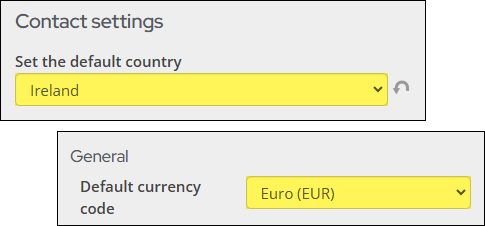
- Ensure the default country is set to a SEPA country (Settings > Contacts > General). See a list of SEPA countries.
- Ensure the Default currency code (Settings > Finance > General) is set to Euro (EUR).
Configuring the EU SEPA direct debit payment method and connecting it to the Stripe gateway
After the above items are correctly configured, you may create the payment method, ensuring it is connected to the Stripe gateway. Lastly, you must add the payment method to the Staff and Public sets.
Create the payment method
Do the following to create the SEPA direct debit payment method and connect it to the Stripe gateway:
- Go to Settings > Finance > Pay Central.
- Click the Payment methods tab.
- Select Add new payment method:
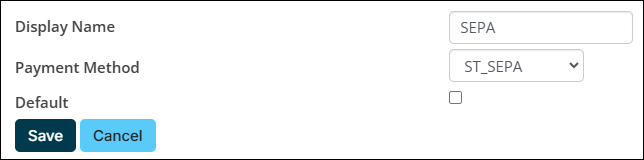
- Code: Enter a Code. No spaces are allowed in this field.
- Name: Enter the Name assigned to the payment method. This is only visible to staff users.
- Type: Select Direct debit.
- (optional) Account: Select the cash account for the payment method.
- (optional) Entity: Select the financial Entity. For more information, refer to Financial entities.
- Gateway account: Select the EU Stripe gateway.
- Display payment authorization checkbox: Enable to display an authorization checkbox in the cart for this payment method. When this setting is enabled for the payment method, the user must enable the authorization checkbox in their cart before they can submit the payment. The provided HTML text box must have the authorization details that the customer is agreeing to, such as: I authorize {Organization name} to charge my bank account for agreed upon purchases. I understand that my information will be saved to file for future transactions on my account.

- Click Save.
Add the payment method to the staff & public payment method sets
Do the following to add the SEPA direct debit payment method to the Staff and Public payment method sets:
- Go to Settings > Finance > Pay Central.
- Click the Payment method sets tab.
- Select the Staff set:
- Select Add new.
- Enter the Display Name. This name appears to staff users in the Cart.
- Select the direct debit Payment Method you just created.
- (optional) Enable Default if you want this payment method selected by default in the staff user's cart.
- Click Save.
- Select the Public set:
- Select Add new.
- Enter the Display Name. This name appears to public users in the Cart.
- Select the direct debit Payment Method you just created.
- (optional) Enable Default if you want this payment method selected by default in the public user's cart.
- Click Save.
Testing SEPA direct debit transactions
The recommended workflow for testing SEPA direct debit transactions is as follows:
- Create a test user.
- Enroll the user in a recurring donation on their behalf.
- Generate and process a future invoice.
- Review the submitted payment in Pay Central Live.
- Refund both the initial and subsequent payments.
Important! EU SEPA direct debit payments take up to 14 business days to confirm the success or failure of a payment for initial recurring payment enrollments, and 2 business days for subsequent recurring payments. Be sure to account for these processing times for testing.
1. Creating the test user
Create a contact with an email address that you have access to.
Tip: It is recommended to use a Staff user email account for the test user account.
2. Enrolling the user in a recurring donation
Next, enroll the test user with a recurring payment. In this example, we are using donations.
Before you begin, you should confirm the following:
To enroll the test use with a recurring payment, do the following:
- From the public website, go On Behalf of the contact.
- Navigate to the Give Now page.
- From the Gift details section, click Recurring.
- Select a gift frequency. For testing purposes, Monthly is recommended.
- Select Other from the Gift amount field.
- Enter 1.00 in the amount field.
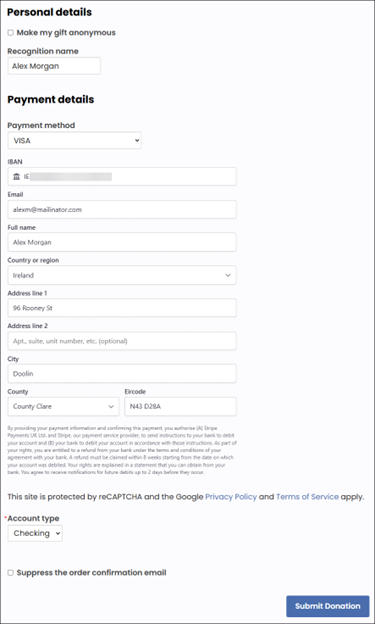
- From the Payment method field in the Payment details area, select the SEPA payment method.
- Enter the required payment details.
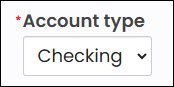
- Select the Account type from the drop-down:
- Click Submit donation.
3. Generate and process a future Donation invoice
Important! As these payments take an average of 7 to 8 business days to confirm the status of a payment for initial recurring payment enrollments, it is recommended to wait 8 business days before generating the future donation invoice. In certain cases, it may take up to 14 business days.
Do the following to process a future donation:
- Go to Fundraising > Automatic Payments > Process payments.
- From the Generate invoices tab, generate the invoice.
- From the Review invoices tab, review the invoice to make sure the test payment is included.
- From the Submit invoices tab, enter the date and donor name, and click Find. Submit the invoice.
- Retrieve the processed payment.
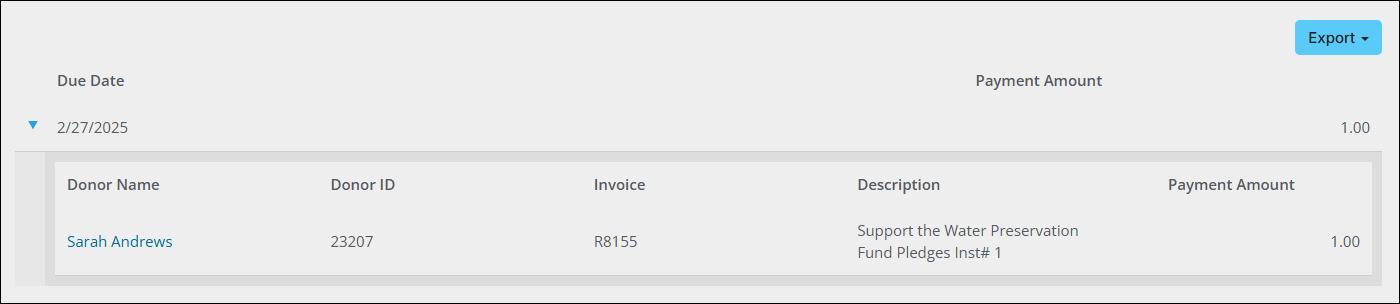
4. Review the payment in Pay Central Live
To ensure the success of the payment, review the payments in Pay Central Live.
5. Refund the payments
After the payments have successfully processed, you may refund the payments.
Additional resources
Review the following resources for further information regarding Stripe payments:
- Reconciliation for recurring UK direct debit payments
- Reconciling unsuccessful ACH/direct debit transactions
- Stripe: Getting Started Guide
- AutoPay: Getting Started Guide
- Setting up UK direct debit payments
- Setting up US ACH direct debit payments
- Setting up AU BECS direct debit payments
- Setting up NZ BECS direct debit payments