Last updated on: June 29, 2026
From Community > Add contact, new user accounts for individuals and organizations are created.
In This Article
Adding a new individual
Adding a new individual creates an account page for the newly added contact. Select Individual to create a profile page for a new member, donor, staff user, company administrator, non-member, and so forth.
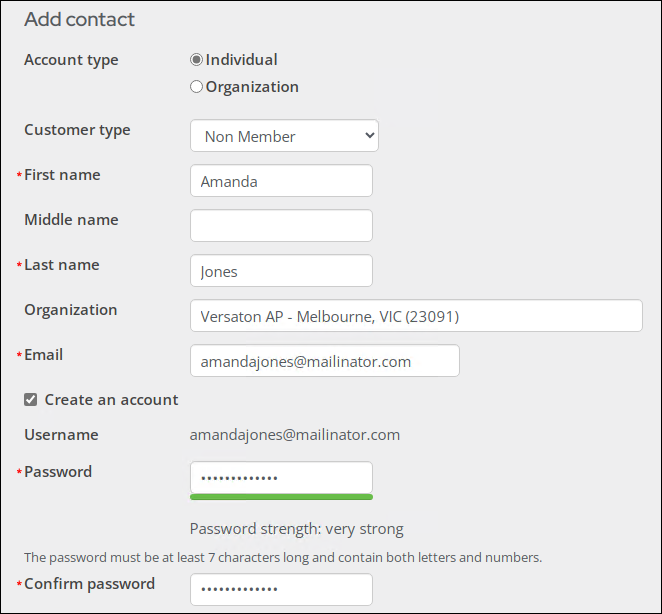
Do the following to add a new individual contact:
- Go to Community > Add contact.
- Leave the Account type set to Individual.
- (optional) Select the Customer type for the contact. The default value is based on the settings in the Contact Account Creator.
- Enter the person's First name and Last name. Entering their Middle name is optional. Extended characters such as those from the Greek alphabet, are allowed.
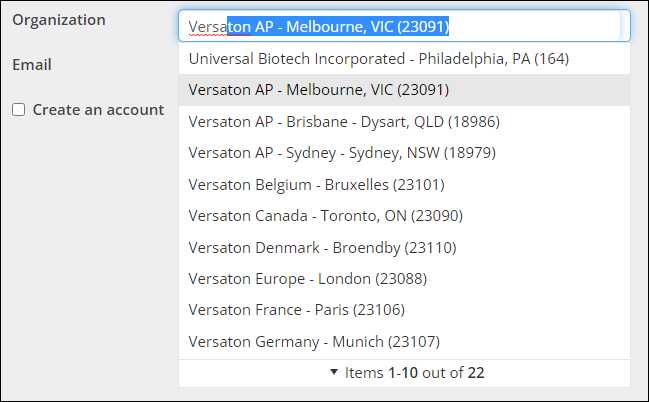
- From the Organization field, enter the contact's primary organization. When you begin typing in this field, a list of organizations beings to populate. Select the correct organization from the list. If the organization does not exist, you can create the organization, then add the contact after the organization has been created. If the contact does not belong to any organization, leave the field blank.
- Enter the contacts Email address. If you do not have their email address, you can enter it on their account page later.
- (email required) Enable Create an account to create a username and password for the contact, so they can access their profile page from your public website. Individuals can perform many actions from their account page on the public website, such as pay invoices, renew their membership, and update their contact information. When Create an account is enabled, the following appears:
- Username: By default, the username is the contact's email address. If you do not currently have their email address, you can still create an account for them after their profile page is created.
- Password: Enter a temporary password for the individual. After the account is created, the contact can use the Forgot my password link on your website, so they can set their own secure password. Never share a temporary password with an individual.
- Confirm password: Enter the temporary password again.
- Click Save.
Important! It is not recommended to assign Is-member customer types when adding contacts through the Contact Account Creator. Instead, use the Join Now process to ensure proper data handling, such as generating invoices and updating membership dates.
You are taken to the individual's new account page. From the account page, staff users can continue to update the contact's information, such as their address, phone numbers, date of birth, and status.
Important! Do not manually update the contact's Member type if you are changing it to a member type with a primary fee (paid-for membership). See Understanding Join Now for details.
Adding a new organization
Adding a new organization creates an account page for a company or organization. After the organization account page is created, contacts can be added to the organization's roster and a company administrator can be defined.
Note: Unlike individuals, organizations cannot create accounts. Instead, organization's have company administrators that perform tasks on the organization's behalf. The company administrator must have their own account credentials (username and password) and be assigned the administrator for the organization.
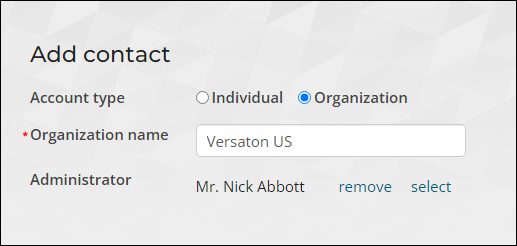
Do the following to add a new organization:
- Go to Community > Add contact.
- From the Account type, select Organization.
- Enter the Organization name. This is the official name of the organization, and will be seen by anyone added to the organization's roster.
- (optional) Select the Customer type for the organization. The default value is based on the settings in the Contact Account Creator.
- From the Administrator field, choose select to search for the company administrator. If the company administrator does not have an iMIS account page, one should be created for them. The company administrator can also be added later.
- Click Save.
Important! It is not recommended to assign Is-member customer types when adding organizations through the Contact Account Creator. Instead, use the Join Now process to ensure proper data handling, such as generating invoices and updating membership dates.
Tip: What does the company administrator do? How can I assign the role later? See Managing organizations.
You are taken to the new organization account page where you can continue adding details about the organization and add contact's to the roster. See Managing organizations for more information.