Last updated on: June 30, 2026
Staff users can request that a contact be marked for erasure and the contact's personal data be removed from the system. System administrators can then approve or reject this request.
Example: Personal data is categorized as any information that can be used to identify an individual, for example, names, addresses, email addresses, phone numbers and license numbers are considered personal data. This information can be used on its own or in conjunction with other information to identify the individual.
Warning! Any contact record that is erased cannot be undone. Be sure you want to erase this information before you mark the contact record for erasure.
In This Article
- Overview of the erasure process
Enabling contact erasure
Enabling the contact erasure task
Requesting contact erasure (staff user)
Erasing a contact (system administrator)
Overview of the erasure process
When a contact is marked for erasure, the contact receives an email notifying them that their personal data is about to be erased. System administrators are also sent an email that details the contacts who have been marked for erasure and the number of outstanding erasure requests that currently exist.
Contacts marked for erasure are deleted after the period defined in the Contact erasure task. The default period is seven days; contacts who have requested to be erased have seven days from the time their information is marked for erasure to rescind their erasure request. If no cancellation request is made the erasure is processed.
When an erasure is processed, the contact's personal data is removed but elements of the contact's activity remain. For instance, orders, CEU credits, giving history and event registrations will remain in the database; however, this information is not connected to the erased contact. Contacts marked for erasure are still searchable in the organization's directory until the erasure task is run.
Note: Personal data stored in dynamic panels is not removed by this erasure process. Staff must manually remove any personal data stored in this manner. Additionally, custom contact queries should be modified to ensure that only active contacts are displayed in the results.
Enabling contact erasure
Do the following to enable contact erasure:
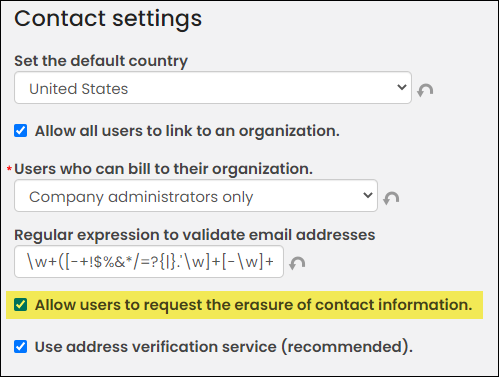
- Go to Settings > Contacts > General.
- Enable Allow users to request the erasure of contact information.
- Click Save.
Enabling the Contact erasure task
The Contact erasure task must be enabled to properly erase contacts. Do the following to enable the Contact erasure task:
- Go to RiSE > Process automation.
- In the Name contains field, enter Contact erasure task.
- Select the task and then make sure the Enabled checkbox is selected.
- Click Save.

The Contact erasure task must have a trigger defined to run daily, weekly or monthly. To run the task manually, click Run task now. Do the following to add a trigger:
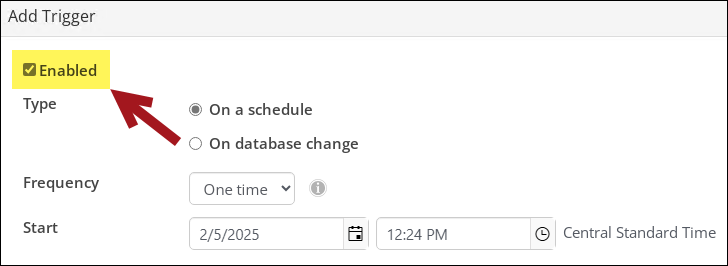
- From the Triggers tab, click Add trigger.
- Select Enabled to enable the new trigger.
- From the Frequency drop-down, select the frequency with which the task is run.
- Schedule the time you want the task to run.
- Select the Start date and time. When using a Frequency of Daily, Weekly, or Monthly, you can also select an End date and time.
- Click Save, then click Save & Exit.
Requesting contact erasure (staff user)
Staff users (non-system administrators) can request a contact erasure, but cannot complete the process. This request is approved or denied by a system administrator.
Do the following to send a contact erasure request:
- From the Staff site, access the contact's account page.
- Click the edit icon on the Contact Mini Profile.
- Scroll to the bottom of the Edit window and click Request contact erasure.
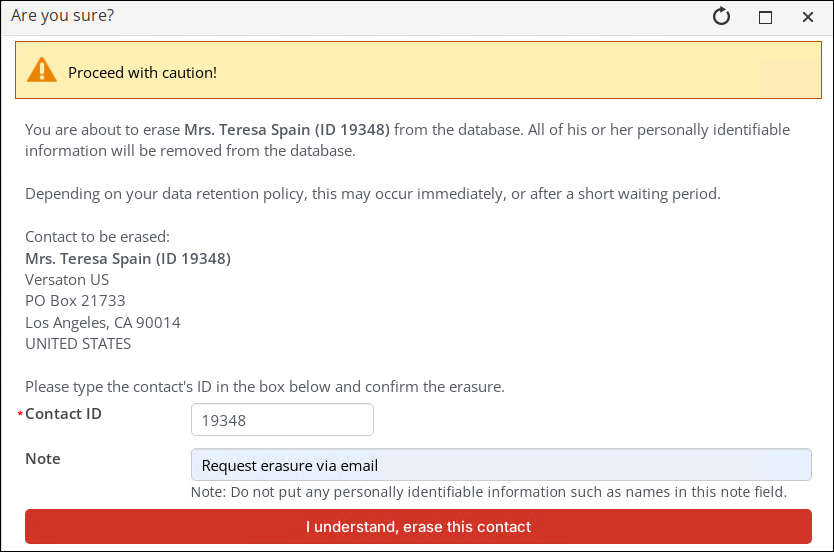
- When prompted, enter the Contact ID (required). A note can also be added to the request.
- Click I understand, erase this contact to submit the erasure request. A message is displayed at the top of the contact's profile page that the request was submitted. If you want to view or cancel the request, click the link in the message.
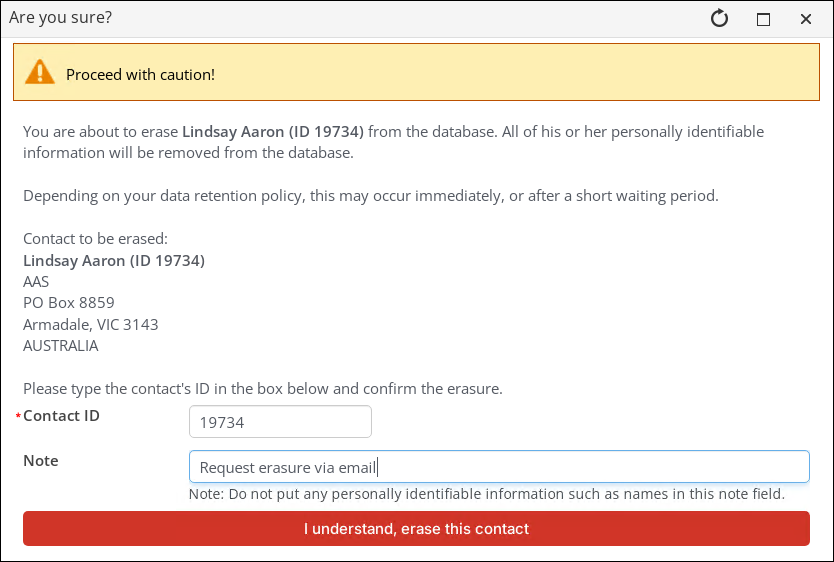
Warning! Do not enter any personal data in the note field. This is especially important for organizations with EU ties, as this violates the General Data Protection Requirement. Review the GDPR guidelines documentation for more information.
Erasing a contact (system administrator)
System administrators can delete a contact's personal data from the system and respond to an erasure request made by a staff user, or initiate the erasure themselves.
Contact erasure requests are displayed on the Community dashboard. The View all link opens the Contact erasure requests log. This log shows a list of all pending erasures and requests.
If you are a sysadmin and want to initiate a contact erasure, do the following:
- Go to the contact's account page.
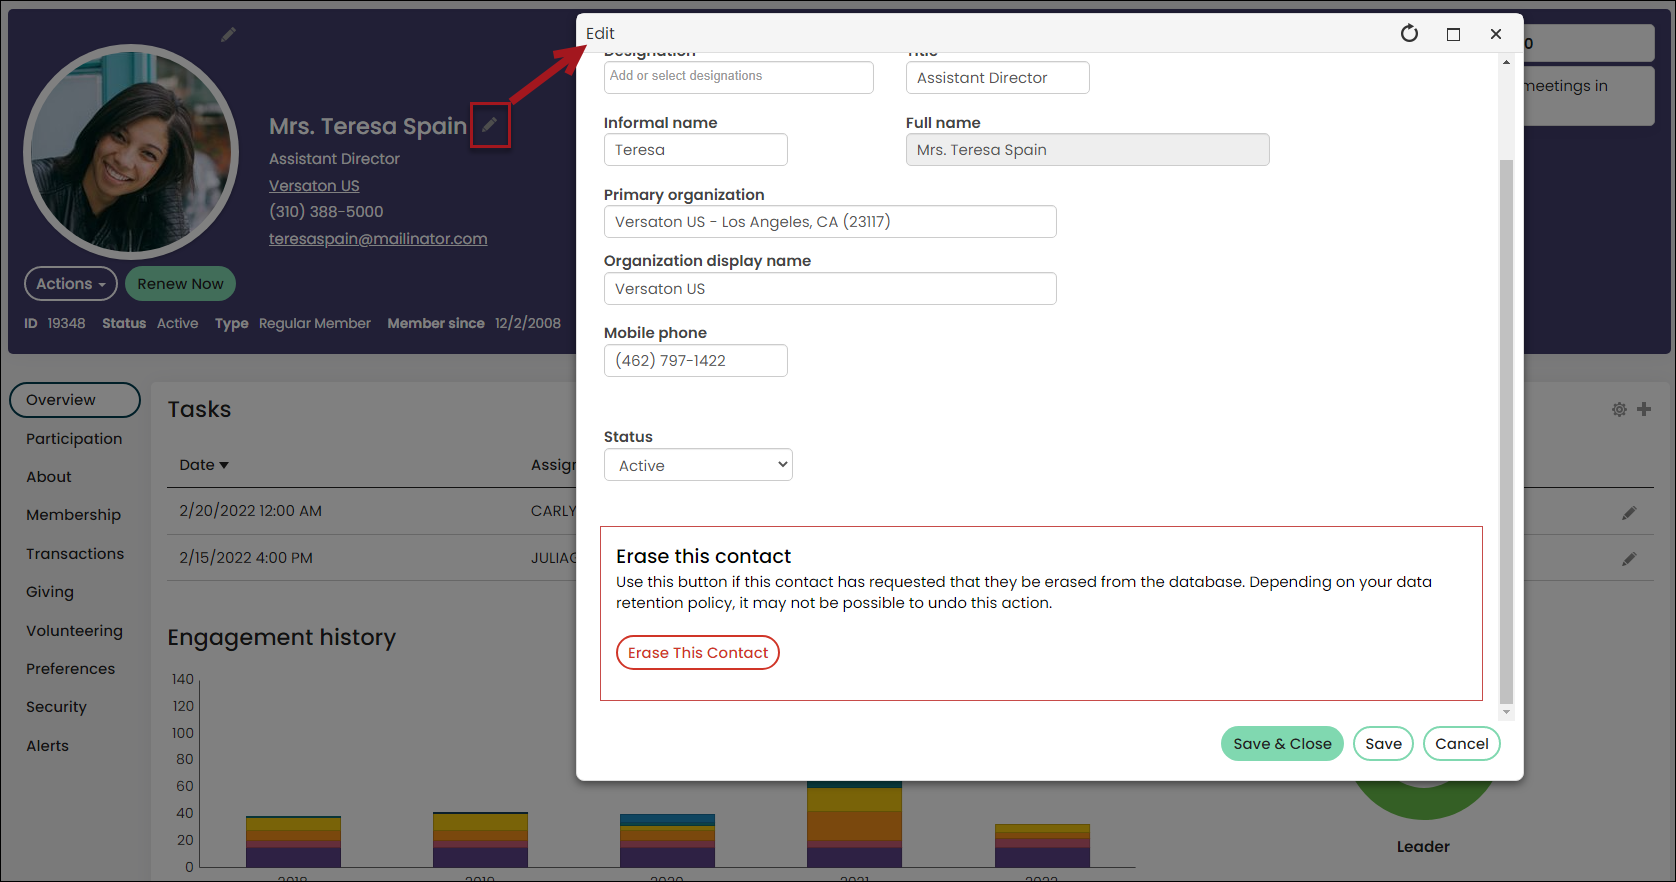
- Click the edit button on the Contact Mini Profile.
- Scroll to the bottom of the Edit window and click the Erase This Contact button.
- When prompted, enter the Contact ID (required) and add a note.
- Click I understand, erase this contact to proceed.
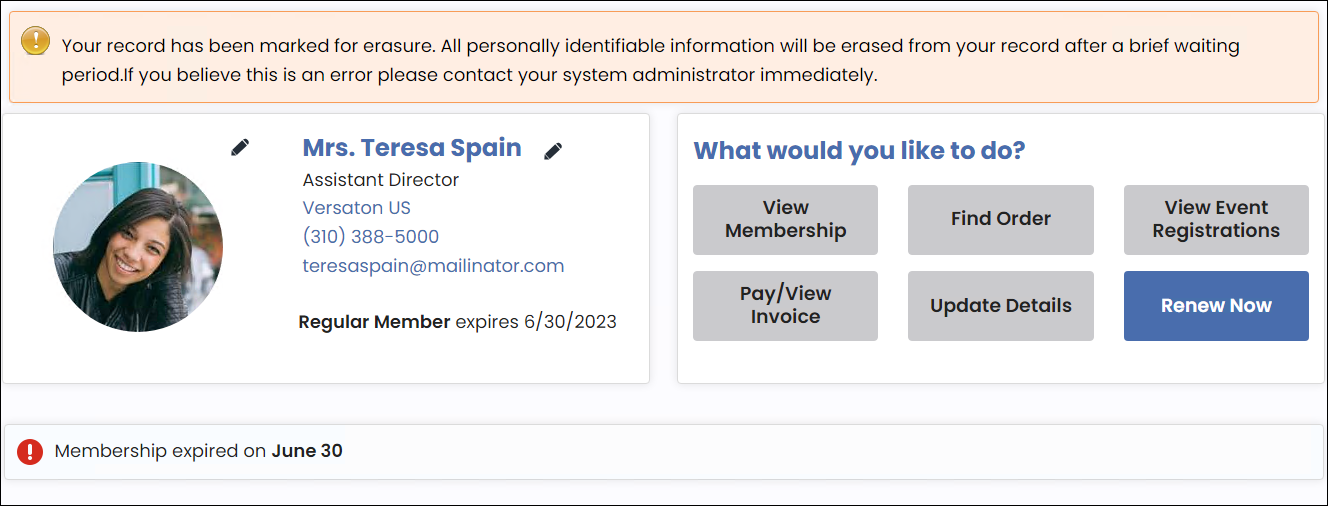
- The contact's record is now Marked for erasure. A message displays at the top of the contact's profile page that the account is Marked for erasure. If you wish to view or cancel the request, click the link in the message.
Warning! Do not enter any personal data in the note field, for instance, names. This is especially important for organizations with EU ties, as this violates the General Data Protection Requirement. Review the GDPR guidelines documentation for more information.