Last updated on: April 23, 2026
The Slideshow content item enables you to place images on any content record in a visually appealing slideshow format. Each image is defined on an individual tab. You can customize each image with formatted text, designate the order in which the images are displayed, and configure each slide to contain a hyperlink.
Note: A link can be defined in the Link field, or within the custom HTML, but not both at the same time.
Note: Text embedded in the slideshow image might be cut off on certain devices, and can make your site less accessible to the visually impaired. The Text field is the best place to add text.
Note: This content item is not WCAG Level AA-accessible. If your site must be WCAG Level AA-accessible, do not use this content item.
Slideshow configuration options
This content item uses the Common content item configuration options, in addition to the following:
- Advance automatically (selected by default) - When selected, slides rotate automatically. When deselected, users must advance the slides manually.
- Seconds per slide (available if Advance automatically is selected) - The number of seconds each slide is displayed before rotating.
- Height (px) - Height of the slide/image in pixels. Default value is 400.
- Click + to add a tab/slide.
- Move left - Click to move the selected tab/slide to the left (changes display order).
- Move right - Click to move the selected tab/slide to the right (changes display order).
- Remove slide - Click to remove the selected tab/slide.
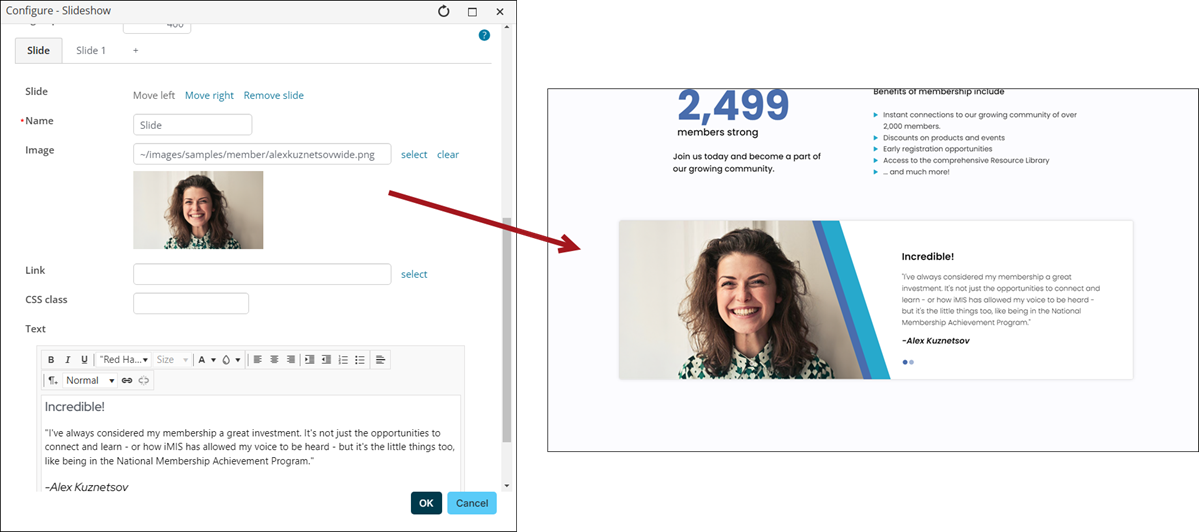
- Name - Enter the tab/slide name. This does not appear anywhere on the slide. The Name is for organizational purposes only.
- Image - Select an image to display on your slide.
- Link - Select a link from the Document browser or enter your own.
- CSS class - Enter custom CSS.
- Text - Enter any text to display on top of the image. Use the tool bar to customize the text alignment, size, color, and more.
Note: You cannot paste images into the editor. You must upload images using the Image Manager.
Note: If you manually enter a link to an image that does not exist or an incorrect file path for an image, your content might not be able to be saved correctly. To ensure you do not have issues saving content that includes references to images, use the Image Manager to upload and manage image files.
It is recommended that you save and Preview your HTML to ensure all content is being saved correctly.
Notes
- A link can be defined in the Link field, or within the custom HTML, but not both concurrently.