Last updated on: January 27, 2026
Search engine optimization (SEO) is the process of maximizing the number of visitors to a particular website by ensuring that the site appears high on the list of results returned by a search engine like Google or Bing. Enhancing your website to appear high at the top of these searches is fundamental and essential. There are a few best practices that we recommend in order to achieve maximum SEO with iMIS RiSE.
These changes might seem like incremental improvements, but when combined with other optimizations, they could have a noticeable impact on your site's user experience and performance in organic search results.
In This Article
- Entice creditable and reputable websites to link back to your website
Offer quality content and services
Write a description of meta elements
Use keywords/phrases in meta tags
Use images in meta tags
Have a mobile-friendly website
Use unique titles for each page on your site by using <title> tags
Reduce the size of large images
Have a useful 404 page
Use canonical URLs
Include a page title suffix
Use simple URLs for navigation links
Disable search engines from searching the page
Entice creditable and reputable websites to link back to your website
Recent studies have found that the more credible and reputable websites are linking to your site, the higher your SEO ranking will be. Typically, quality is more important than quantity when discussing this point. For the most part, you want trustworthy and prominent sites linking back to your site. However, quantity shouldn't be completely ignored. In some cases, larger sites will reference your site because it was found through looking at a smaller site, for example, a blog.
Offer quality content and services
Interesting sites will increase their recognition on their own. Creating compelling and useful content will likely influence your website more than anything else. Pages with at least 1,500 words score highest on search results. Google also cares about site content to ensure what your site is saying is important enough for Google users to find. The more detailed the content, the better.
Write a description of meta elements
To enhance a website's chances of ranking higher in search engine results, include descriptions in the <META> element.
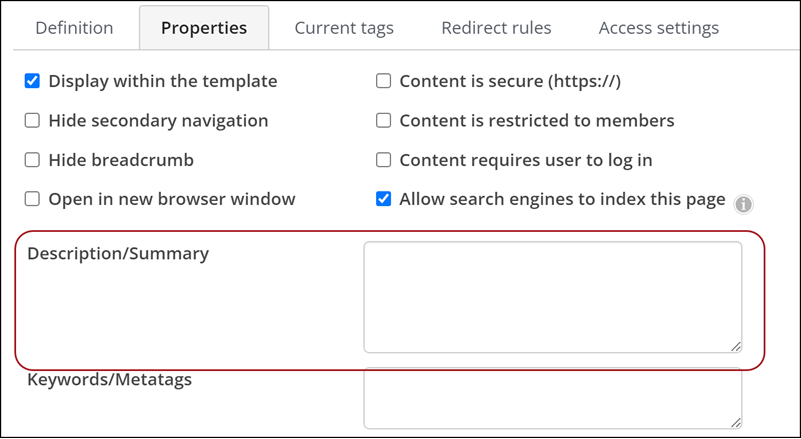
Populate the Description field on the Properties tab of the content record to add meta descriptions to content records without needing to directly edit the source code. Although this text is not visible on the webpage, it assists search engines, such as iMIS and Google, in locating the content record.
To add a meta description, do the following:
- Go to RiSE > Page Builder > Manage content.
- Locate and open the content record.
- Click the Properties tab.
- Add the desired page description in the Description/Summary field.
- Click Save & Publish. The description is automatically added to the
<META>element's description attribute in the page's source code.

When creating a page description, keep in mind the following tips:
- Keeping the description to 155 characters or less
- Using active voice
- Adding a call-to-action
- Adding a focus keyword
- Adding specific details
- Making sure it matches the content of the page
- Making it unique
For more information, see Choosing keywords and description text for a content record.
Use keywords/phrases in meta tags
Use keywords and meta tags to help people find webpages and to provide data to search engines and visitors.
Entering Keywords/Metatags from the Properties tab of a content record automatically adds the tags to the <META> element's keywords attribute in the rendered page's source code. Though not visible on the webpage, this text helps search engines like iMIS and Google locate the content record, enabling searches to find the page even if the keywords are not in the visible content.
Note: External web-based search engines such as Google do not typically index the contents of this <META> element.
To add keywords and metatags to a page, do the following:
- Go to RiSE > Page Builder > Manage content.
- Locate and open the content record.
- Click the Properties tab.
- Add the desired metatags in the Keywords/Metatags field.
- Click Save & Publish. The keywords are automatically added to the
<META>element's keywords attribute in the page's source code.
For more information, see Choosing keywords and description text for a content record.
Use images in meta tags
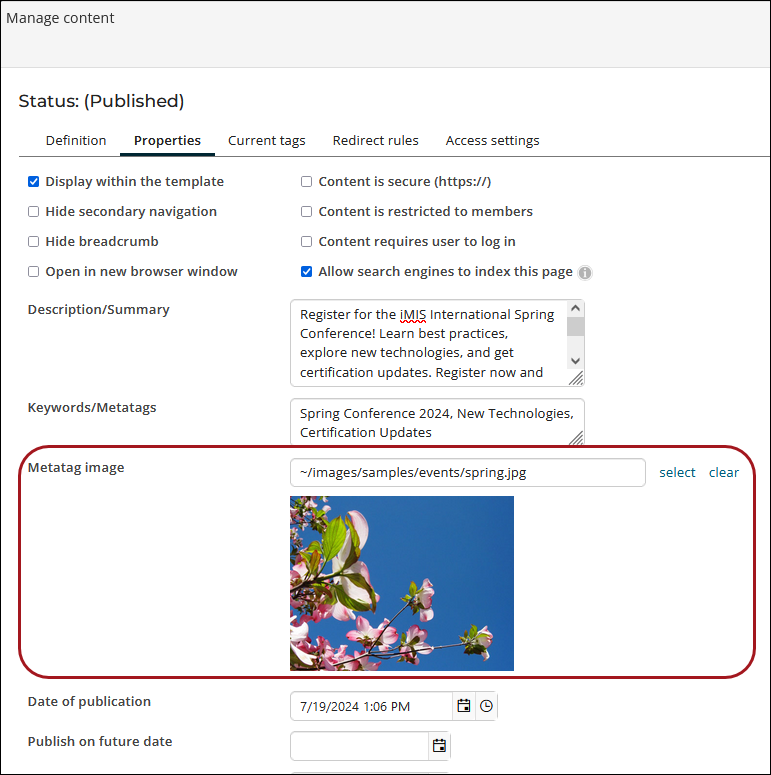
Using images helps visitors to your website understand your other content, especially for those that are visual learners. Selecting the Metatag image from the Properties tab of a content record automatically adds the image to the <HEAD> element in the page's source code. This allows the image, along with any associated attributes such as a description, to be rendered on websites when shared.
To add metatag images to a page, do the following:
- Go to RiSE > Page Builder > Manage content.
- Locate and open the content record.
- Click the Properties tab.
- From the Metatag image field, select the desired image.
- Click Save & Publish. The image is automatically added to the
<HEAD>element in the page's source code.

Have a mobile-friendly website
Google recently announced that mobile-friendly sites score higher for searches. Having a mobile-friendly site means that your website is responsive. iMIS comes with an out-of-the-box Member Responsive site that you can copy to ensure all responsive features are intact. Google also recommends that your mobile site is indexed and verified by them.
Use unique titles for each page on your site by using <title> tags
These are the page titles that are displayed in search results, so you will also want to make sure the title is a clear representation of what is displayed on the page. In iMIS, the <title> tag is used around the content Title.
Reduce the size of large images
Large image files contribute to slow moving websites. Site speed is a crucial factor when considering SEO. Having useful alt text for images when they are used as links is also an important factor.
Have a useful 404 page
Having a useful 404 error page that guides users back to a working page on your website will allow for more clicks around your site, resulting in higher traffic. This increase in traffic will help contribute to a higher SEO ranking.
Use Canonical URLs
Canonical URLs are URLs designed to help search engines rank the amount of traffic your site receives through various methods. The Use canonical URLs for SEO option under RiSE > Settings > Quick setup tells search engines to recognize, categorize, and rank the traffic to this piece of content at the same.
When enabled, the canonical URLs are automatically generated and cannot be edited. The URLs use the publish file path of the content and include the first defined URL and website name of the website being visited. All URL parameters are excluded from the canonical link except for ProductCode and EventKey.
There is no where to define canonical URLs, since they are automatically generated by iMIS.
Example: A member visited a page in the Member Site: www.mydomain.com/mbrr/path/to/content.ascx. The member then visited the same page in the Annual Conference Site: www.mydomain.com/imisannualconference/path/to/content.aspx. Visiting the same page from multiple different sources in one site will have one unique link, but the link will be different for each website you visit.
Example: Members are accessing the member directory through different access points. One member accesses the directory through the home page and another through the membership landing page. The search engine categorizes and ranks these access points differently.
Include a page title suffix
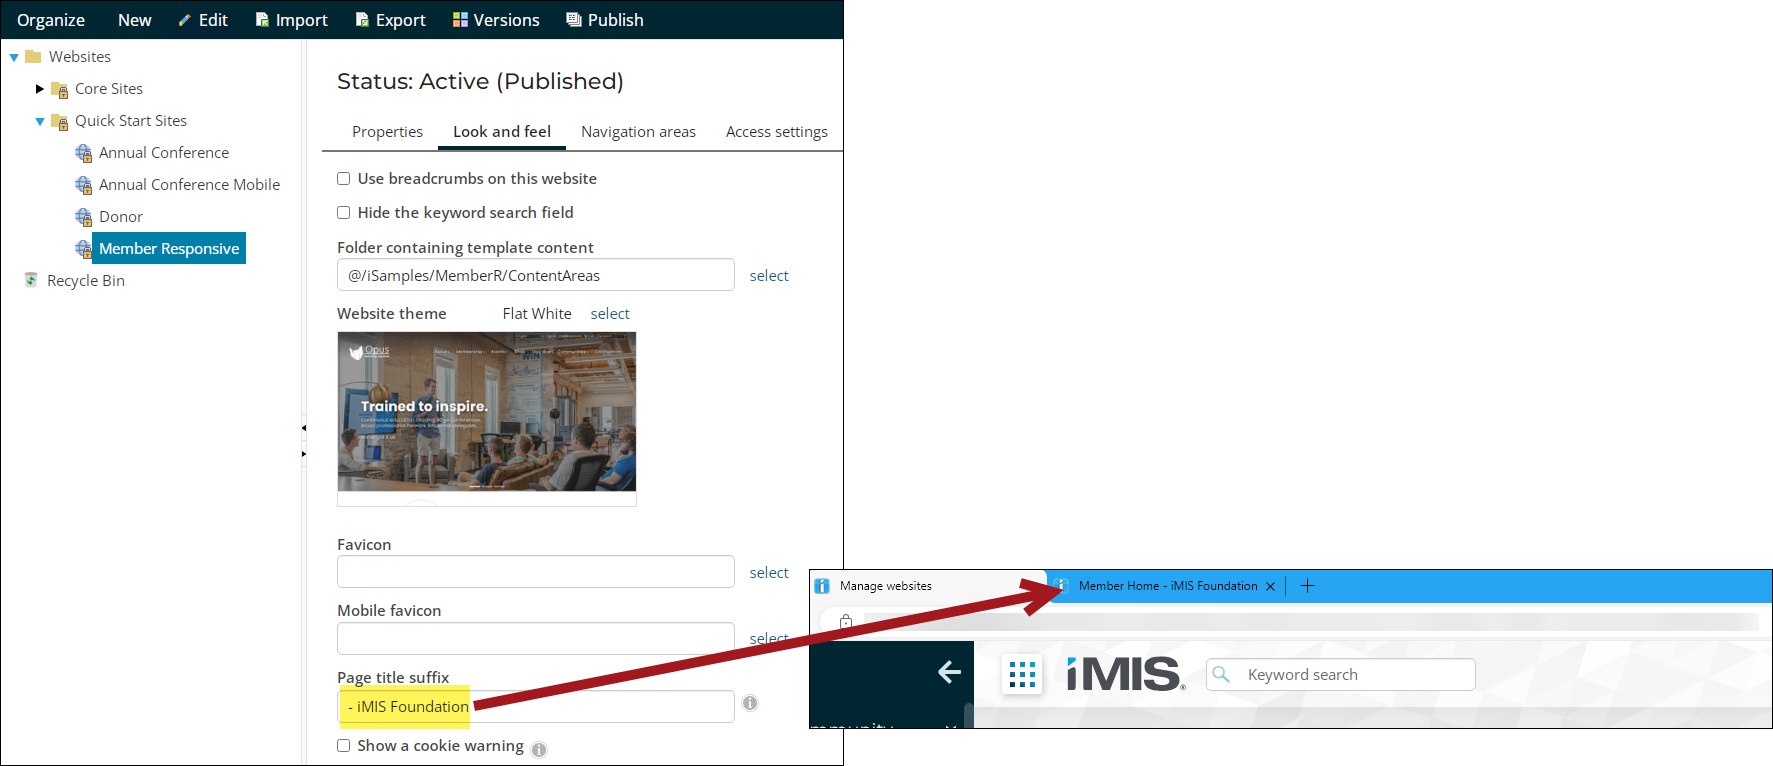
On the Look and Feel tab of website content, there is an option to include a Page title suffix. This helps users identify the site on their browser tabs and bookmarks and typically is the name of the site or organization. The maximum number of characters allowed for this option is 150, including special characters.
Note: Note: Including HTML in the Page title suffix is not supported.

To enable a Page title suffix, do the following:
- Got to RiSE > Site Builder > Manage websites and open the website content you wish to edit.
- From the Look and Feel tab, scroll down to the Page title suffix option, and enter your preferred title.
- Click Save and then Publish the website content.
Use simple URLs for navigation links
An option to Use simple URLs for navigation is enabled by default under RiSE > Settings > Quick Setup that allows for shortened URLs by excluding the navigation path within the URL.
For example, when this option is disabled, a URL for the site might be: yourdomain.com/MBRR/Membership/Directory/Find/iSamples/SharedContent/ContactManagement/Directory.aspx and enabling the option changes the URL to: yourdomain.com/MBRR/iSamples/SharedContent/ContactManagement/Directory.aspx
Note: While this option shortens the length of URLs, any URLs that members and users may have bookmarked on their browser are still active links.
Disable search engines from searching the page
The Allow search engines to index this page option under the Properties tab on website content allows your organization to either approve or deny search engines from indexing the specific page. This option is enabled by default on all existing pages and any new pages that are created. When disabled, a noindex meta tag is added to the <HEAD> of the page.
To access this option, do the following:
- Go to RiSE > Page Builder > Manage content, and open the content record for edit.
- Click the Properties tab. Note that the option to Allow search engines to index this page is enabled by default. If you wish to prevent search engines from indexing the page, disable the option.
Note: Pages secured behind a login are not indexed by search engines regardless of this option.