Last updated on: June 30, 2026
Installment pledges are gifts paid through scheduled invoices. This allows your members and donors to give on a regular basis. Staff users can easily enter installment pledges when entering gifts on the staff site.
In This Article
- Entering installment pledges
Paying one or more installments as a staff user
Paying installment pledges as a public user
Entering installment pledges
When creating a gift batch from the staff site, staff users can either enter the full installment pledge, or enter one pledge payment of the installment pledge.
To enter an installment pledge, do the following:
- Go to Fundraising > Enter gifts.
- From the Batch drop-down, select New gift batch.
- Select an existing gift batch, or click Create Batch.
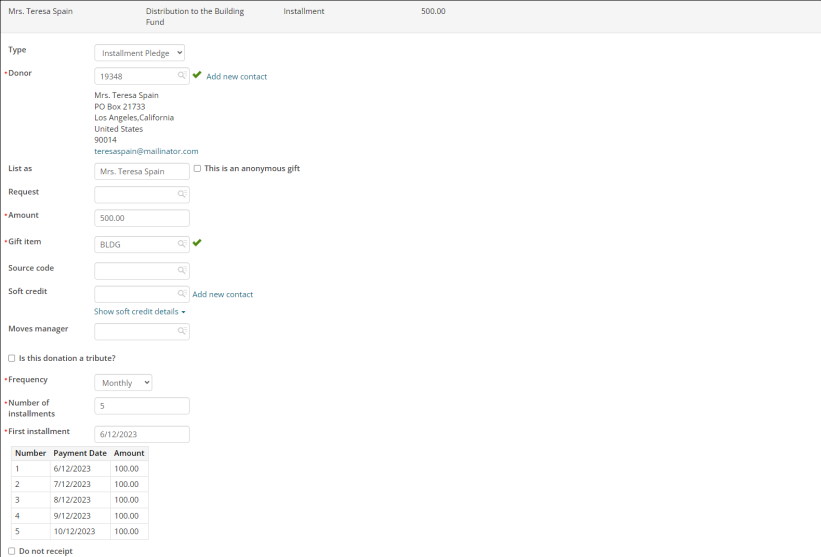
- From the Type field, select Installment Pledge.
- Enter the required pledge details:
- Donor – Enter the user ID of the Donor placing the donation, or begin typing their name to review a filtered list of contacts.
- Amount – If you set a Default amount, this value will be prepopulated, but can be overwritten.
- Gift Item – Enter the Gift item code. As you type in the Gift item field, the field acts as a drop-down and you can select a Gift item.
- Frequency – Select an option from the drop-down to indicate how often you want to make an installment payment on your donation.
- Monthly
- Quarterly
- Annually
- Number of installments – The number of payments over which the donation amount will be paid. The maximum number allowed is 99, but it is not recommended to go above 36.
- First installment – Date the first payment will be applied.
- Enter any other details.
- Click Save.
- Once you are finished entering any other gifts or pledges, click Process Batch.
Paying one or more installments as staff user
To pay a single installment from a pledge, do the following:
- Go to Fundraising > Enter gifts.
- From the Batch drop-down, select New gift batch.
- Select an existing gift batch, or click Create Batch.
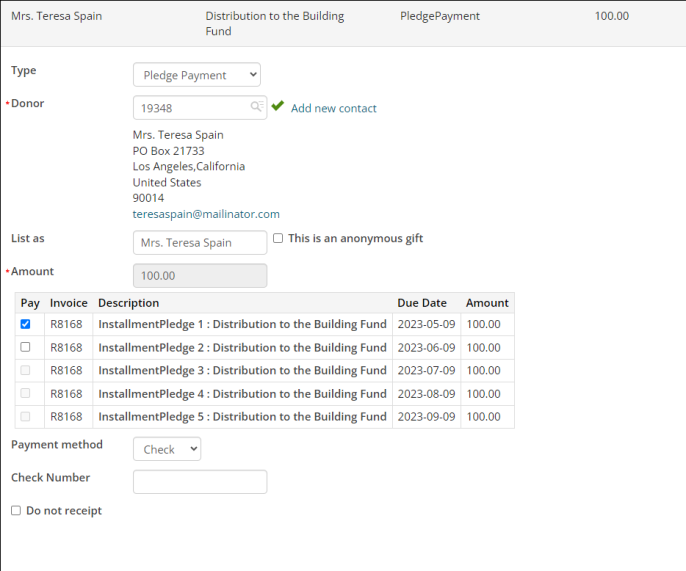
- From the Type field, select Pledge payment.
- Enter the required pledge details:
- Donor – Enter the user ID of the Donor placing the donation, or begin typing their name to review a filtered list of contacts. You must enter a Donor before you can view their open pledges.
- Amount – Select an Installment Pledge from the available list. You may select more than one payment.
- Enter any other details.
- Click Save.
- Once you are finished entering any other gifts or pledges, click Process Batch.
Paying installment pledges as a public user
Public users can pay installment pledges from their account page. Do the following:
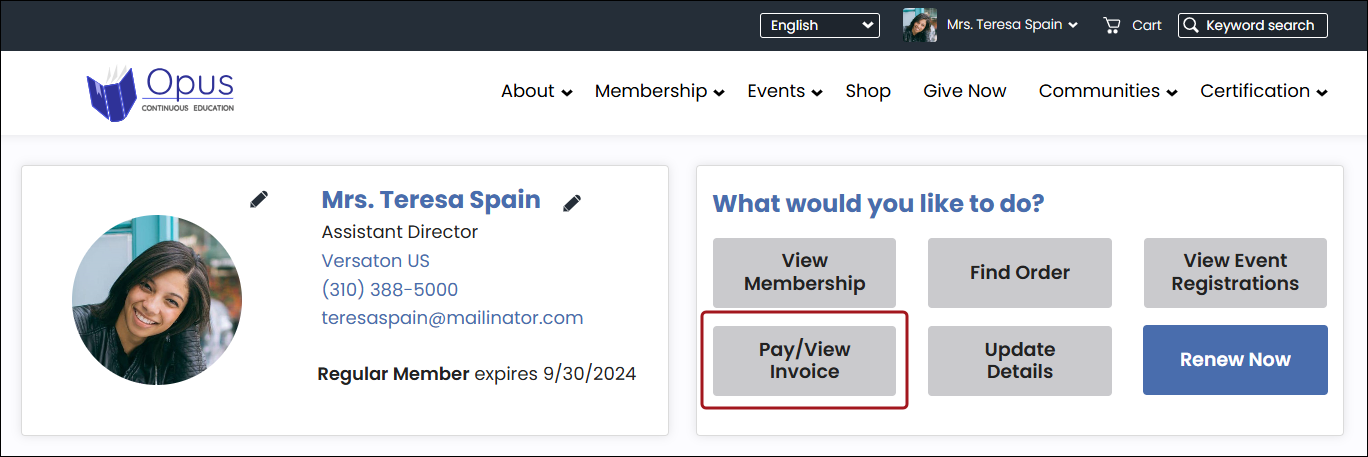
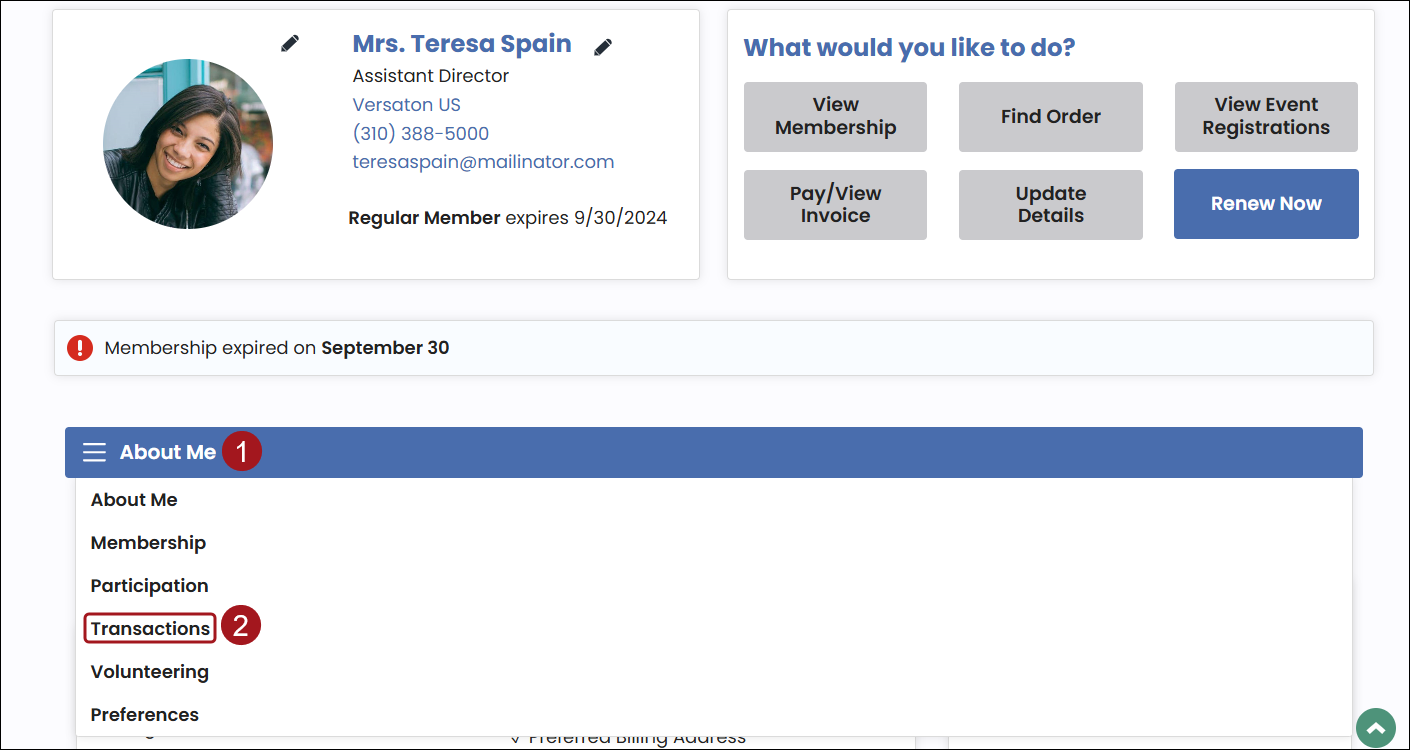
- Log in to the public site and go to your account page.
- Navigate to the Open Invoices panel by doing one of the following:
- Click Pay/View Invoice.
- Select the Transaction tab from the drop-down menu.
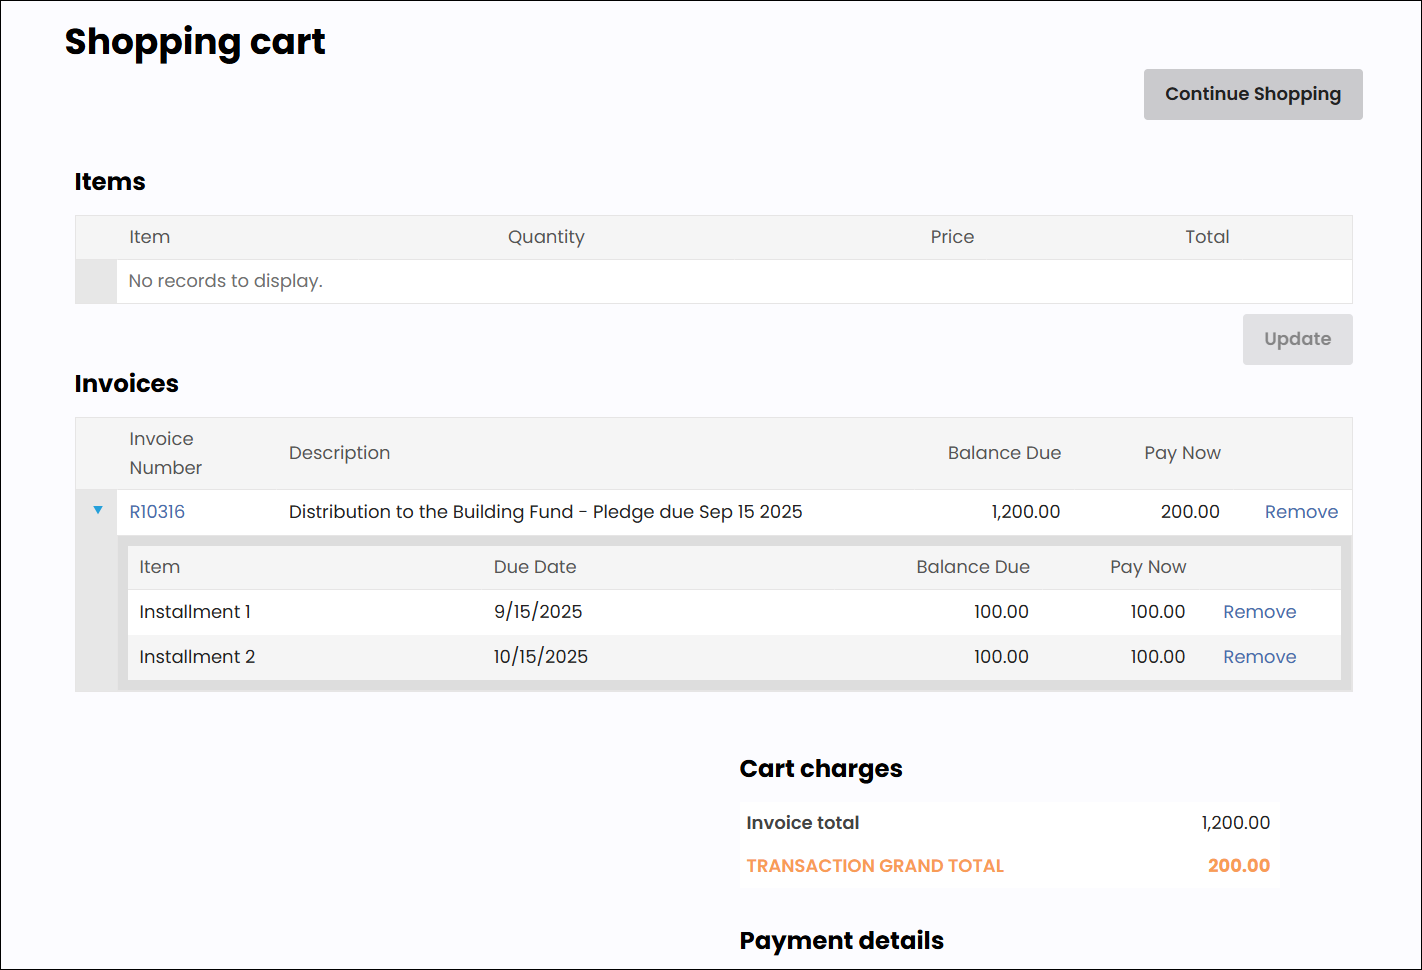
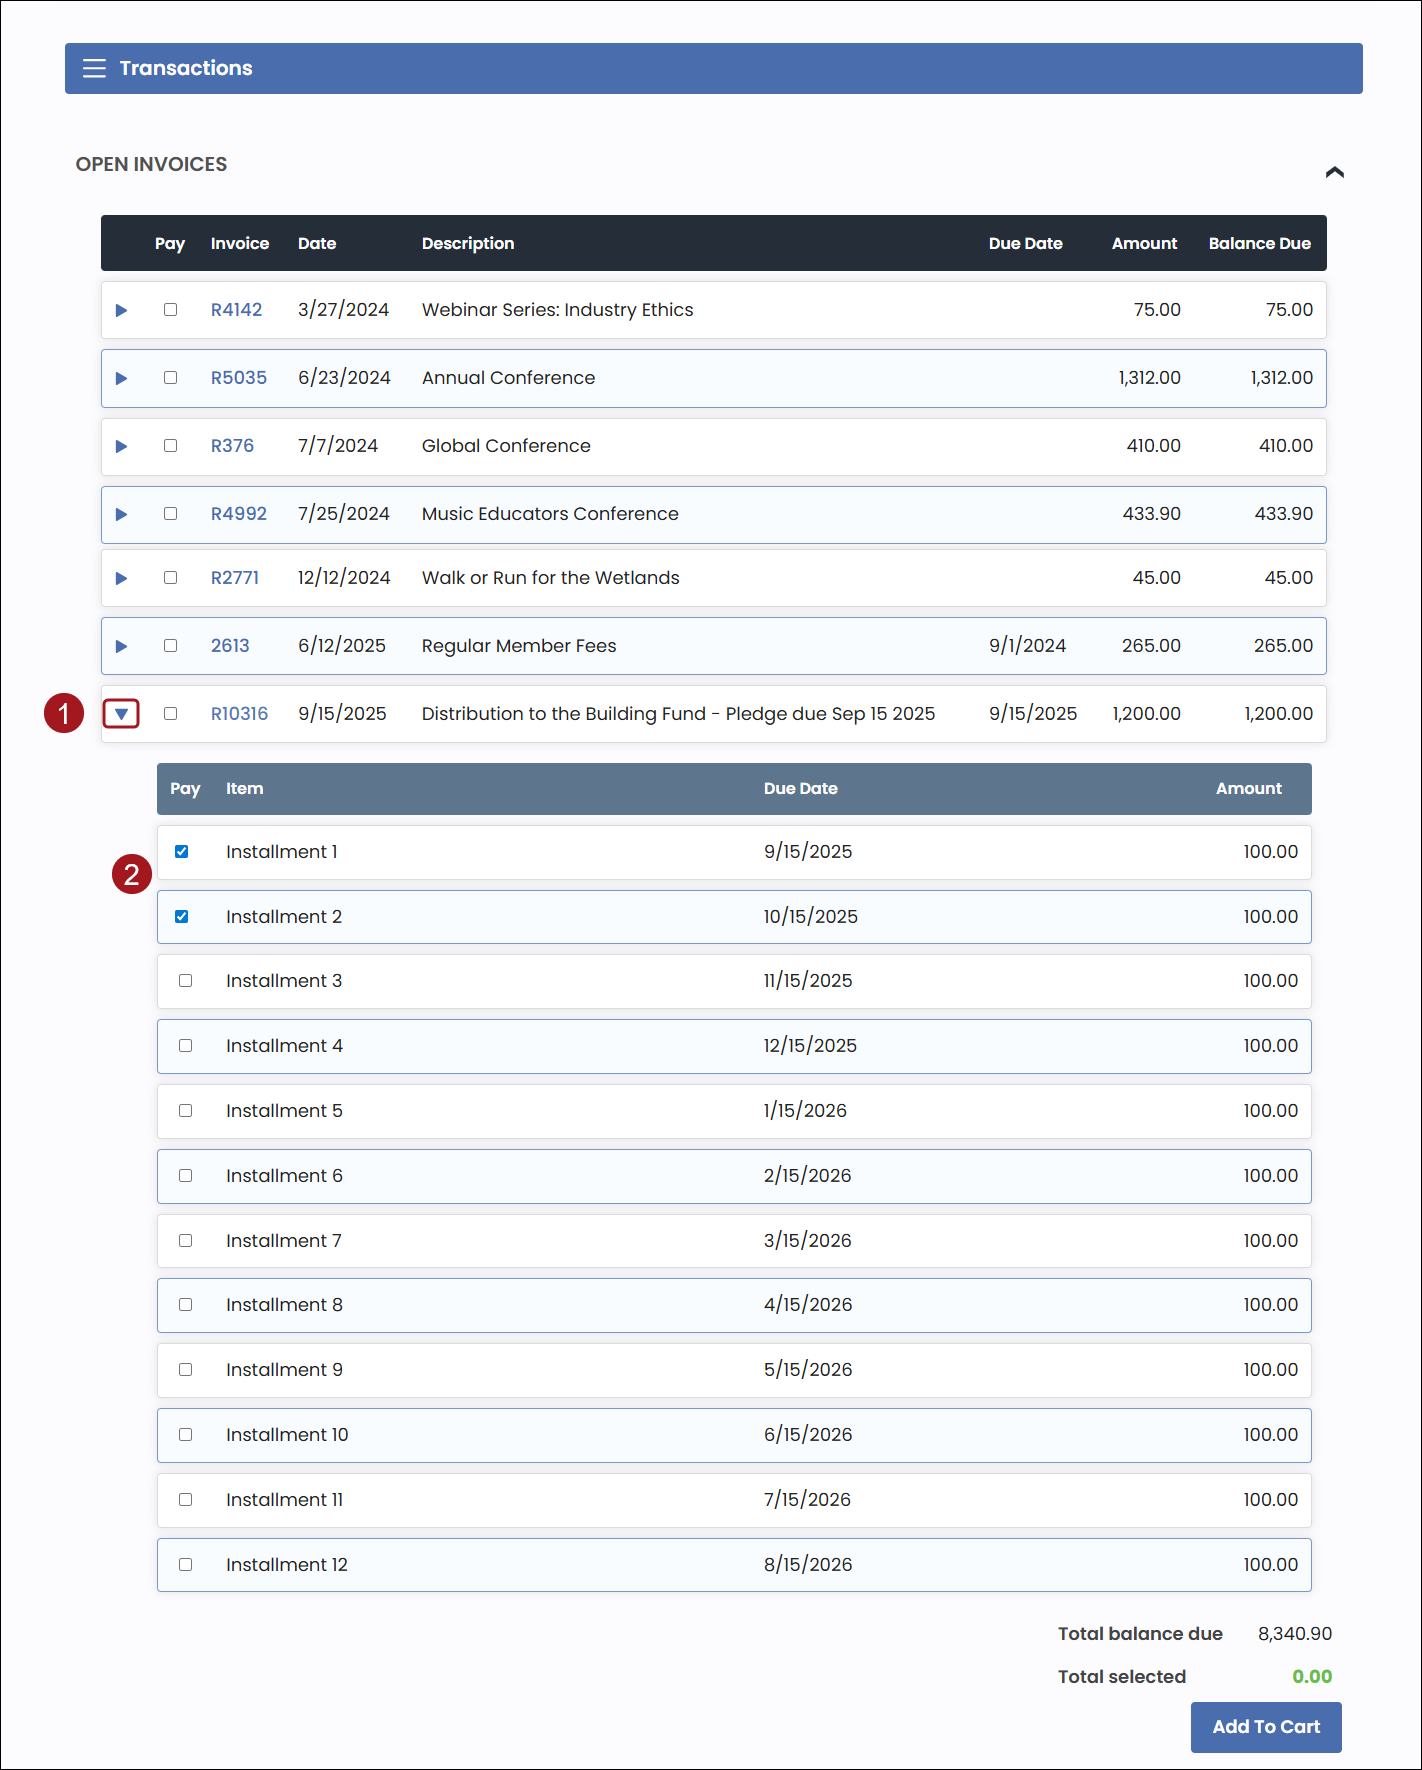
- Locate the pledge invoice, and do one of the following:
- Open Invoices panel:
- Click the arrow to expand the pledge installment information.
- Enable the checkbox for installments you want to add to the cart.
- Click Add To Cart.
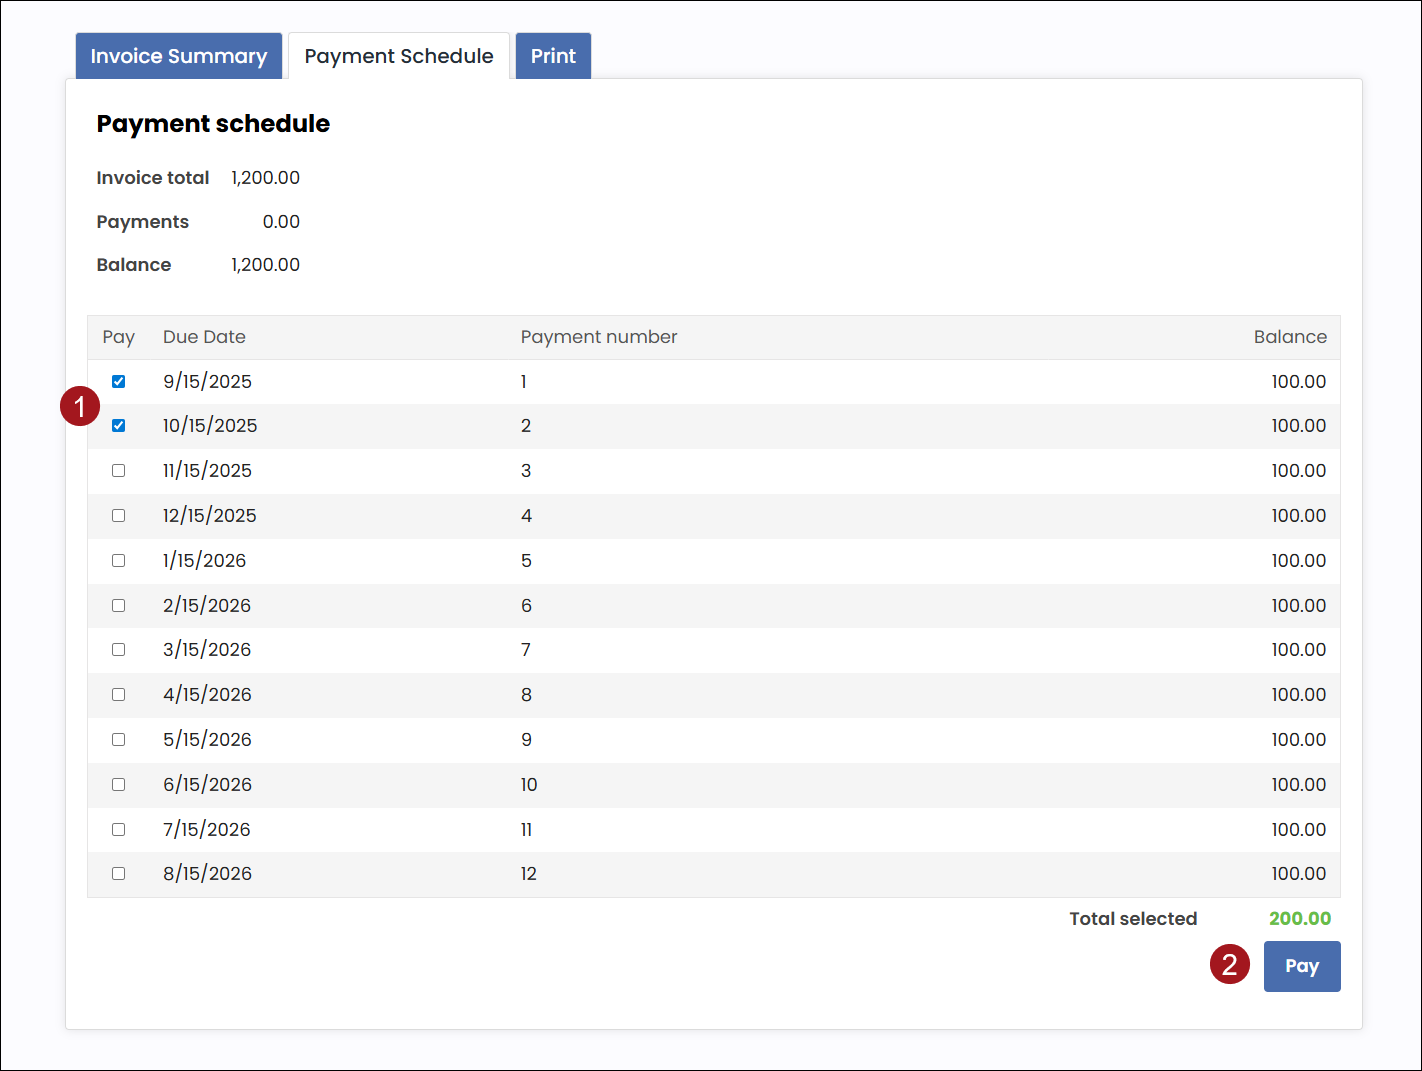
- Pledge Invoice Detail:
- Select the Invoice number to open the Pledge Invoice Detail page.
- From the Payment Schedule tab, enable the checkbox for installments you want to add to the cart.
- Click Pay.
- Open Invoices panel:
- Enter your payment details and Submit the order.