Last updated on: June 23, 2026
Add Member Configuration
This new feature exists in iMIS Chapter Experience (ICE) version 5.1 and forward. It allows the ICE Admin to create and maintain multiple add member type pages. This feature does not enable management of legacy add new member page.
Creating the action
Do the following to create the action:
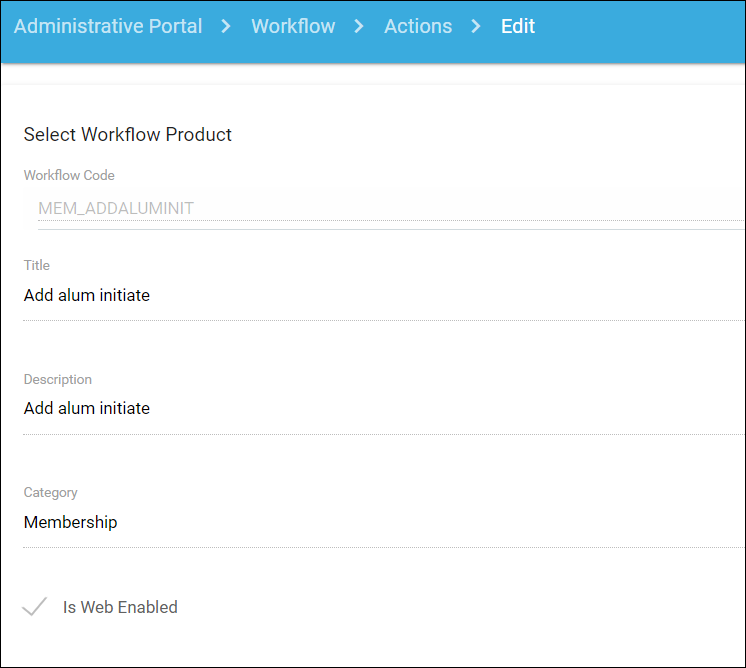
- Go to Workflow > Actions > Create (or Clone). Alternatively, use a preexisting action. This will be used to add the new member page.
- Make sure to update the other sections like qualifiers, additional information and activity mapping.
- If cloning, update the other sections like qualifiers, additional information, and activity mapping.
Note: In this example, the MEM_ADDALUMNIIT action was created for adding a new Alum Initiate record into iMIS. This action was created by cloning the MEM_ADDNEW action that is currently used to add new collegiate members.
Creating the page for adding new members
Next, create the page that is used by the chapter officers to add the new member.
Do the following to create the new page:
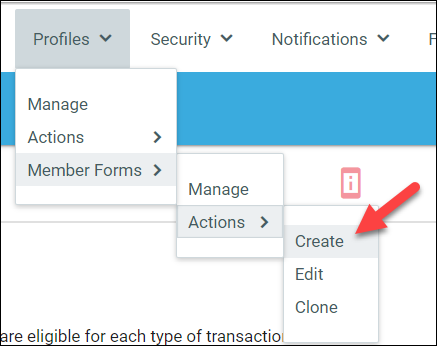
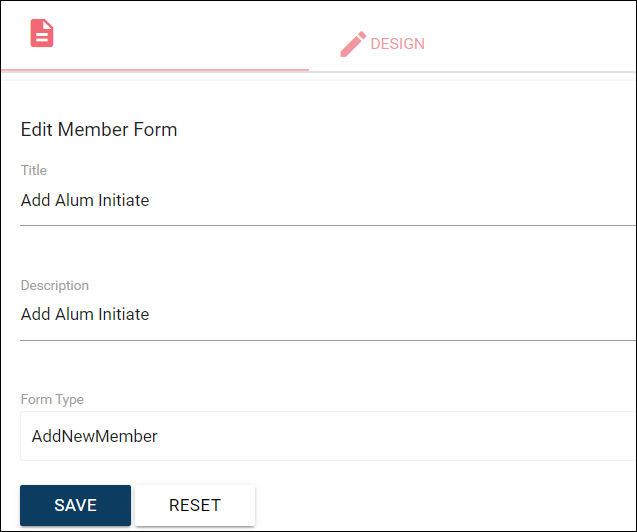
- Go to Profiles > Member Forms > Actions > Create.
- Select AddNewMember as the Form Type.
- Set a Title and Description to identify how this page will be used. In the example, it is called Add Alum Initiate.
- Click the Design tab.
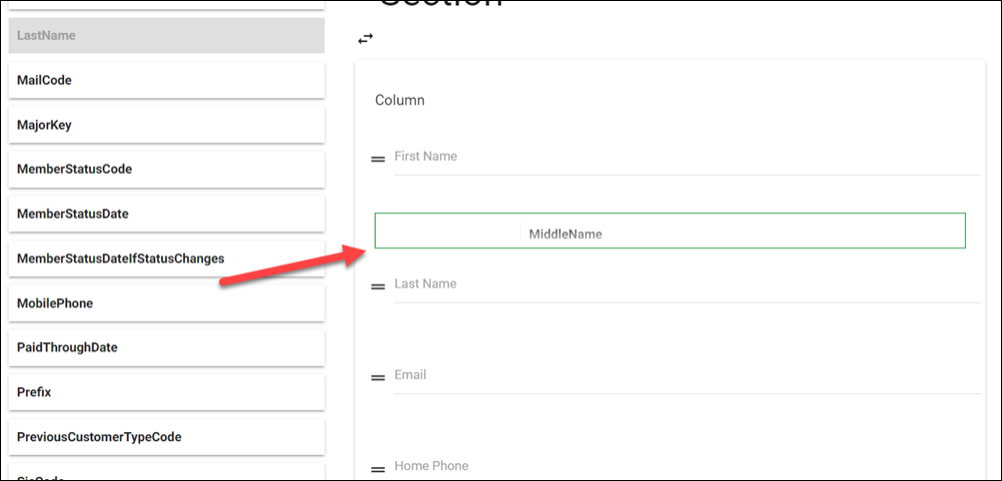
- On the left side, select a source that contains the field to collect from the chapter officer about the new member. It is recommended to collect First Name, Last Name, and Email at a minimum, which is required to create a record in iMIS.
Source Contains Contact Same fields as in CsContact business object or the Name table Address Same fields as in CsAddress business object or the Name_Address table ExtTable Allows selection from current User Defined tables - To add a field to the form, select it on the left and drag it to the right in the area you would like. You will see a green border showing you a location where the field can be placed.
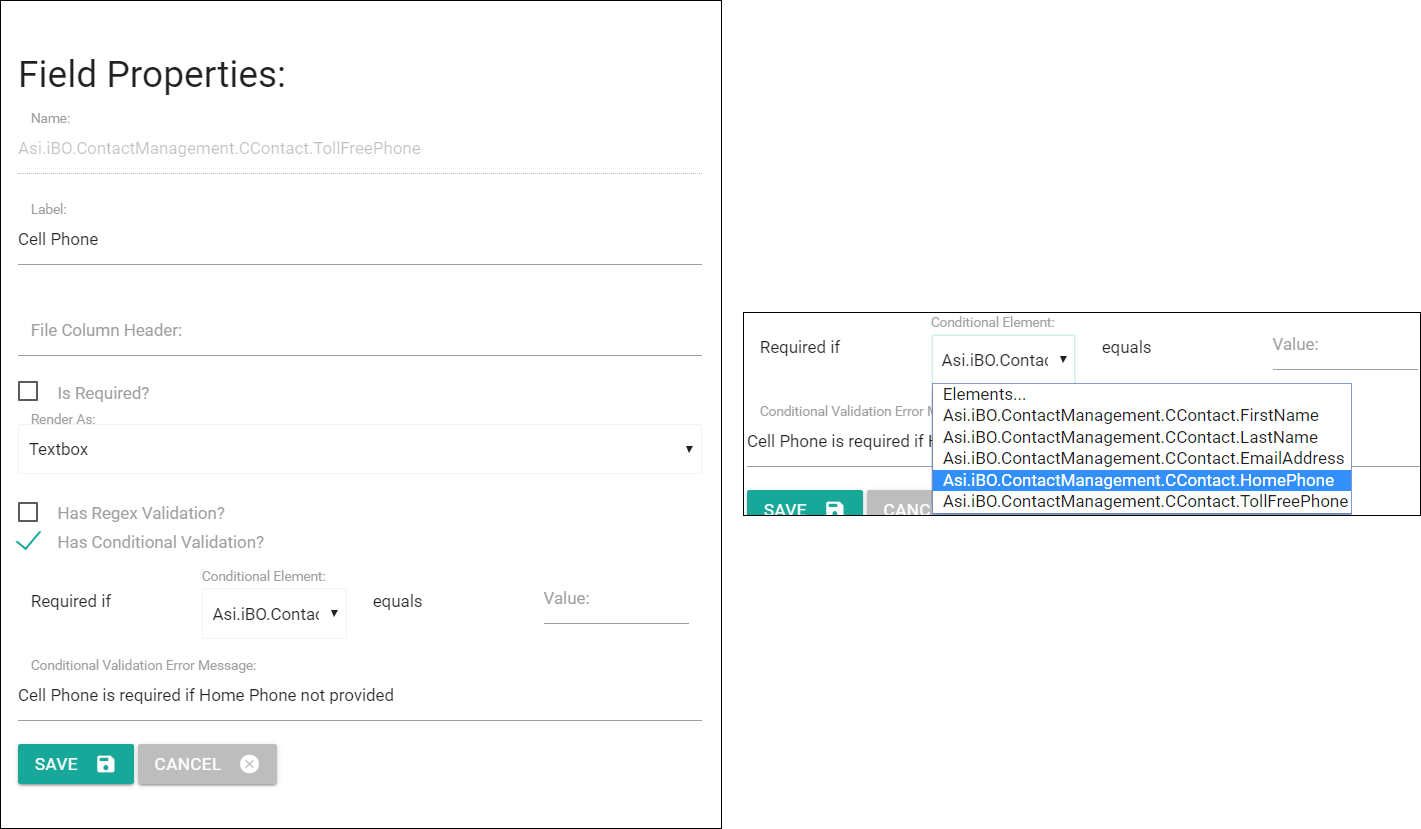
- Release the mouse to see the field properties window:
- Modify the label, which is what the user will see.
- The file column header would be the header used for the new member import file (license required).
- Select if the field should be required.
- Identify the format of the field under Render As.
Note: When selecting State/Province or Country, select Dropdown under Render As. The state and country lists used in iMIS will automatically be used for these fields unless you specify other general lookup validation tables.
- You can add Regex validation:
- Regular Expression Examples
- US Zip Code: ^\d{5}(?:[-\s]\d{4})?$
- Canadian and US Zip Code: ^\d{5}-\d{4}|\d{5}|[A-Z]\d[A-Z] \d[A-Z]\d$
Phone Number: ^\+?(\d{1,3})?[\s.-]?\(?\d{3}\)?[\s.-]?\d{3}[\s.-]?\d{4}(\s?[a-zA-Z\s,.!?]*\d{1,5})?$
- Email: \s*\w+([-+.']\w+)*@\w+([-.]\w+)*\.\w+([-.]\w+)*\s*
- Email excluding .edu domain: \s*\w+([-+.']\w+)*@(?!(?:\w+)\.edu$)\w+([-.]\w+)*\.\w+([-.]\w+)*\s*
- Regular Expression Examples
- Specify conditional validation to require a field if a criteria is met. In this example, I am going to require Cell Phone if Home Phone is not populated:
- You would select the Conditional Element which should be another field in your form.
- You then would specify the value expected to require the field.
- You can also specify the error message that appears if conditional validation is not met.
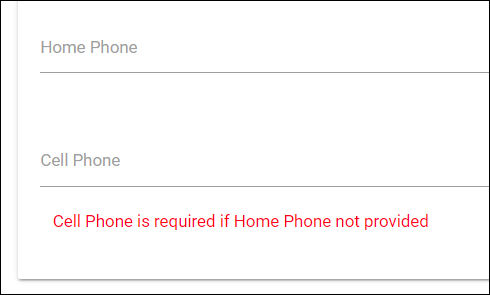
- Message example shown to user.
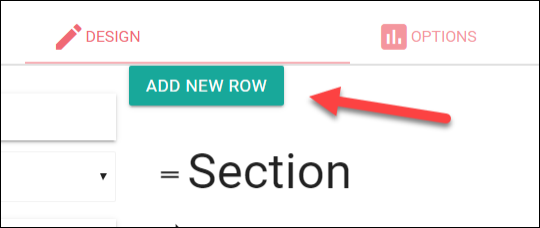
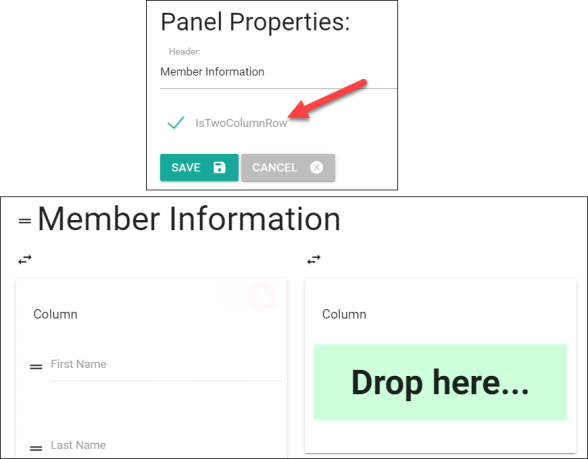
- Use the Add New Row button to include a new section to separate your field groupings if desired.
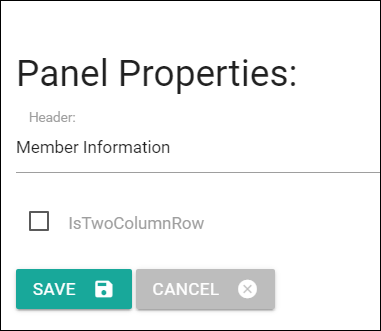
- Click on the Section header to change the text that will appear above your field grouping.
- When editing the section header, you can also select to add another column to your page if desired.
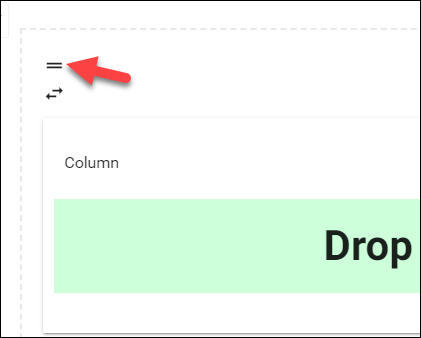
- To move a Section, select the "=" to the left of the section header and drag the entire section to the desired new location.
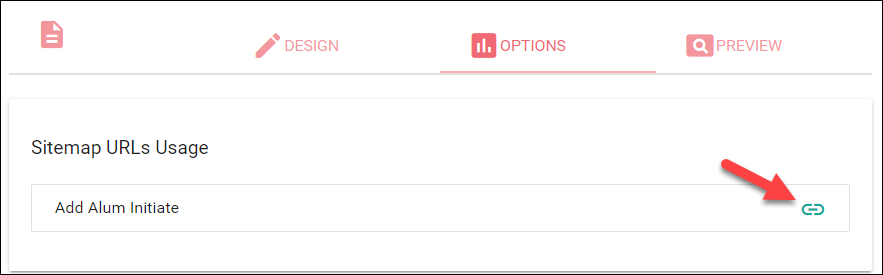
- The Options tab will provide a link to view your form in the user interface.
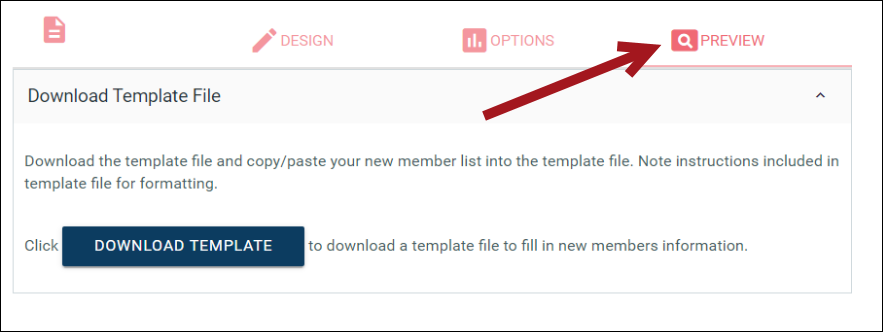
- Select the Preview tab to view your form within ICE admin along with the template file if in use.
Adding the form to the sitemap
Do the following to add the form to the sitemap:
- Go to Sitemaps > Manage > Select applicable sitemap.
- Select the menu area you would like to add a new item under and use the green plus sign to add a new sitemap node.
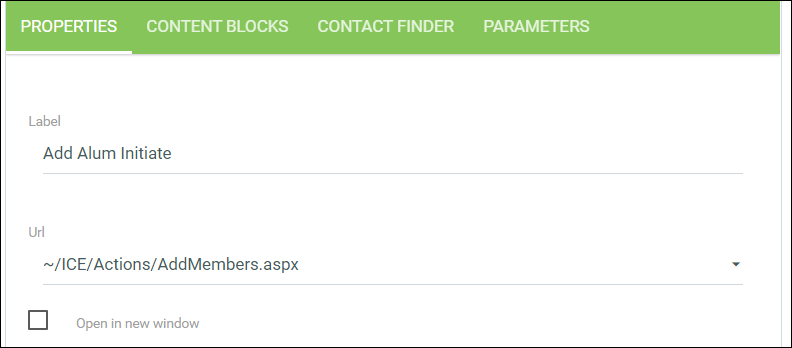
- On the Properties tab, select the AddMembers URL control.
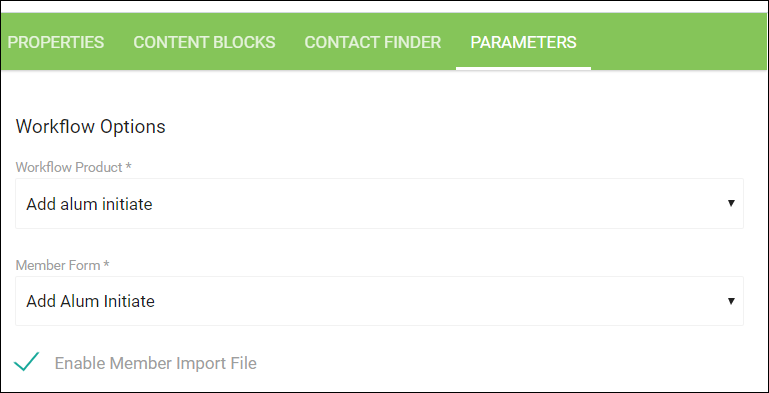
- On the Parameters tab, select the workflow product and member form you created above. In our example, our workflow product is Add alum initiate and our member form is also Add alum initiate.
- Select if you would like to enable the member import file (license required).
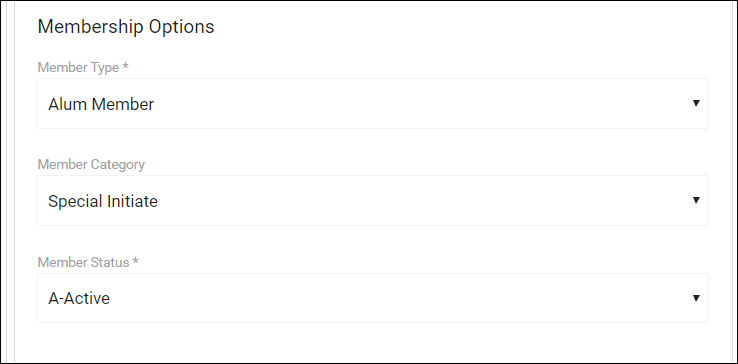
- Under the Membership Options section, this is where you will specify the member type, status and category for the new record that will be created in iMIS.
- Don't forget to update your content blocks! The content blocks pulled in by default will be the same used on your current add new member page so you may want to create new content blocks for this new page.
Important! The membership options should MATCH your qualifiers for the workflow action you are using on the page so that your membership script will continue to process necessary updates.
Testing
You are ready to test adding new members:
- Go to your new menu item in the user interface and go through the steps to add new members.
- Confirm any validation applied is working as expected.
- Confirm records are created as expected.