Last updated on: June 08, 2026
Attach files to activity records through the use of multi-instance panels. Users can add up to fifty attachments to a panel.
Adding the Attachment property to a panel
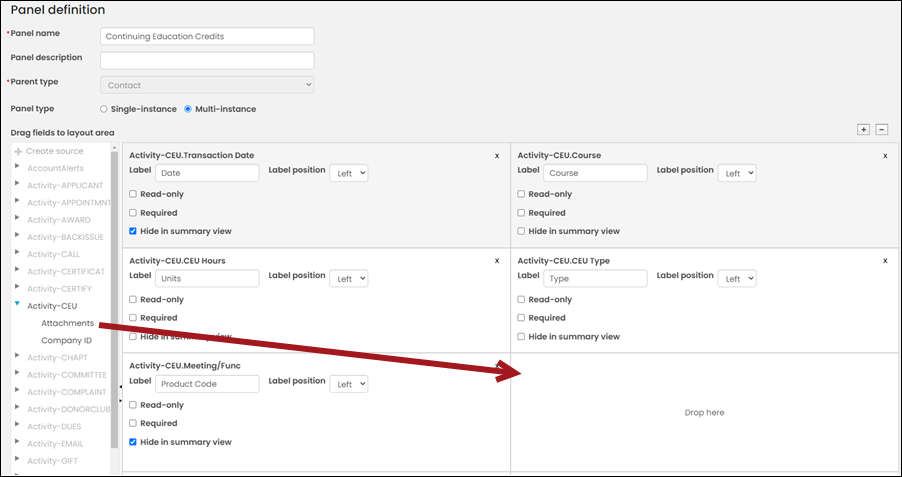
Do the following to add the Attachment property to an activity panel:
- Go to RiSE > Panel Designer > Panel definitions.
- Edit or create a new multi-instance panel. The following configurations are required:
- Parent type: Contact
- Panel type: Multi-instance
- Open the related activity type.
- Drag the Attachments property to the layout area.
- Click Save & Exit.
Tip: Most activity types have an Attachments property. This process must be repeated for any activity panel that requires attachments.
Uploading documents to the property
After the Attachment property is added to the panel, you can upload attachments:
- Navigate to the account page and locate the panel. To learn how to add a panel to an account page, see Creating a panel and adding it to account pages.
- Click the + icon to add a new row.
- From the Attachments property, click Select and choose the attachment.
Note: Allowed file formats for attachments are specified in the Quick setup settings.

- To continue adding attachments, click Select and choose the next attachment. The maximum amount of attachments is 50.
- Click Save & Close.
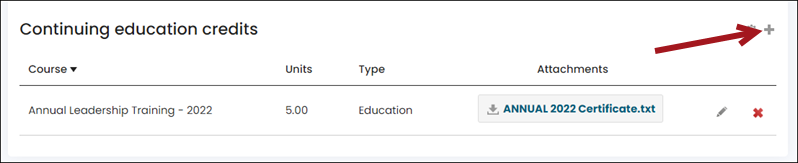
Download the attachments by clicking on the file. Edit the attachment by clicking the pencil icon for the desired row.
