Last updated on: January 27, 2026
Easily create a checkbox option (yes/no) for a panel. When the checkbox is enabled, the user selected Yes, and if blank, they selected No or have not yet replied.
In This Article
- Creating the checkbox property
Adding the checkbox property to a panel
Editing the checkbox property
Reporting on the property
Creating the checkbox property
Do the following to create a new checkbox property for a panel:
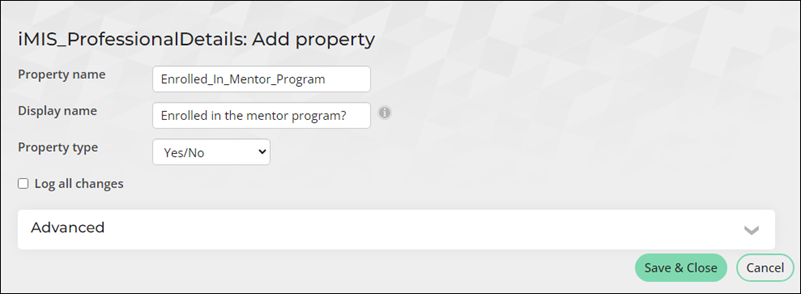
- Go to RiSE > Panel Designer > Panel sources.
- Open the custom source, or create a new source.
- Select Add new property.
- Enter the Property name, which cannot include any spaces.
- Update the Display name to make it clear and legible.
- From the Property type drop-down, choose Yes/No.
- (optional) Enable Log all changes to have the changes made to this field logged in the change history.
- Click Save & Close.

Adding the checkbox property to a panel
Do the following to add the new checkbox property to a panel:
- Go to RiSE > Panel Designer > Panel definitions.
- Select the desired panel or create a new panel.
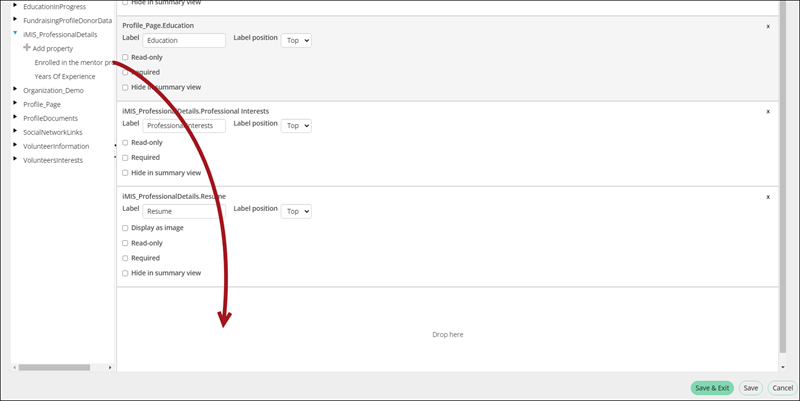
- Expand the source you added the checkbox property to, then drag the property to the panel layout.
- Click Save & Exit.
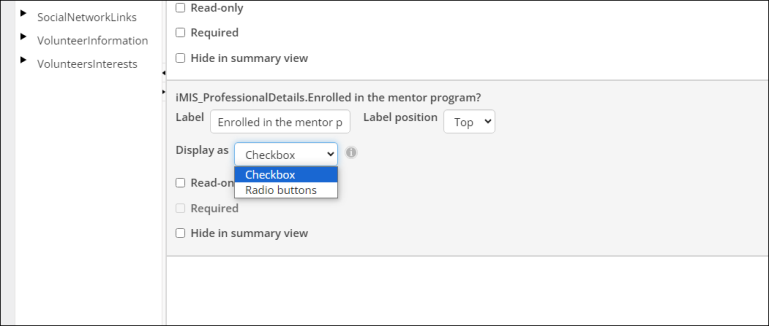
- (optional) To alternatively display the property as radio buttons, update the Display as option from the panel layout area.


Editing the checkbox property
Do the following to edit the new property:
- Go to the panel location, for example, if the panel is on the staff account pages, navigate to an account page from the staff site.
- Click the edit icon.
- From the new checkbox property, select the checkbox for yes, or leave it unchecked for no.
- Click Save.
Note: To add a new panel to the account pages, see Creating a panel and adding it to account pages.