Last updated on: January 27, 2026
You can further customize your alerts by adding images, links, CSS classes, and more.

Do the following to format an alert:
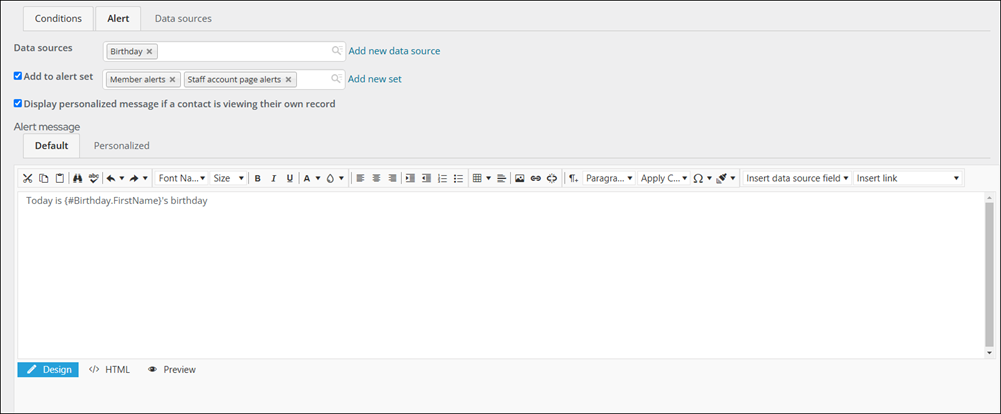
- (optional) To insert icons in an alert, use the Image Manager.
- (optional) To insert fields from the selected Data sources into the alert, use the Insert data source field drop-down.
format=“C”- Currency: Convert 123.456 to $123.46 ("C", en-US)format=“d”- Short date: Convert 6/15/2009 1:45:30 PM to 6/15/2009 (en-US)format=“D”- Long date: Convert 6/15/2009 1:45:30 PM to Monday, June 15, 2009 (en-US)- (optional) To include repeating data from a data source in the alert, use the {foreach} placeholder. See Using the foreach placeholder for more information on the {foreach} placeholder.
- (optional) You can use the Apply CSS Class drop-down to apply styling and formatting to specific portions of the alert message. Select the area you want to style and choose a CSS class from the drop-down.
- (optional) To insert a link to a content record in the message, use the Insert link drop-down to select Alert link:
- You can select a content record or enter a shortcut as the Link Target. If you enter a shortcut, it should include the [Website] variable. This format points users to the web page within the correct site, ensuring that the page displays with the correct theme. For example, if you want to link to the EventDetail shortcut, enter Website/EventDetail or [Website]/EventDetail.
-
Enter the Link text that will display in the alert message.
-
If needed, enter the Url parameter of a web page. For example, you can enter ProductCode=FR004 to use the page for a specific product as the link destination. You can also use a variable as the Url parameter, such as ProductCode={#product.ProductCode}.
- If needed, enter or select a Source code to associate this link with a marketing campaign.
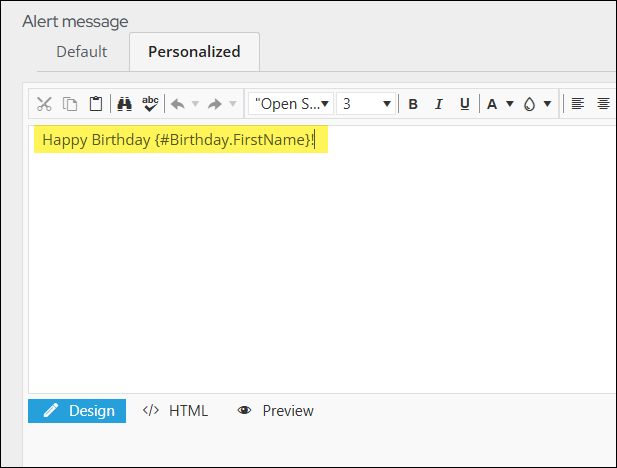
- (optional) To create a second version of the alert that only displays when a contact views their own record, select Display personalized message if a contact is viewing their own record. Enter and format a Personalized message. For example, you might want a membership renewal alert to use different wording when displayed to a contact (“John Smith's birthday is today.”) than when displayed to a staff user (“Happy Birthday John Smith!”).
You can reformat these fields with a formatting string. To specify a format, add format=”FORMAT_HERE” inside the brackets, with FORMAT_HERE specified by .NET Framework Standard Format Strings. For example: {#iqa.DataAdded format="d"}.
There are both Date/Time and Number formats available:
Note: For more information on formatting types, please reference the .NET framework.
