Last updated on: January 27, 2026
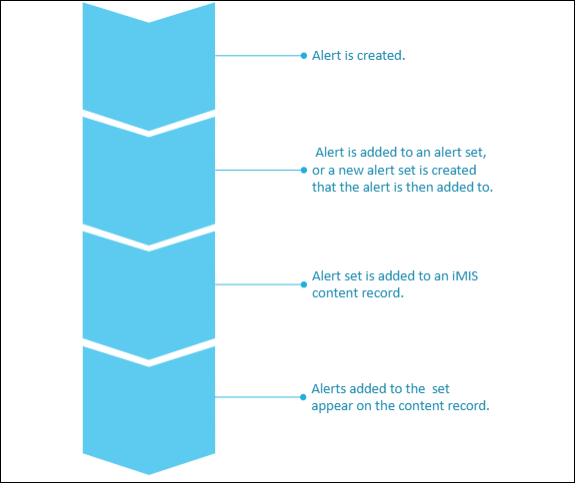
Alerts are made up of a series of tasks that can then be grouped into an alert set that displays to users.
In This Article
Understanding alert tasks
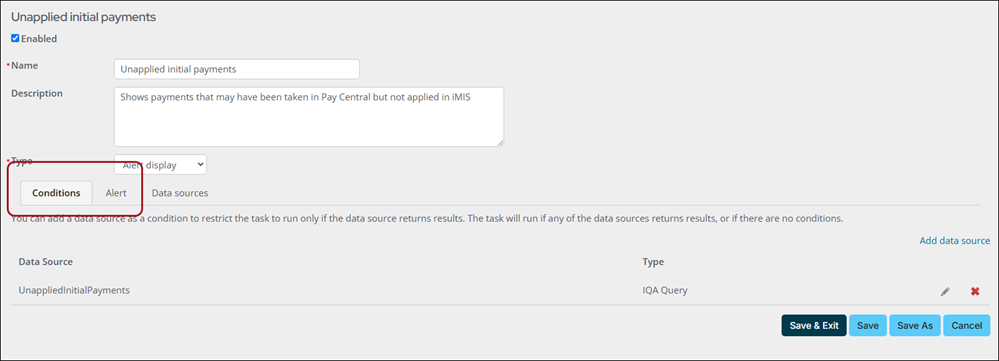
To generate alerts, you need to create alert tasks. For each task, define Conditions and an Alert.

The Conditions determine which records qualify for the alert. This is where you specify query data sources.
The Alert is the text, images, links, and buttons that comprise the alert. When the data sources return records, the task generates the Alert.
You can create a task that displays a predefined alert on your website when specified conditions are met. Conditions instruct the task to run only when records are returned by selected data sources, filtering when the alert displays. If needed, you can specify a personalized alert message to display to a user signed in as themselves.
Creating an alert task
Do the following to create an alert task:
- Go to RiSE > Process automation. A list of existing tasks displays.
- Select Add new task.
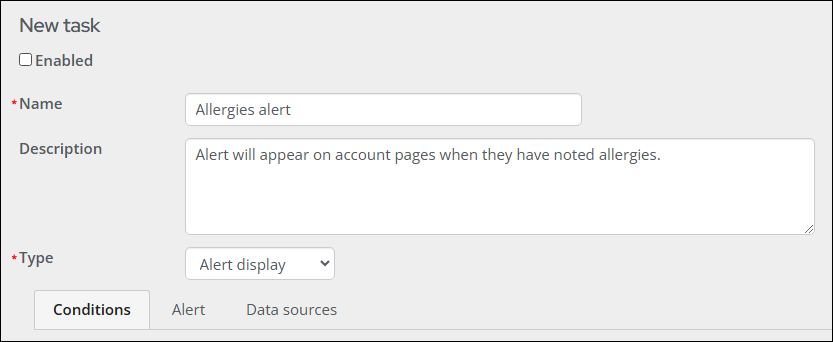
- Enter a Name that indicates the purpose of the task.
- (optional) It is recommend that you enter a task Description.
- From the Type drop-down, select Alert display.
- (optional) (Data sources tab) Create and manage query data sources for the task:
- Select Add data source.
- Enter a Data source name.
- Save your data source.
- If needed, add additional data sources. See Creating new alerts for more information.
- (Conditions tab) Specify the Conditions of the query you created that must be met in order for the task to run:
- If a query data source was defined on the Data sources or Alert tab, select one of the following options:
- Use existing data source - select a previously defined data source from the drop-down that will only display data sources that are not being used in any other Conditions.
- Use results of IQA query as data source - select this option to define a new data source:
- Enter a Data source name. It is recommended that you choose a name that indicates the type of records returned by the data source.
- Select an existing query or click Create source query to add a new query. See Creating data sources (queries) for your alert task.
- If there were no previously defined data sources from the Data sources or Alert tab, provide the following required information:
- Enter a Data source name. It is recommended that you choose a name that indicates the type of records returned by the data source.
- Select an existing query or click Create source query to add a new query. See Creating data sources (queries) for your alert task.
- Save your data source.
- If needed, add additional data sources.
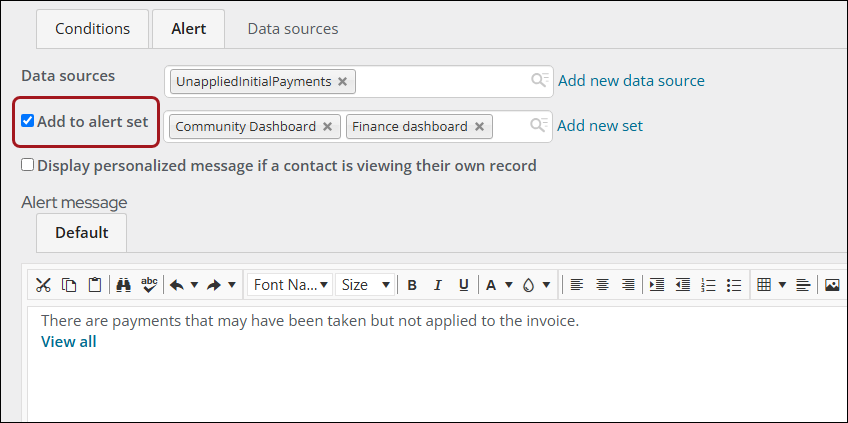
- (Alert tab) Create the Alert that the task generates when the conditions are met:
- (optional) To insert fields (such as a contact’s name) from data sources in the defined Data sources or Conditions into the alert, specify the Data sources you want to use. To learn more about how to format and utilize these options, see Using placeholders.
- Add a new data source to be used as a source for merge fields. New data sources added on the Alerts tab are not added as task Conditions. See Creating data sources (queries) for alert tasks.
- Add to alert set to include the task in an alert set. You can choose from existing alert sets or select Add new set to create a new alert set. The task can belong to multiple sets. See Understanding alert sets. You can also add tasks to an alert set when editing the set. See Creating an alert set.
- Enter and format the Default message. See Formatting alerts.
- To activate the task, select Enabled.
- Save the task.

Note: Additional query data sources can be used to insert dynamic fields if the recipient query has no dynamic fields. See Creating recipient queries for communications and Defining queries for more information. All query data sources created for this task are listed. The name of all data sources will populate in a drop-down when defining a Condition or Alert. You cannot delete a data source if the data source is selected within a Condition or Alert; however not every data source you have defined must be used when creating a Condition or Alert.
Note: This data source will populate on the Data sources tab once you click Save.
When the task is called to display the alert, it displays if any of the selected data sources return one or more records or if no Conditions are defined.
See Creating data sources (queries) for your alert task for more information about creating a query to use as a task data source.
Note: This data source will populate on the Data sources tab once you click Save.
Note: If the Conditions data sources apply the Selected Contact value to a filter, any new data sources that you create for merging purposes should also use Selected Contact with the same filter.
In order to display an alert to users, you must include it in an alert set and configure an Alert Display content item on your website to display the alert set.
Note: The task is added to the bottom of the alert set. Alerts display to the user in their order in the set. To rearrange the order of tasks in the set, you must edit the alert set.
Note: It is strongly recommended that you test the alert message to confirm that the formatting and styling is correct. After adding it to an alert set used by an Alert Display content item, find a contact for whom the alert displays and view the alert to verify its appearance.
Understanding alert sets
To display the alert messages, you must group these tasks into sets.

The individual alerts are not added to content records, rather, an alert set is added to a content record, and then the content record displays all alerts belonging to that set.

Alert sets are groups of alert tasks that you want to display as a group to users. For example, you might want to create separate alert sets for staff alerts and member alerts.
The alert set determines the order that the alerts display on the web page, so you should confirm that your alert tasks are in the correct order within the set.
Note: You must configure an Alert Display content item to display the alert set. See Alert Display for more information.
Alert sets are cached in internet browsers for at least two minutes, depending on how long the browser takes to process the alert set. Specifically, for every second spent processing, the alert set is cached for two minutes. Users do not see any changes made to the alert set data until the cache duration expires and the page refreshes.
Creating an alert set
Do the following to create an alert set:
- Go to RiSE > Process automation.
- Click the Alert sets tab.
- Select Add alert set.
- Enter a Name for the new alert set.
- Enter a Description for the new alert set.
- (optional) To restrict the users who can view alerts for other contacts to authorized users only, enable Limit users who can view alerts for other contacts. Authorized users include staff users and Company Administrators for groups to which a contact belongs. Users can always view their own alerts.
- Save the alert set.
- Click Add new to add an alert task to the set:
- Select the Task you just created.
- Click Save.
- If needed, add other tasks to the set.
- Use the arrows to rearrange the tasks in the set. The alerts display to the user in the set order.
- Save the alert set.