Last updated on: June 08, 2026
When entering new gifts, pledges, or adjustments, staff can capture additional user-defined details directly from Enter gifts. This allows staff users to classify donations with more context that’s specific to organizational needs. By recording these details at the time of entry, staff can streamline reporting, improve tracking accuracy, and ensure that valuable donor and transaction information is never lost.
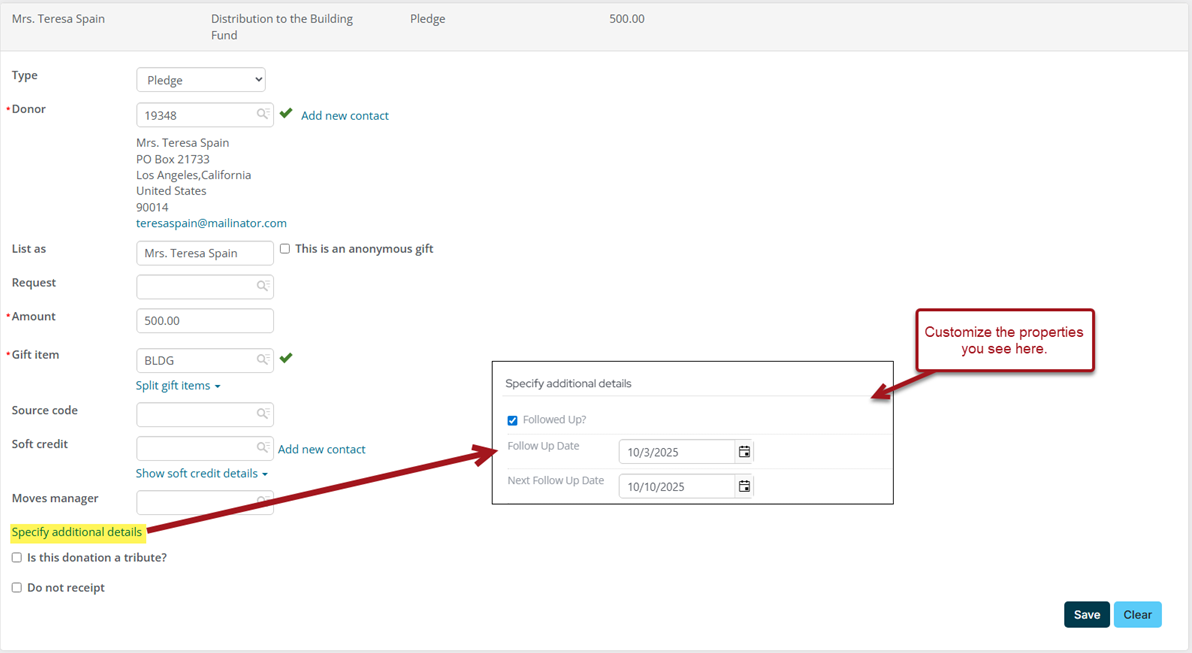
From the Enter gifts window, there is a Specify additional details link that allows staff users to enter the additional details. To surface this link, you must first create the Gift Entry Additional Details panel, then add the panel to the Gift information and Pledge information content records.
In This Article
- Creating the Gift Entry Additional Details panel
Updating the Gift information and Pledge information content records
Reviewing the additional details
Creating the Gift Entry Additional Details panel
Do the following to create the panel:
- Go to RiSE > Panel Designer > Panel definitions.
- Select Add panel definition.
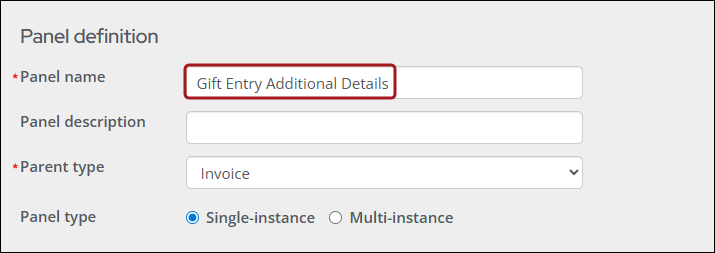
- Enter Gift Entry Additional Details as the Panel name and an optional Panel description.
- From the Parent type drop-down, select Invoice.
- Select Single-instance from the Panel type.
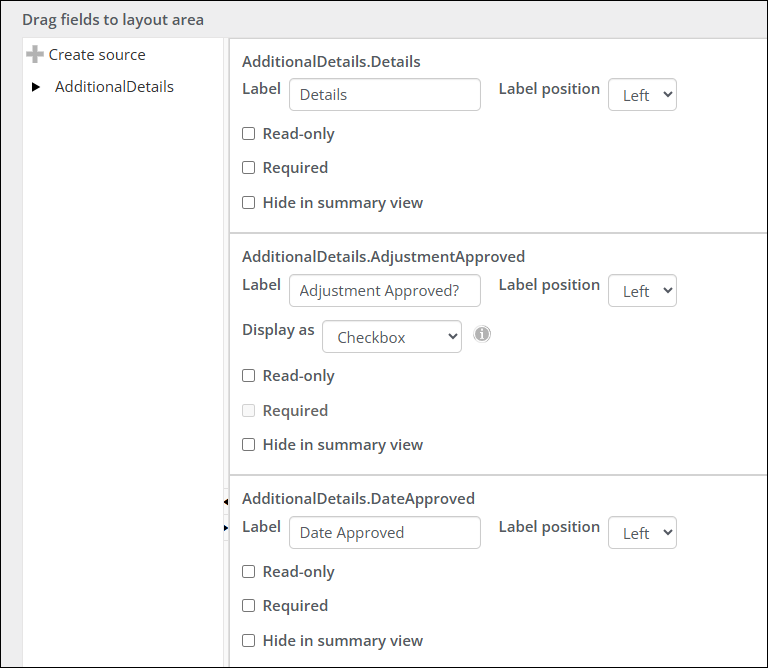
- Create panel sources as needed.
- Drag the sources to the layout area.
- Click Save & Exit.
- Add the new panel to the Gift information and Pledge information pages.
Updating the Gift information and Pledge information content records
The Gift Entry Additional Details panel must be added to the Gift information and Pledge information content records if you want to see the panel data from Fundraising > Find gifts > View details.
Do the following to update the content records:
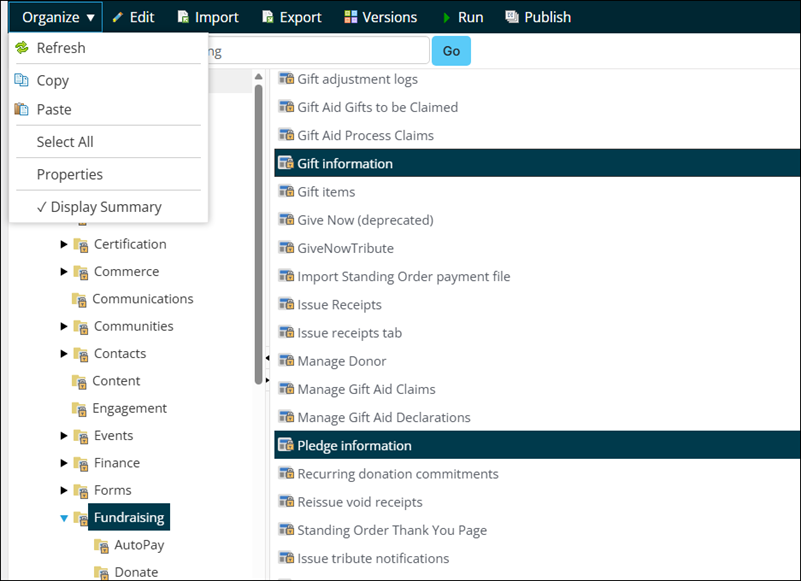
- Go to RiSE > Page Builder > Manage content.
- Navigate through the following folder path: @/iCore/Fundraising/
- Select Ctrl, then choose both the Gift information and Pledge information content records.
- Hover over Organize, then click Copy.
- Navigate to the desired non-system folder.
- Hover over Organize, then click Paste.
- Double-click the Gift information content record.
- Select Add content, then add the Panel Editor content item (Content folder) to the page:
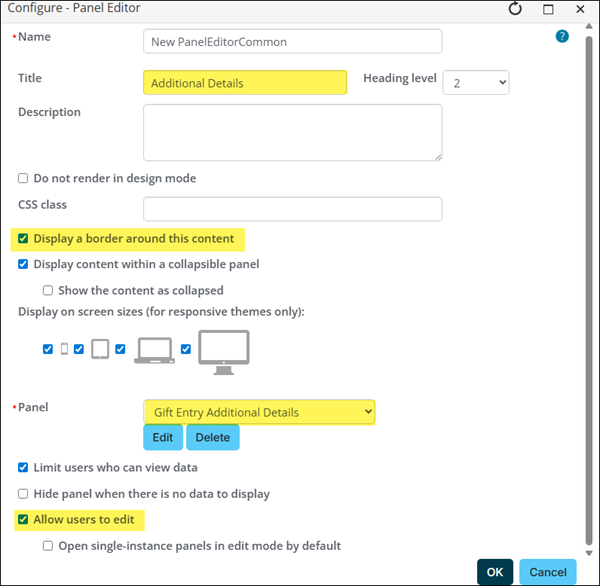
- From the Title field, enter Additional Details, or enter any title you prefer.
- Enable Display a border around this content.
- From the Panel drop-down, choose Gift Entry Additional Details.
- Enable Allow users to edit.
- Click OK.
- Click Save & Publish.
- Repeat steps 8 & 9 for the Pledge information content record.
- Go to RiSE > Site Builder > Manage shortcuts:
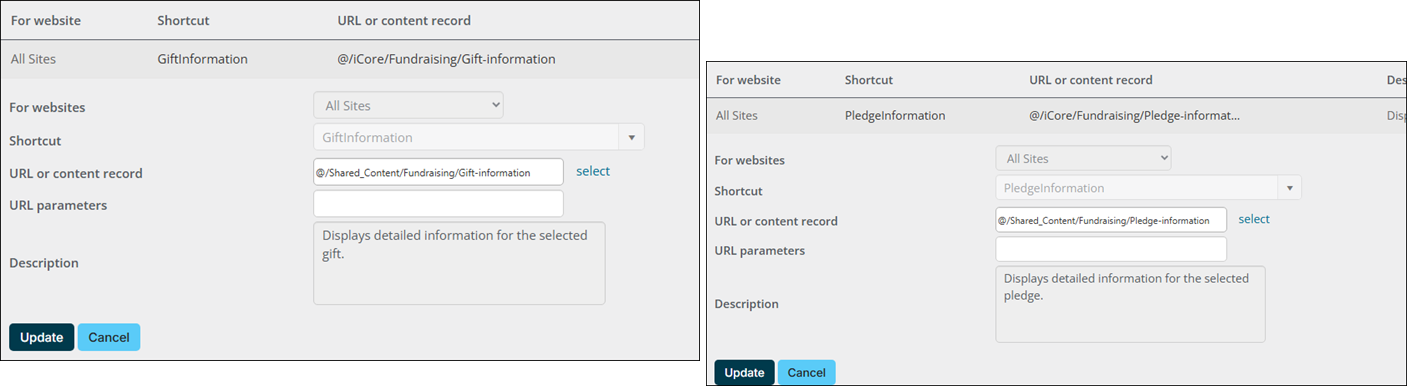
- Search for and update the GiftInformation shortcut to point to the copied content record.
- Search for and update the PledgeInformation shortcut to point to the copied content record.3
Reviewing the additional details
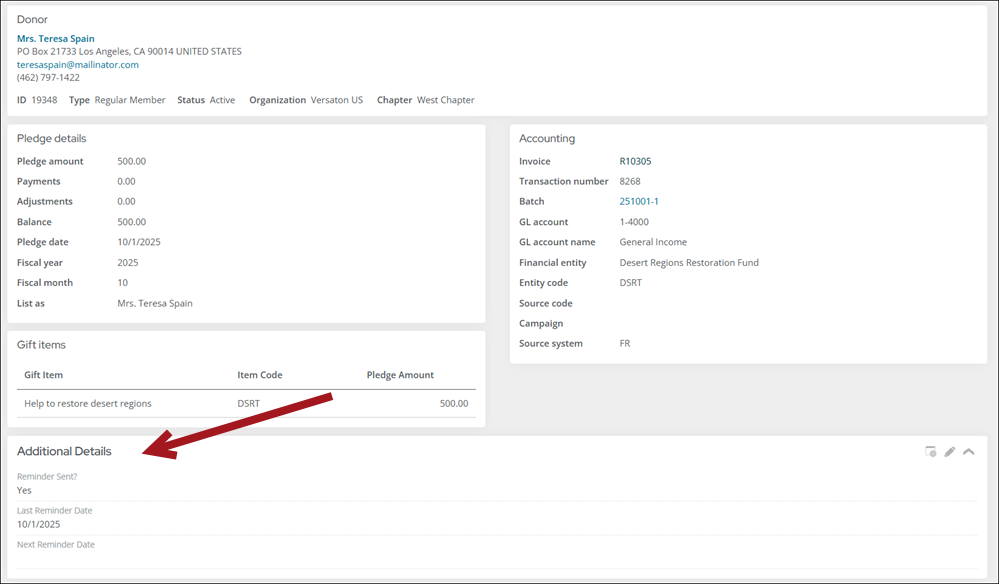
After the additional details are defined for a gift, pledge, or pledge adjustment, the details is visible from the Gift information and Pledge information pages.
To review the additional details, do the following:
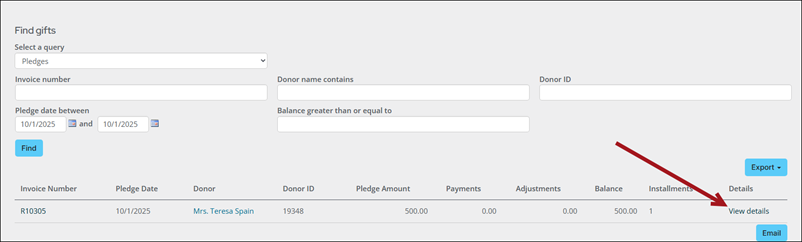
- Go to Fundraising > Find gifts.
- Search for the gift, pledge, or pledge adjustment.
- Select View details.
- Review the additional details from the panel.