Last updated on: May 07, 2026
The Address Fields element is directly linked to Address purpose addresses (Settings > Contacts > System options). Only the address purposes defined in the System options are available under the Address Fields form element.
Each address purpose contains a PreferredMail, PreferredBill, and PreferredShip property in the form elements. If you need to present these options in a form, they need to be deployed in pairs or trios to allow users to choose between them.
Example
The address purposes are Address, Street Address, and Home Address. Each address has its own option for Preferred Mailing, Preferred Billing, and Preferred Shipping.
A form must be created that contains the Address and Home Address purposes, along with the option to define the addresses as Preferred Mailing, Preferred Billing, or Preferred Shipping. The form will need six fields: three address purposes (mail, bill, ship), multiplied by the two address labels (Address, Home Address) to cover the possible combinations:
- Address.PreferredMail
- Address.PreferredBill
- Address.PreferredShip and
- Home Address.PreferredMail
- Home Address.PreferredBill
- Home Address.PreferredShip
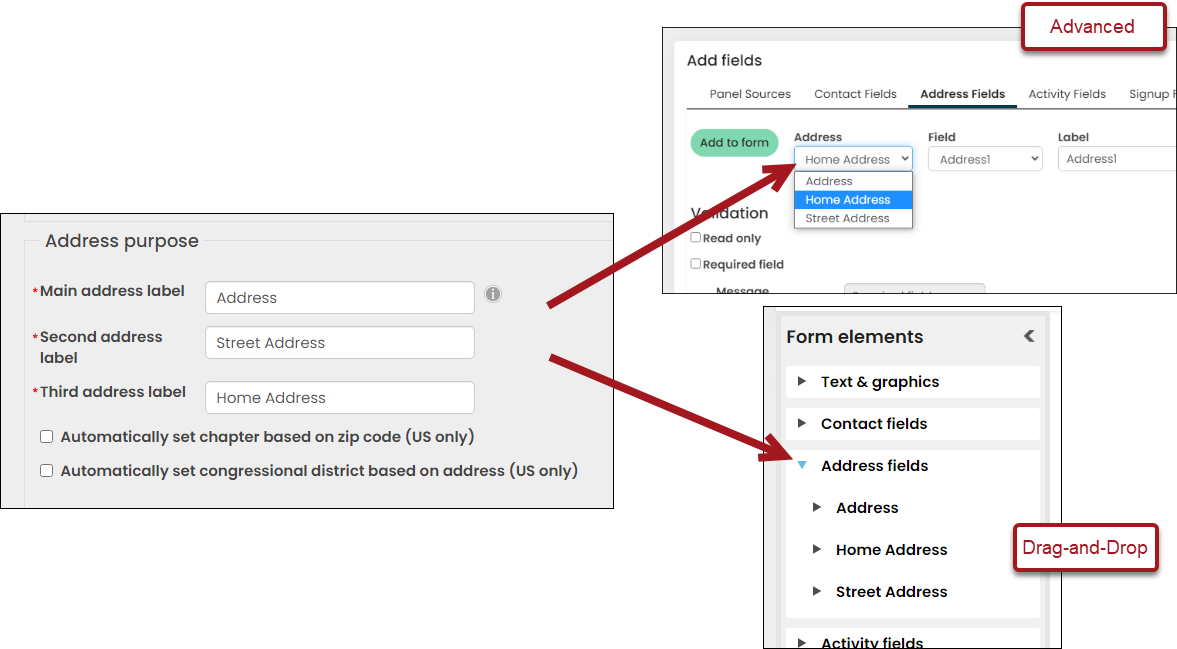
Updating a Drag-and-Drop form
To properly configure this form offering on a Drag-and-Drop form, do the following:
- Go to RiSE > Form Builder > Form library.
- Select the Form Name.
- From the Address fields drop-down, expand the Address or Home Address purpose. The one that is not selected will be added in step 10.
- Locate the PreferredBill property, then drag it to the form layout.
- Click the property to open the settings.
- Update the Label to Preferred Billing Address.
- From the Position drop-down, choose where the field Label will appear in relation to the text field.
- Click Save.
- Repeat steps 4-8 for PreferredMail and PreferredShip.
- Repeat steps 3-8 for the other address purpose.
Updating an Advanced Form
To properly configure this form offering on an Advanced, do the following:
- Go to RiSE > Form Builder > Form library.
- Select the Form Name.
- Click the Address Fields tab.
- From the Address drop-down, choose the Address or Home Address purpose. The one that is not selected will be added in step 9.
- From the Field drop-down, select PreferredBill.
- Update the Label to Preferred Billing Address.
- From the Position drop-down, choose where the field Label will appear in relation to the text field.
- Click Add to form.
- Repeat steps 4-7 for PreferredMail and PreferredShip.
- Repeat steps 3-8 for the other address purpose.