Last updated on: January 27, 2026
With single sign-on, a user logs in with a single username and password and can navigate through multiple applications without ever needing to log back in. To configure single sign-on with iMIS and your third-party applications, you will first need to set up your application in iMIS, then add the client application redirect (Single Sign-On content item) to a page.
Note: Single Sign-On does not support SAML, JWT, CAS, or any other tokens besides OAuth2.
In This Article
- Understanding Single Sign-On: FAQ
Setting up the application in iMIS
Adding the client-application redirect to a page
Testing the Single Sign-On connection
Understanding Single Sign-On: FAQ
Can users log into the third-party system first, or do they need to login to iMIS first? Because iMIS is the membership application, you must log into iMIS first. SSO will not work if you log in to the third-party application first. You can configure iMIS so that after a member is logged in, they are redirected to the page with the SSO content item and have the content item redirect the user to the non-iMIS site.
Is it possible for a user to log into a third-party application using the iMIS log-in page and then be redirected back to the third-party system once iMIS logs them in? Not at this time.
If a user is first signed into iMIS and then goes to a third-party website, how is iMIS going to verify their previous authentication? The authentication is done via an OAuth2 refresh_token that is specific to the user. The refresh token is used to gain bearer access tokens from the /token endpoint. They do not need the end user’s credentials for this as long as the refresh token is valid. When the refresh token expires, the end user will need to log back into iMIS and click on their redirect link into the client application.
How is Single Sign On implemented? Single Sign On works by sending a POST request to a registered URL. The POST will contain one value which is a refresh_token. Single Sign On uses OAuth2 authorization tokens. Once configured, iMIS will pass a refresh token to the client application. The refresh token granted to the client application will be used, along with the client application’s credentials, to grant access tokens on behalf of the user logged into iMIS. The client application will manage the local login but can store this token in a cookie, or in an authorization middleware of their choosing.
Does anything need to be completed on the third-party side? Yes. In addition to the iMIS setup, additional coding is required on the third-party side to create a local login (client ID and client secret) and a strategy to accommodate the refresh tokens to request access tokens. After the additional coding is completed, the non-iMIS site can then make API calls to obtain and display the iMIS information. The third-party client application must also support OAuth2.
What contact details are inherited from iMIS after the user clicks on the redirect link to the third-party application? The user is only authorized authenticated, and no contact details are inherited. If you would like additional contact details to be inherited, a custom bridge must be built.
Setting up the application in iMIS
Warning! Before configuring SSO, make sure to review the above FAQ. Do not use system records for SSO.
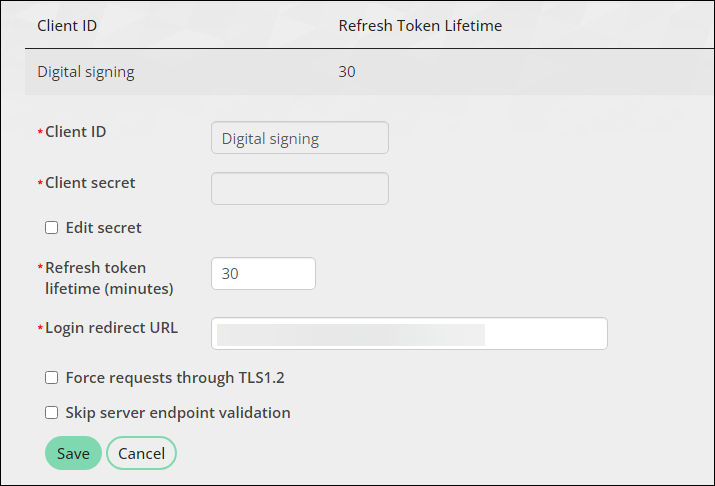
To add the third-party client application to iMIS, do the following: . Do not use system records for SSO.
- Go to Settings > Contacts > Client applications.
- Select Add client application.
- Enter the Client ID. This can be any name you choose. The name should reference the third-party application to which you are creating a link. This name cannot be edited after the client application is saved.
- Enter the Client secret. The Client secret is used to authenticate the application's identity to iMIS upon an access token request and should not be publicly shared.
- In the Refresh token lifetime (minutes) field, enter the expiration value of newly generated refresh tokens. The maximum allowed value is 60 and can be invalidated earlier when the cache is cleared. This value determines the length of time for which a token is valid when making authorization requests against iMIS between initial granting and expiration. The maximum allowed value is 60 and can be invalidated earlier when the cache is cleared. When the refresh token expires, the user must return to iMIS and go back through the login flow.
- Enter the Login redirect URL. This is the link to the third-party application, where the user will be redirected.
- Force requests through TLS1.2 - Enable to add the TLS 1.2 protocol to the application’s security protocols (alongside the existing server protocols). Enabling will help troubleshoot the server and client that are trying to establish a handshake.
- Skip server endpoint validation - Enable to bypass the sending of head requests to the base or main URL. When enabled, post requests are directly sent with the refresh token.
- Click Save.
To edit an application, select the edit icon and update the necessary fields. To edit the Client secret, enable Edit secret, then enter a new secret. The Client ID cannot be edited after it is saved.
Adding the client-application redirect to a page
The Single Sign-On content record serves as the redirect to the third-party application. To add the Single Sign-On content item to a page, do the following:
- Go to RiSE > Page Builder > Manage content.
- Create a new content record (New > Website Content).
- Give the content record a Title.
- From a content record, select Add content.
- Open the Contact folder, then select the Single Sign-On content item.
- Select the desired Client application.
- Click OK, then click Save & Publish.
- Continue the process for each necessary client application.
- Add the redirect link to any location in your iMIS website. When the link is clicked, the contact will remain logged in with their same iMIS credentials.
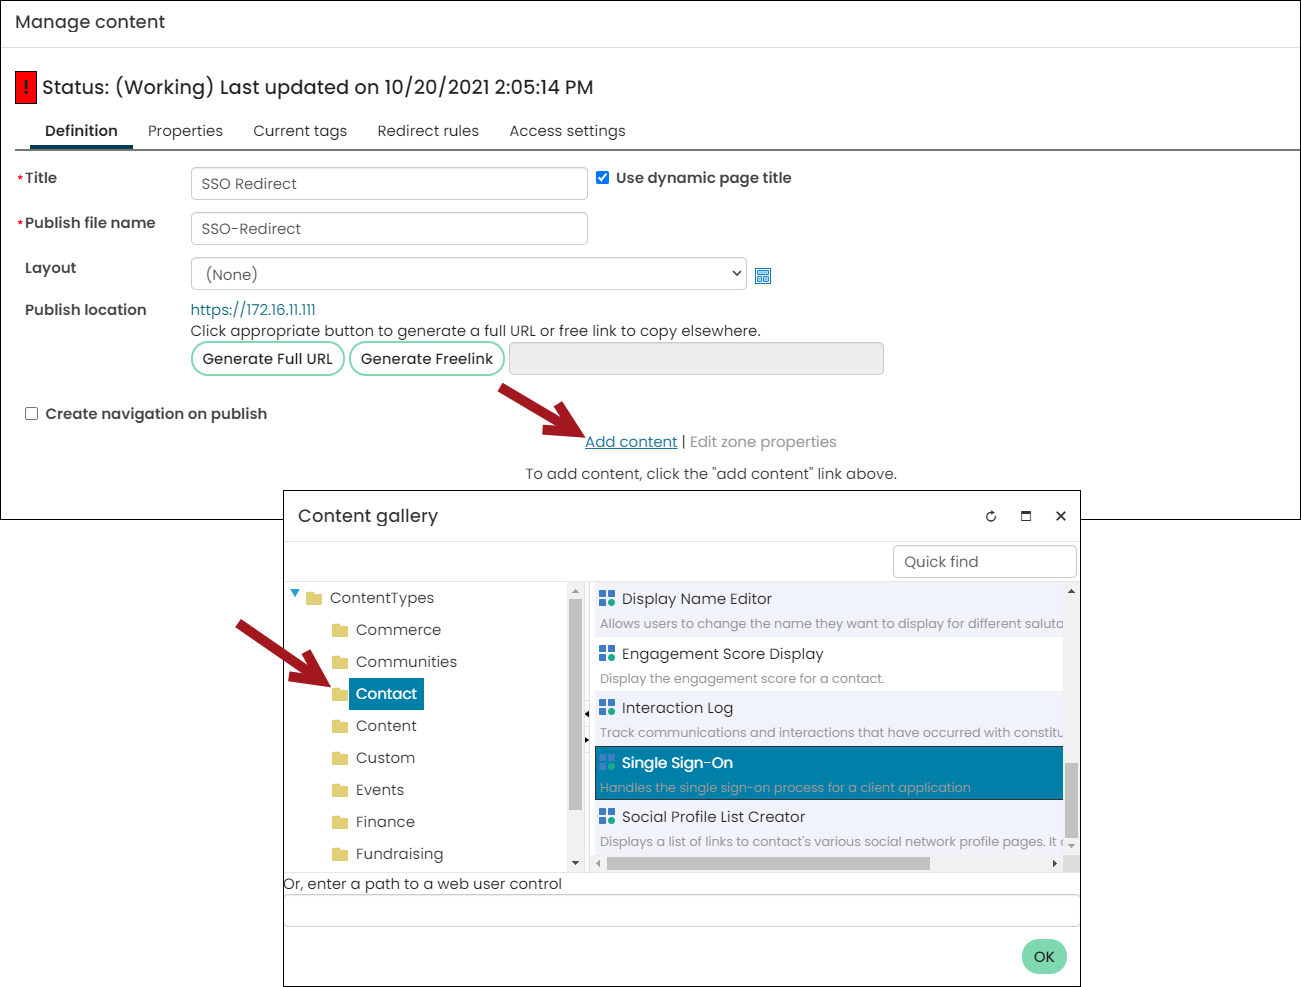
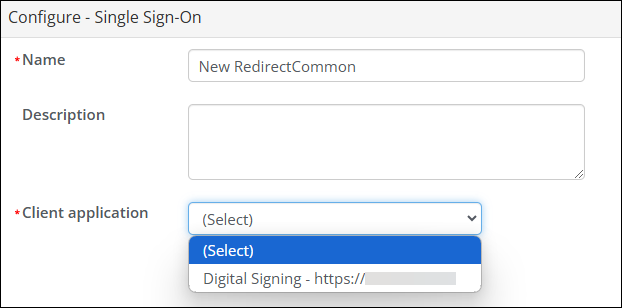
The content record to which the Single Sign-On content item is added does not need to be a publicly accessible content record, but it cannot be deleted. It is recommended to keep the content record in a secure folder.
Testing the Single Sign-On connection
To test the SSO connection, you need an application or a working URL to collect requests. For this test, use RequestBin.
Obtaining a test URL
- Go to RequestBin.
- Under the Create Request Bin button, disable the Private (requires log in) checkbox.
- Click Create Request Bin.
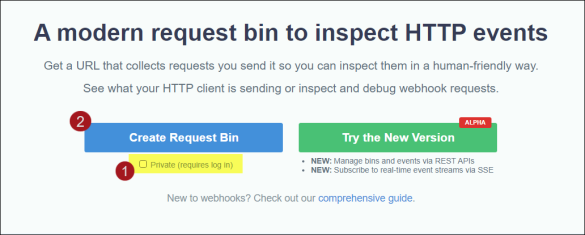
You are provided an endpoint, and it will look similar to https://enbyh96eeud6j.x.pipedream.net. Notice that the window has a section for incoming requests and details for each request. The window will be empty at this point.
Important! Make sure to keep this page open for testing.
Configuring the client application in iMIS
Do the following to test the connection:
- Go to Settings > Contacts > Client applications.
- Select Add client application:
- Client ID - SSOTest
- Client secret - SSOsecret1
- Refresh token - 30
- Login Redirect URL - Enter the URL you created in the section above (https://enbyh96eeud6j.x.pipedream.net).
- Click Save.

Add the Single Sign-On content item to a page
Follow the steps outlined in the Add the client-application redirect to a page section. Be sure to select the URL you created above.
After you have created your new page, copy the page's URL.
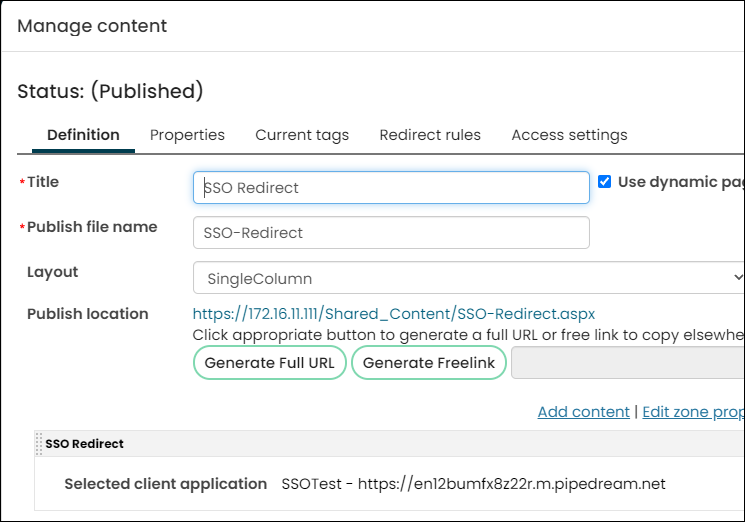
Testing the connection
There are three parts to testing the SSO connection:
- Obtaining a refresh token
- Obtaining an access token
- Using the access token
Obtaining a refresh token
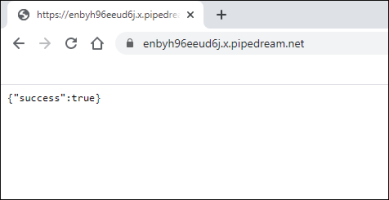
As a logged-in user, use your browser to navigate to the page's URL that you created in the Add the Single-Single On content item to a page section. All you will see is a page redirect that says, "true."
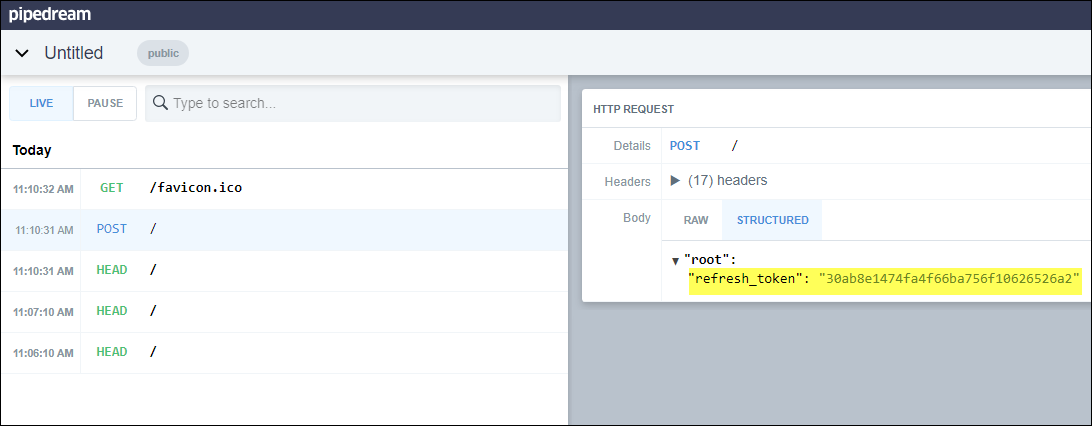
Navigate to the RequestBin page. You will see the POST request come in, along with other requests. Select the POST request and observe the variable in the details for refresh token. Keep note of this refresh_token.
Obtaining an access token
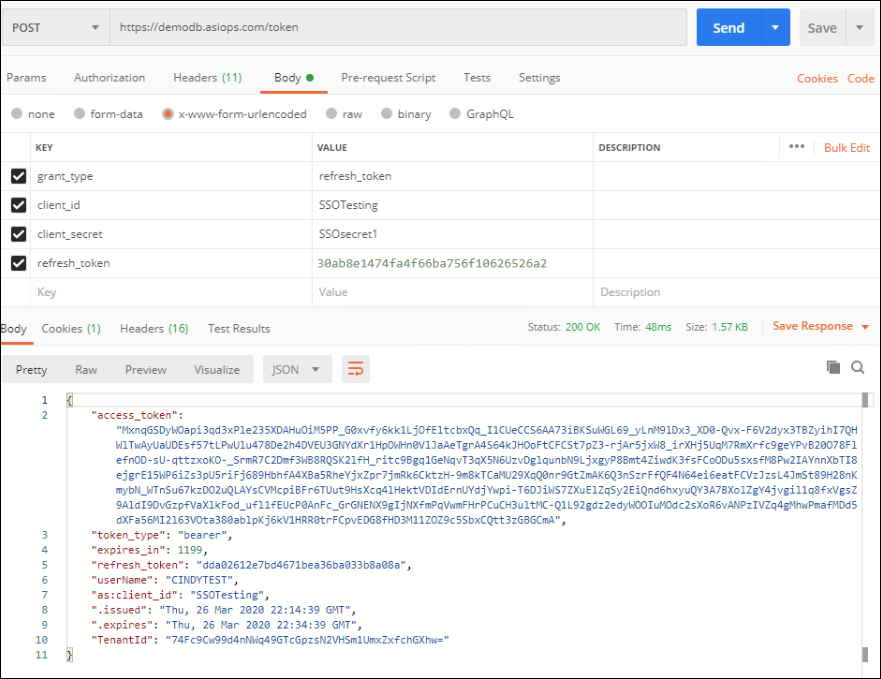
In this part of the test, we will use Postman as our REST client, but you should already have an application created for this step that will automate the process. In your REST client, initiate a new request with the URL pointing to your iMIS application and the /token endpoint, for example, https://websiteurl.com/token.
The parameters will be set in the body portion as follows:
- grant_type: refresh_token
- client_id: SSOTesting
- client_secret: SSOsecret1
- refresh_token: Enter your refresh_token from the previous step
Ensure the content type is set to application/x-www-form-urlencoded or the radio button x-www-form-urlencoded is selected.

Send the request and review the access_token.
Using the access token
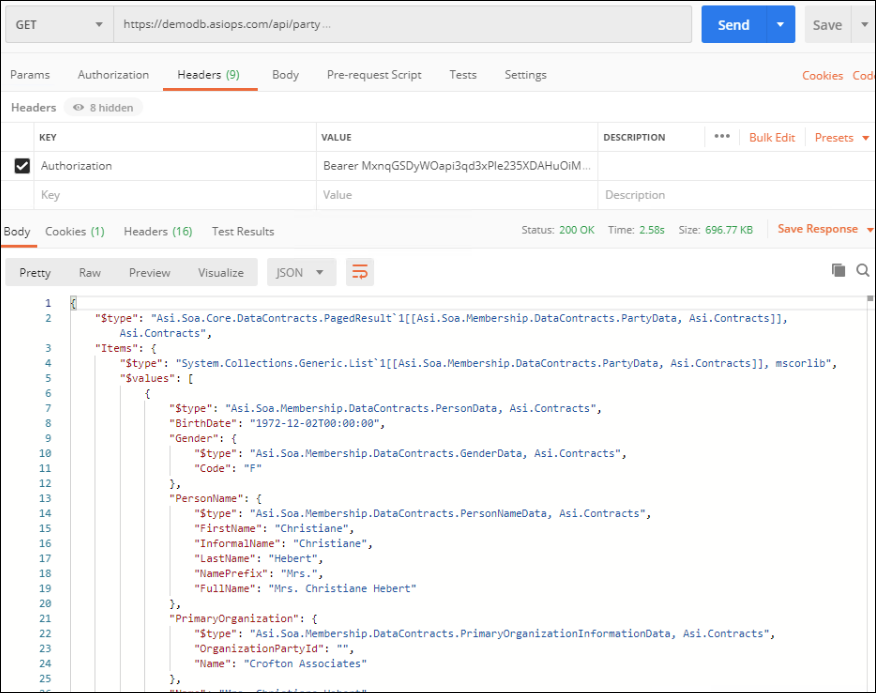
The access token is what you will use to make other requests to the API. For example, make a request to the endpoint https://demodb.asiops.com/api/party. In the headers, add one for Authorization with the value Bearer {{access_token}}, where the {{access_token}} is the value obtained above (remove the curly brackets).
Do the following to use the access token:
- Sign in to staff site as a system administrator.
- Load the link to the SSO Redirect content to get the refresh token.
- Generate the access_token (same steps as above).
- Use the access_token for the GET request to party endpoint.
