Last updated on: January 27, 2026
Generate renewals manually or set them to generate automatically on a user-defined schedule. With an AutoPay license, you can further streamline the membership renewal process by automating payments and confirmation emails.
In This Article
- Automation steps based on AutoPay licensing
AutoPay prerequisites
Confirm the billing cycles are properly configured to ensure a correct effective date
Enable the Generate membership renewals task
Add triggers to the Pay Central processing tasks (AutoPay only)
Configure automatic confirmation emails (AutoPay only)
Automation steps based on AutoPay licensing
The extent to which the membership renewal process can be automated depends on your organization's AutoPay license. Below are the available steps based on your licensing:
| License | What can be automated? | How can I begin? |
|---|---|---|
| Without AutoPay | Generating renewals and posting the batch (either accrual or persisted cash-based memberships) | |
| With AutoPay | Generating renewals, posting the batch (either accrual or persisted cash-based memberships), processing payments, and sending confirmation emails |
AutoPay prerequisites
If your organization is licensed with AutoPay, complete the following steps before fully automating renewals:
- Enable Allow users to create auto-renewing memberships and subscriptions under Settings > Finance > Pay Central > Automatic payments. For more information, see Configuring the AutoPay settings.
- Set up AutoPay for membership renewals.
- Manually generate invoices for several renewal cycles before automatically generating renewals to verify the accuracy of the invoices generated. For more information, see Billing for membership fees.
Confirm the billing cycles are properly configured to ensure a correct effective date
It is important to confirm the billing cycles are properly configured, so that the correct Effective date is determined when the task is run.
Do the following to check the billing cycles:
- Go to Membership > Billing cycles.
- Open the billing cycle.
- Review the Default number of months prior to expiration that members are billed for renewal setting, which is used to determine the Effective date. When set to 0, the Advance start month as of setting (Settings > Membership) is used to determine whether to advance the Effective date to the following month. If the task run date is before the Advance start month as of setting, then the Effective date is the first of the current month.
- Save the changes.
- Continue reviewing the Default number of months prior to expiration that members are billed for renewal setting for other billing cycles.
Note: The Effective date determines who is billed, not the Default number of months prior to expiration that members are billed for renewal setting. The task will bill those whose membership expires before the Effective date.
| EXAMPLES | ||||
|---|---|---|---|---|
| Default number of months prior to expiration that members are billed for renewal | Task run date | Bill date | Advance start month as of | Effective date |
| 3 | December 1, 2024 | Equal to Task run date. | Not used | March 1, 2025 |
| 1 | January 1, 2025 | Not used | February 1, 2025 | |
| 0 | January 1-14, 2025 | 15 | January 1, 2025 | |
| 0 | January 15-30, 2025 | 15 | February 1, 2025 | |
Enable the Generate membership renewals task
Automate the generation of renewal invoices by enabling the Generate membership renewals scheduled task:
- Go to RiSE > Process automation.
- Open the Generate membership renewals task.
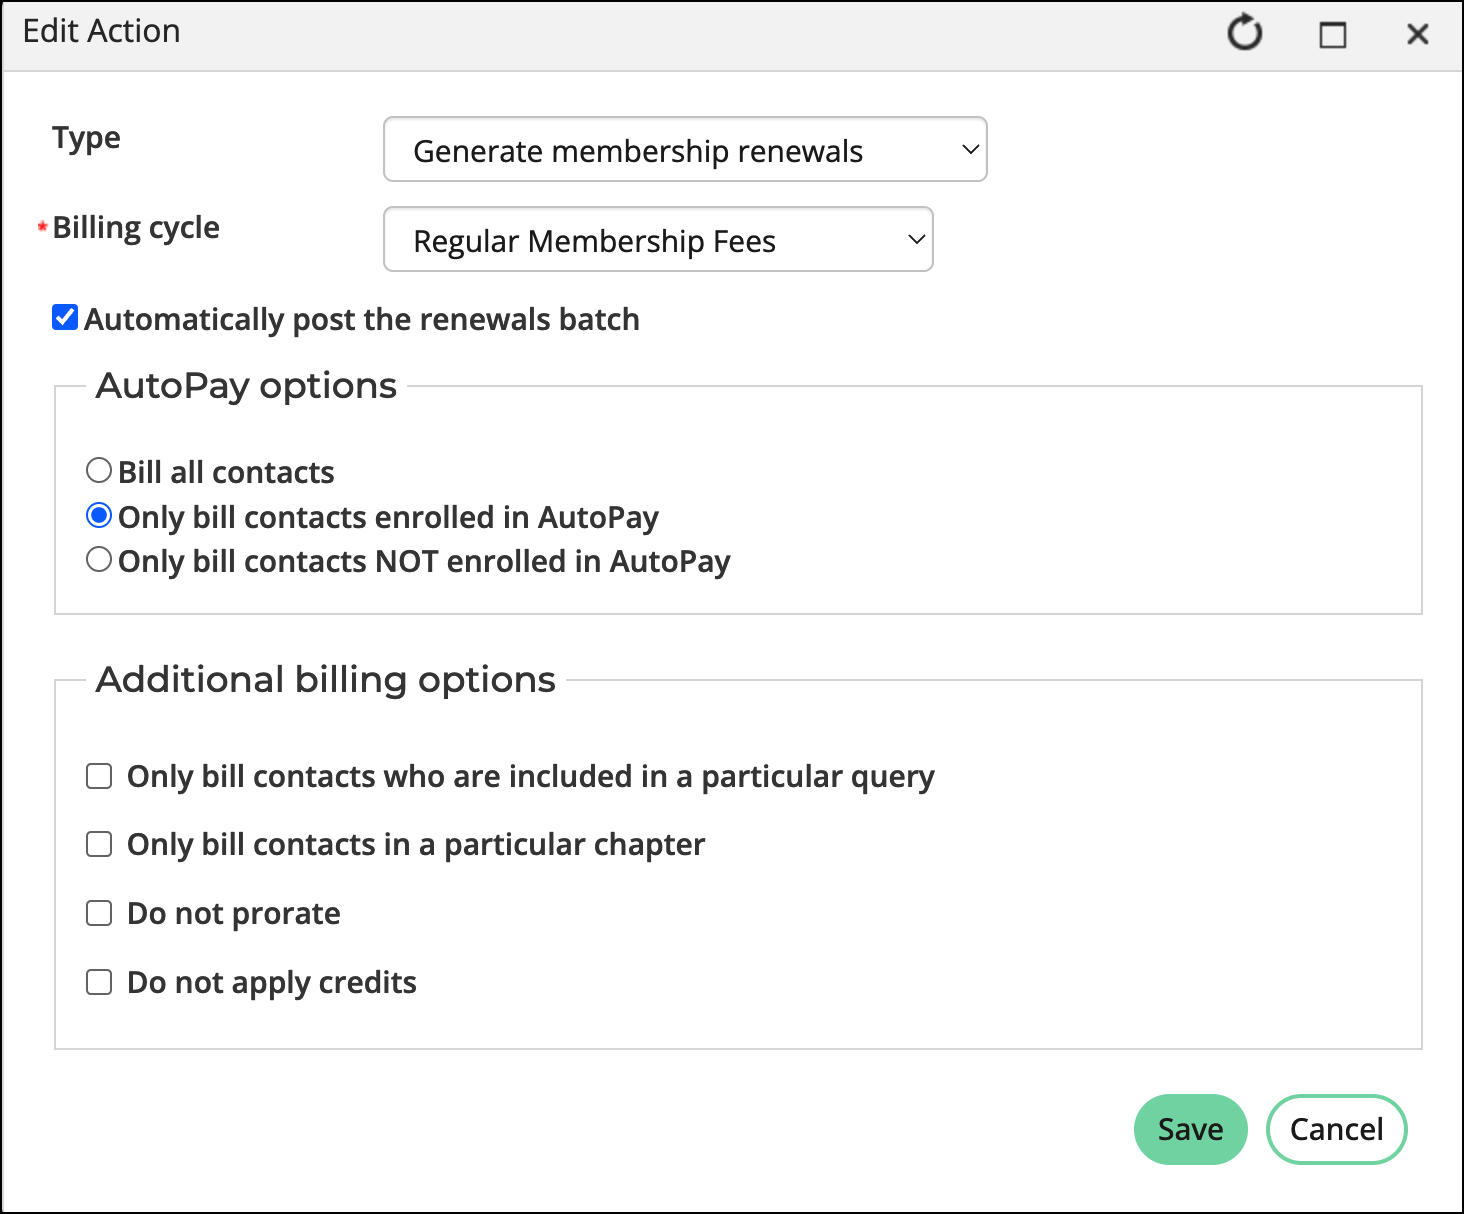
- (Actions tab) Edit the Generate membership renewals action and adjust the following as needed:
- Type – Leave Generate membership renewals selected.
- Billing cycle – Select the cycle to automate.
- Automatically post the renewals batch – Enable to ensure the related batch is automatically posted.
- (AutoPay only) AutoPay options – Select one of the following:
- Select Only bill contacts enrolled in AutoPay for full automation.
- Choose Bill all contacts or Only bill contacts NOT enrolled in AutoPay to include members who pay manually.
See Creating a billing cycle for AutoPay renewals for more information on these options.
- Configure the Additional billing options:
- Only bill contacts who are included in this data source – Enable to restrict billing to contacts included in a specified query. A code_BillingID column or column with an alias of code_BillingID is required.
- Only bill contacts with this primary chapter – Enable to restrict billing to members of a designated primary chapter.
- Do not prorate – Enable to prevent the proration of dues.
- Do not apply credits – Enable to prevent the application of open credits to the billing.
Tip: The sample query at $/Common/Queries/Billing/BillingAllActiveContactsQuery works with this action and can be copied and customized to add filters.
- Click Save.
- (optional) Continue adding actions for each additional billing cycle, making sure to use the Generate membership renewals action.
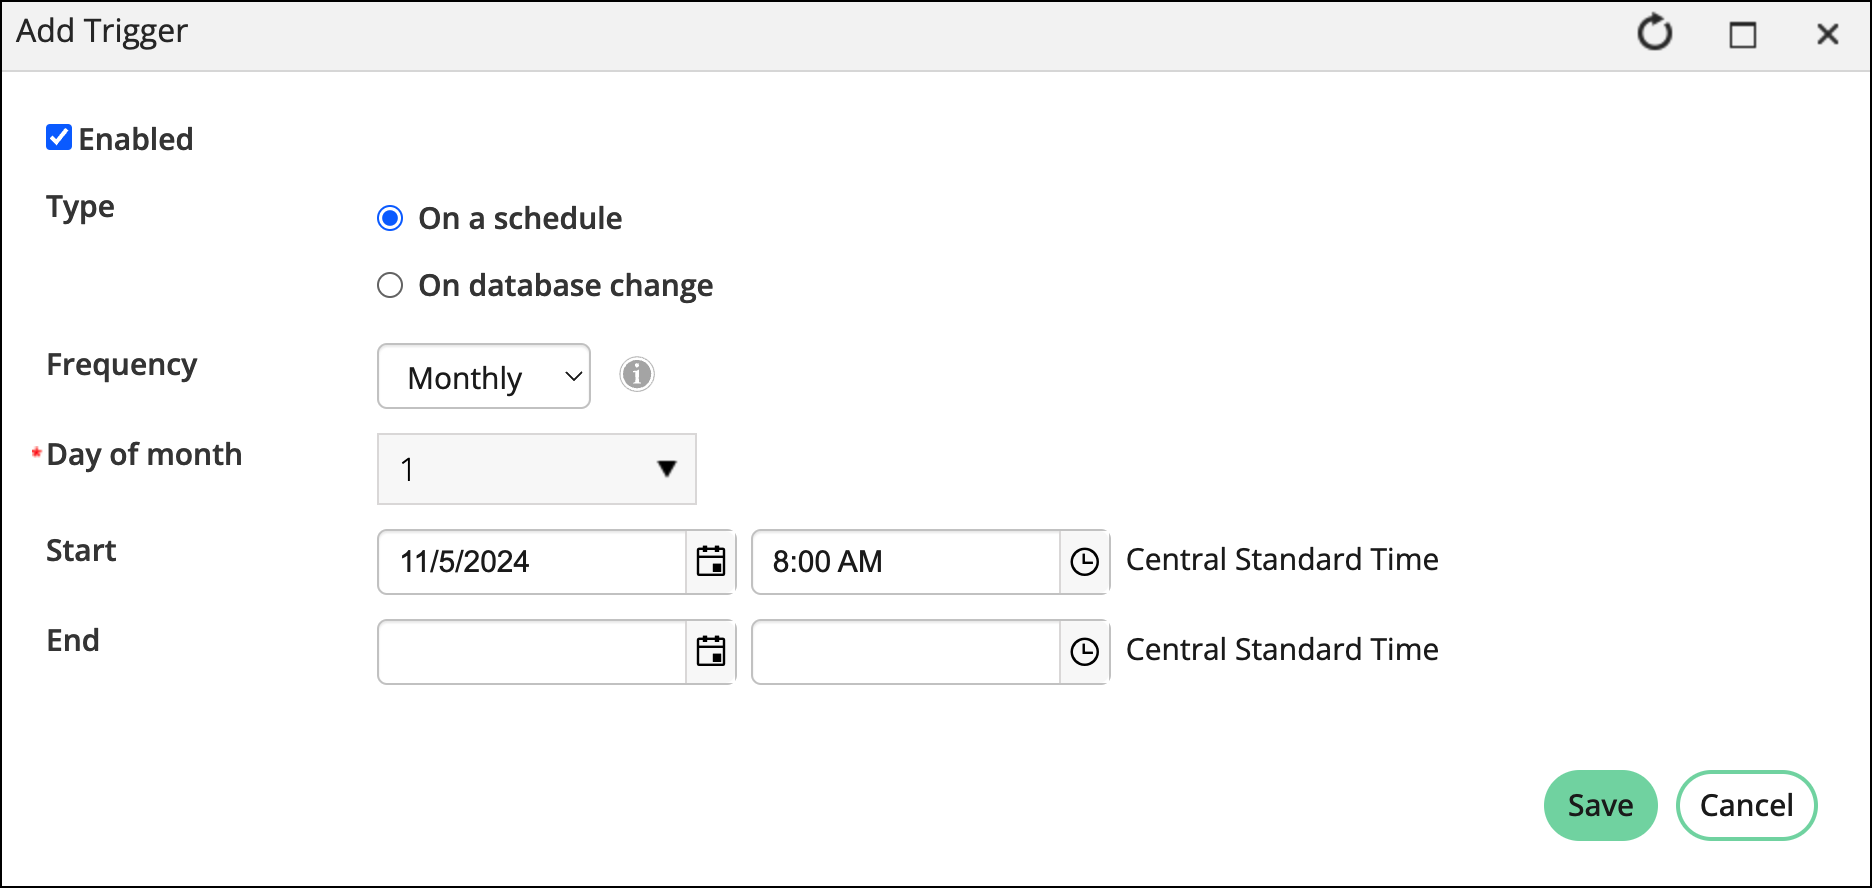
- (Triggers tab) Select Add trigger, and define the following:
- Type – Select On a schedule.
- Frequency – Choose between daily, weekly, or monthly.
- Day of month – Choose the day to generate renewals (e.g., 1st of the month).
- Start – Leave today's date selected and choose the time to run the task.
- Enable the trigger, then click Save.
- Enable the task, then click Save & Exit.
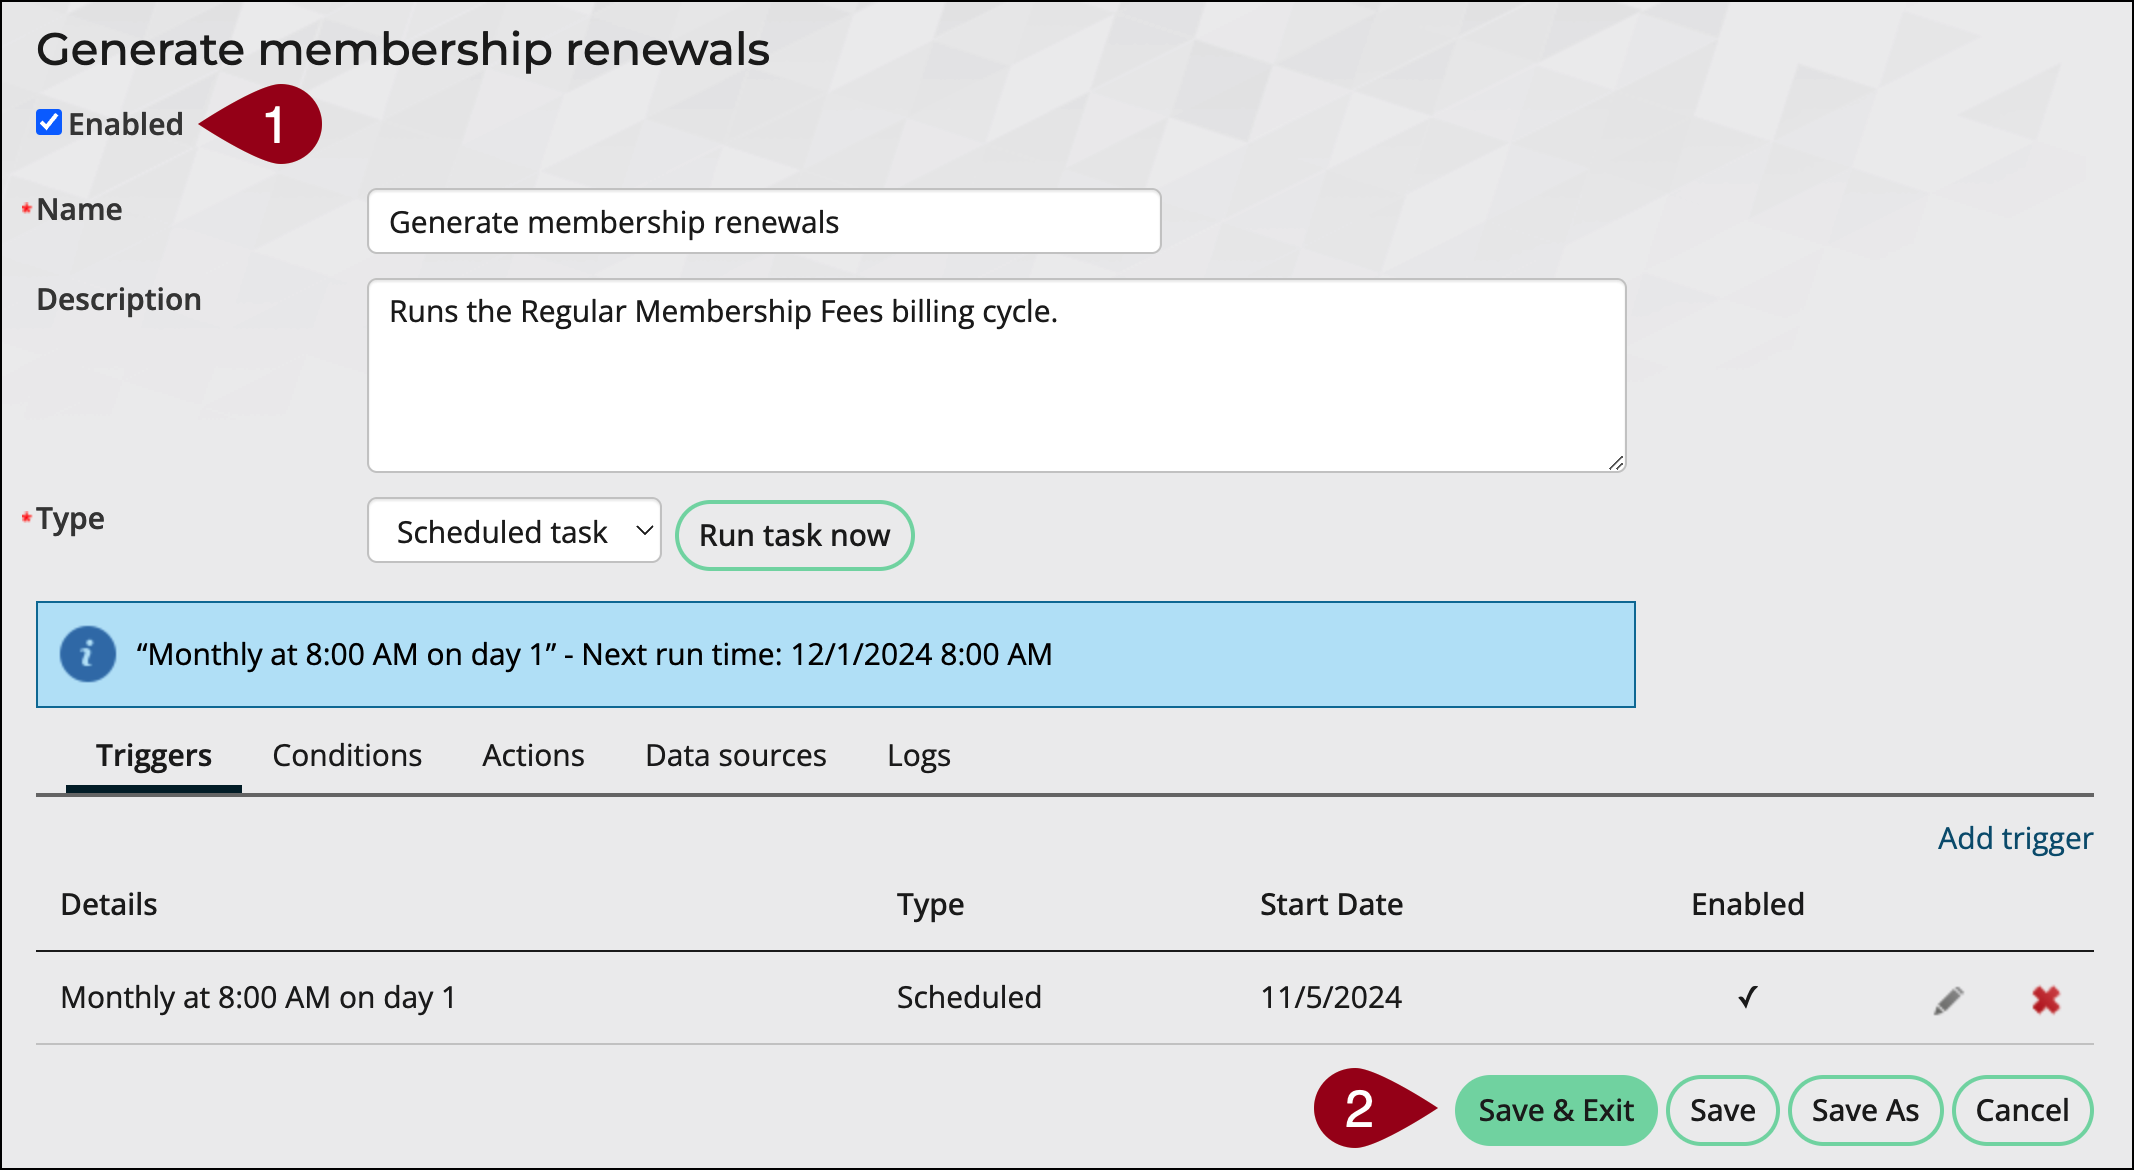
When run, the Generate membership renewals task creates renewal invoices for all AutoPay members whose Paid through and Renewed through dates fall before the scheduled date and posts the related batch. The renewals generated by this task can be reviewed from the billing logs (Membership > Renewals > Generate renewals > Logs tab).

Add triggers to the Pay Central processing tasks (AutoPay only)
For organizations with an AutoPay license, configure the Send membership renewal invoices to Pay Central and Retrieve processed payments from Pay Central tasks to run after the Generate membership renewals task is completed:
- From RiSE > Process automation, open the Send membership renewal invoices to Pay Central task.
- (Triggers tab) Select Add trigger and define the following:
- Type – Select On a schedule.
- Frequency – Choose between daily, weekly, or monthly.
- Day of month – Select the same days selected in the scheduled task created for membership renewals.
- Start – Leave today's date selected and choose the time to run the task. This task must be run after the Generate membership renewals task.
Enable the trigger, then click Save.
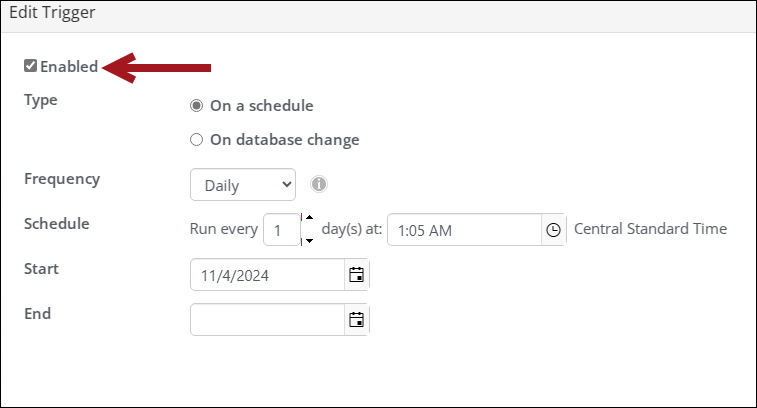
- Enable the task, then click Save & Exit.
- Open the Retrieve processed payments from Pay Central scheduled task.
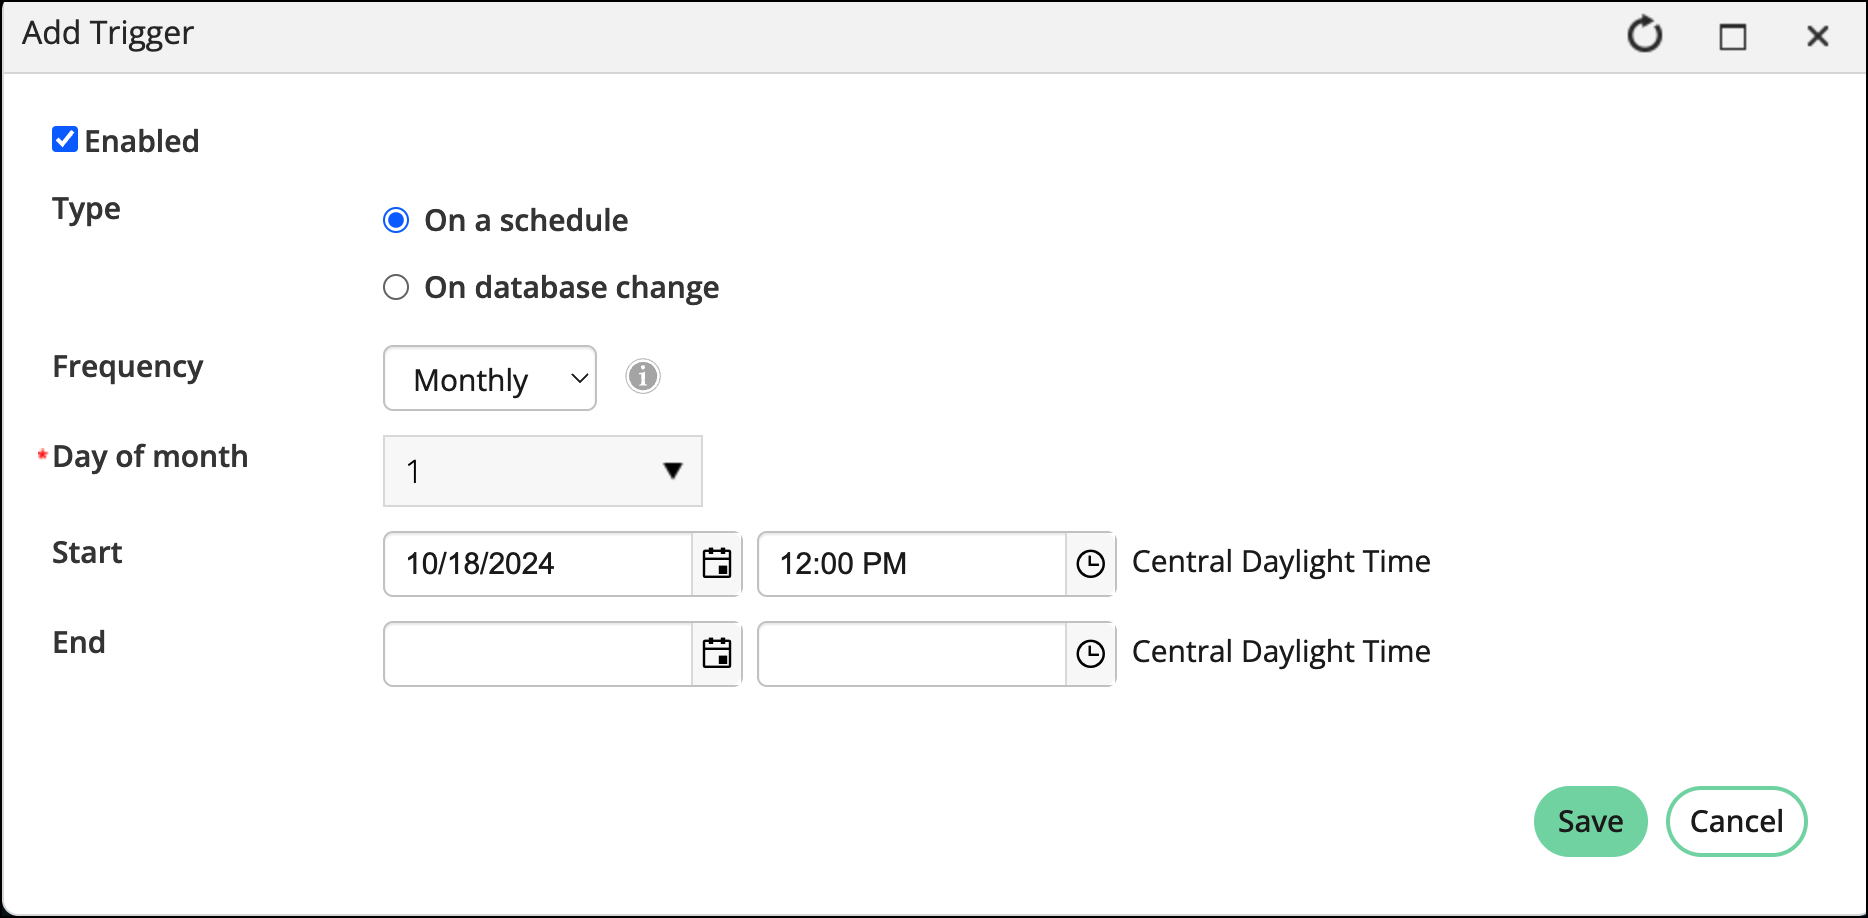
- (Triggers tab) Select Add trigger and define the following:
- Type – Select On a schedule.
- Frequency – Choose between daily, weekly, or monthly.
- Day of month– Select the same days selected in the Generate membership renewals task.
- Start– Leave today's date selected and choose the time to run the task. This task must be run several hours after the
- Send membership renewal invoices to Pay Central task to ensure all payments have completed processing.
- Enable the trigger, then click Save.
- Enable the task, then click Save & Exit.
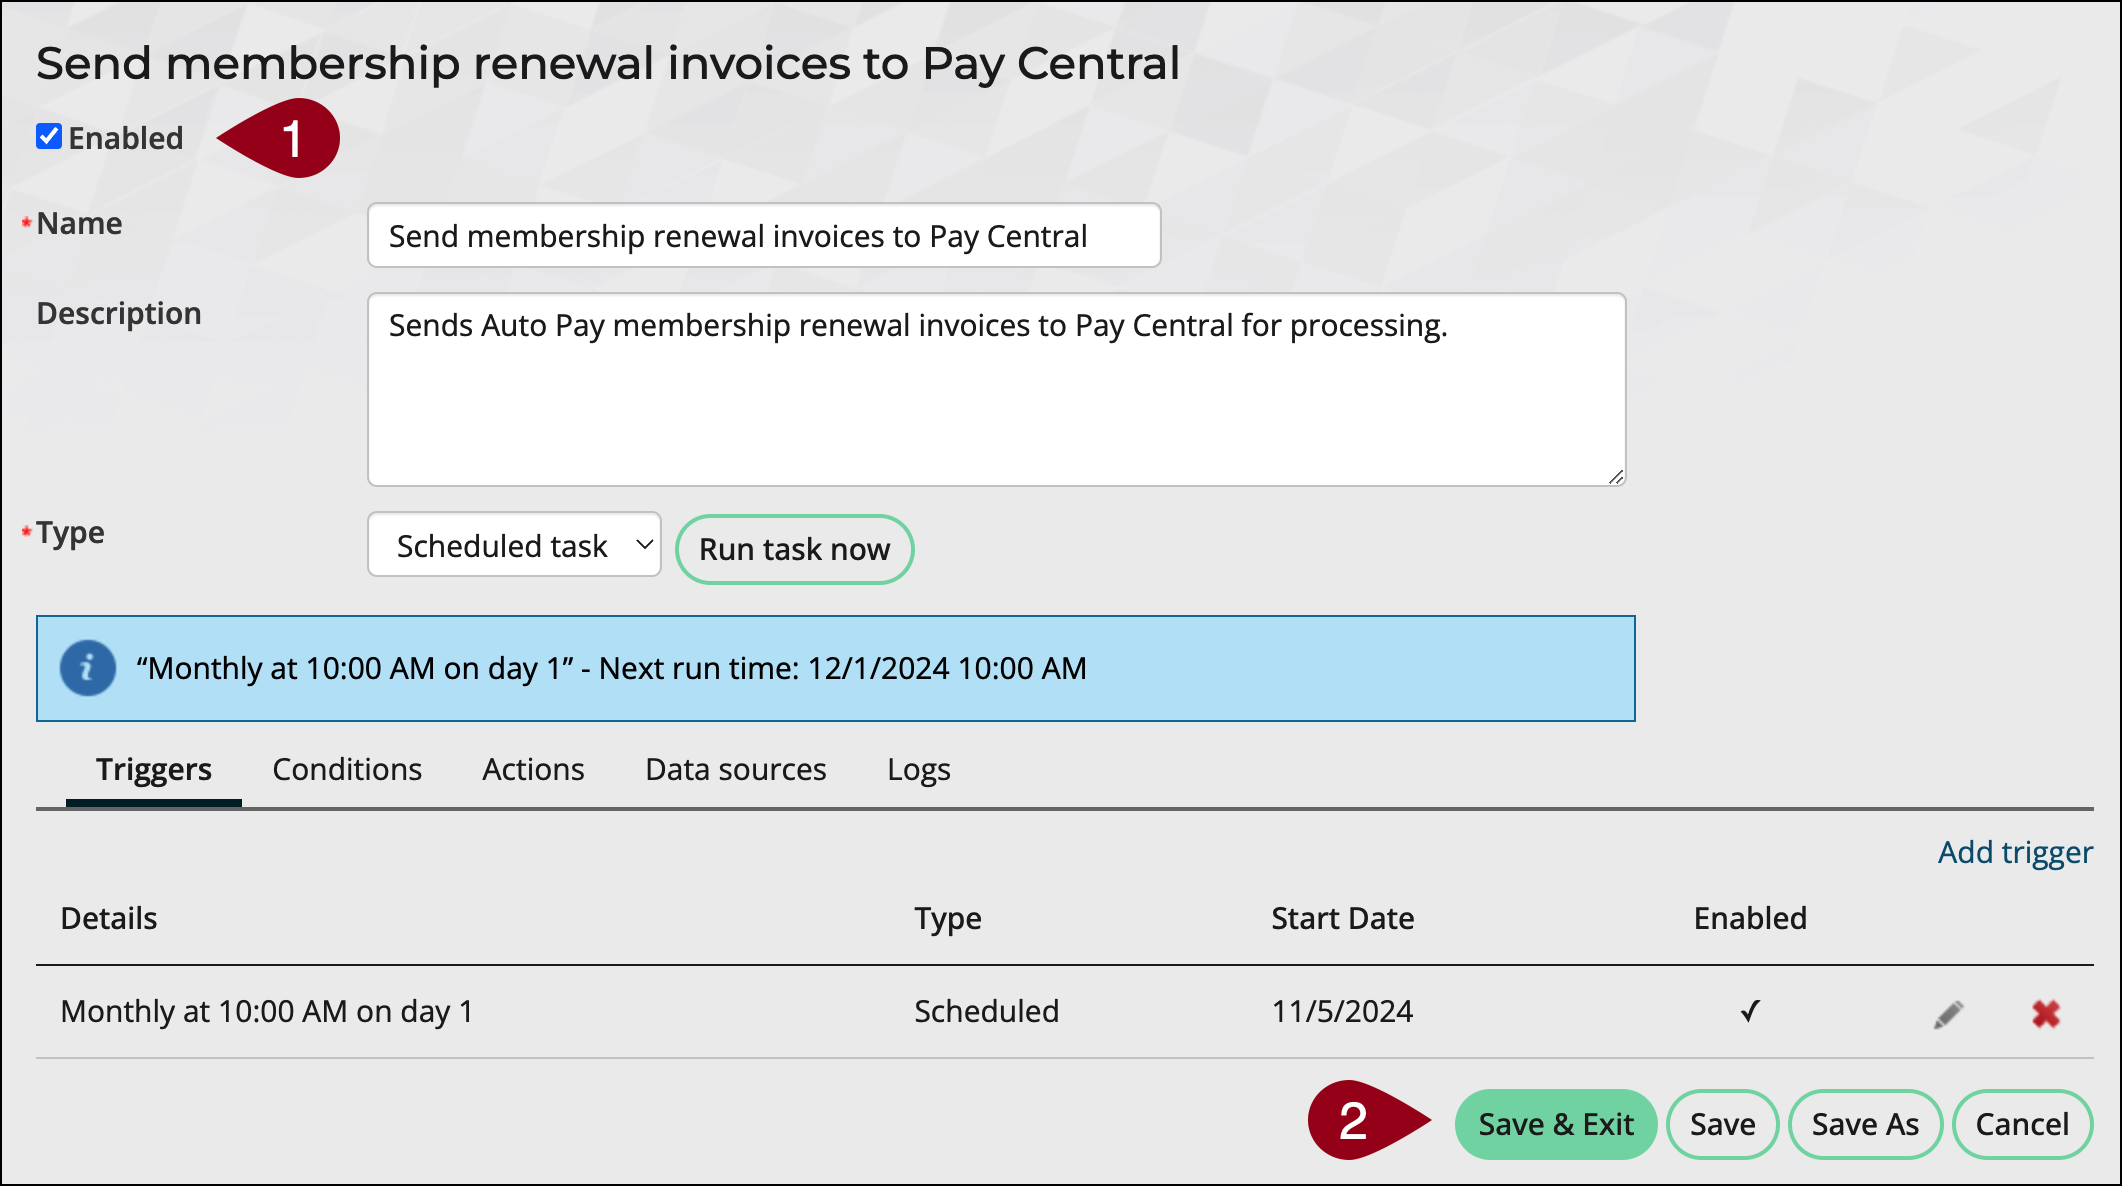
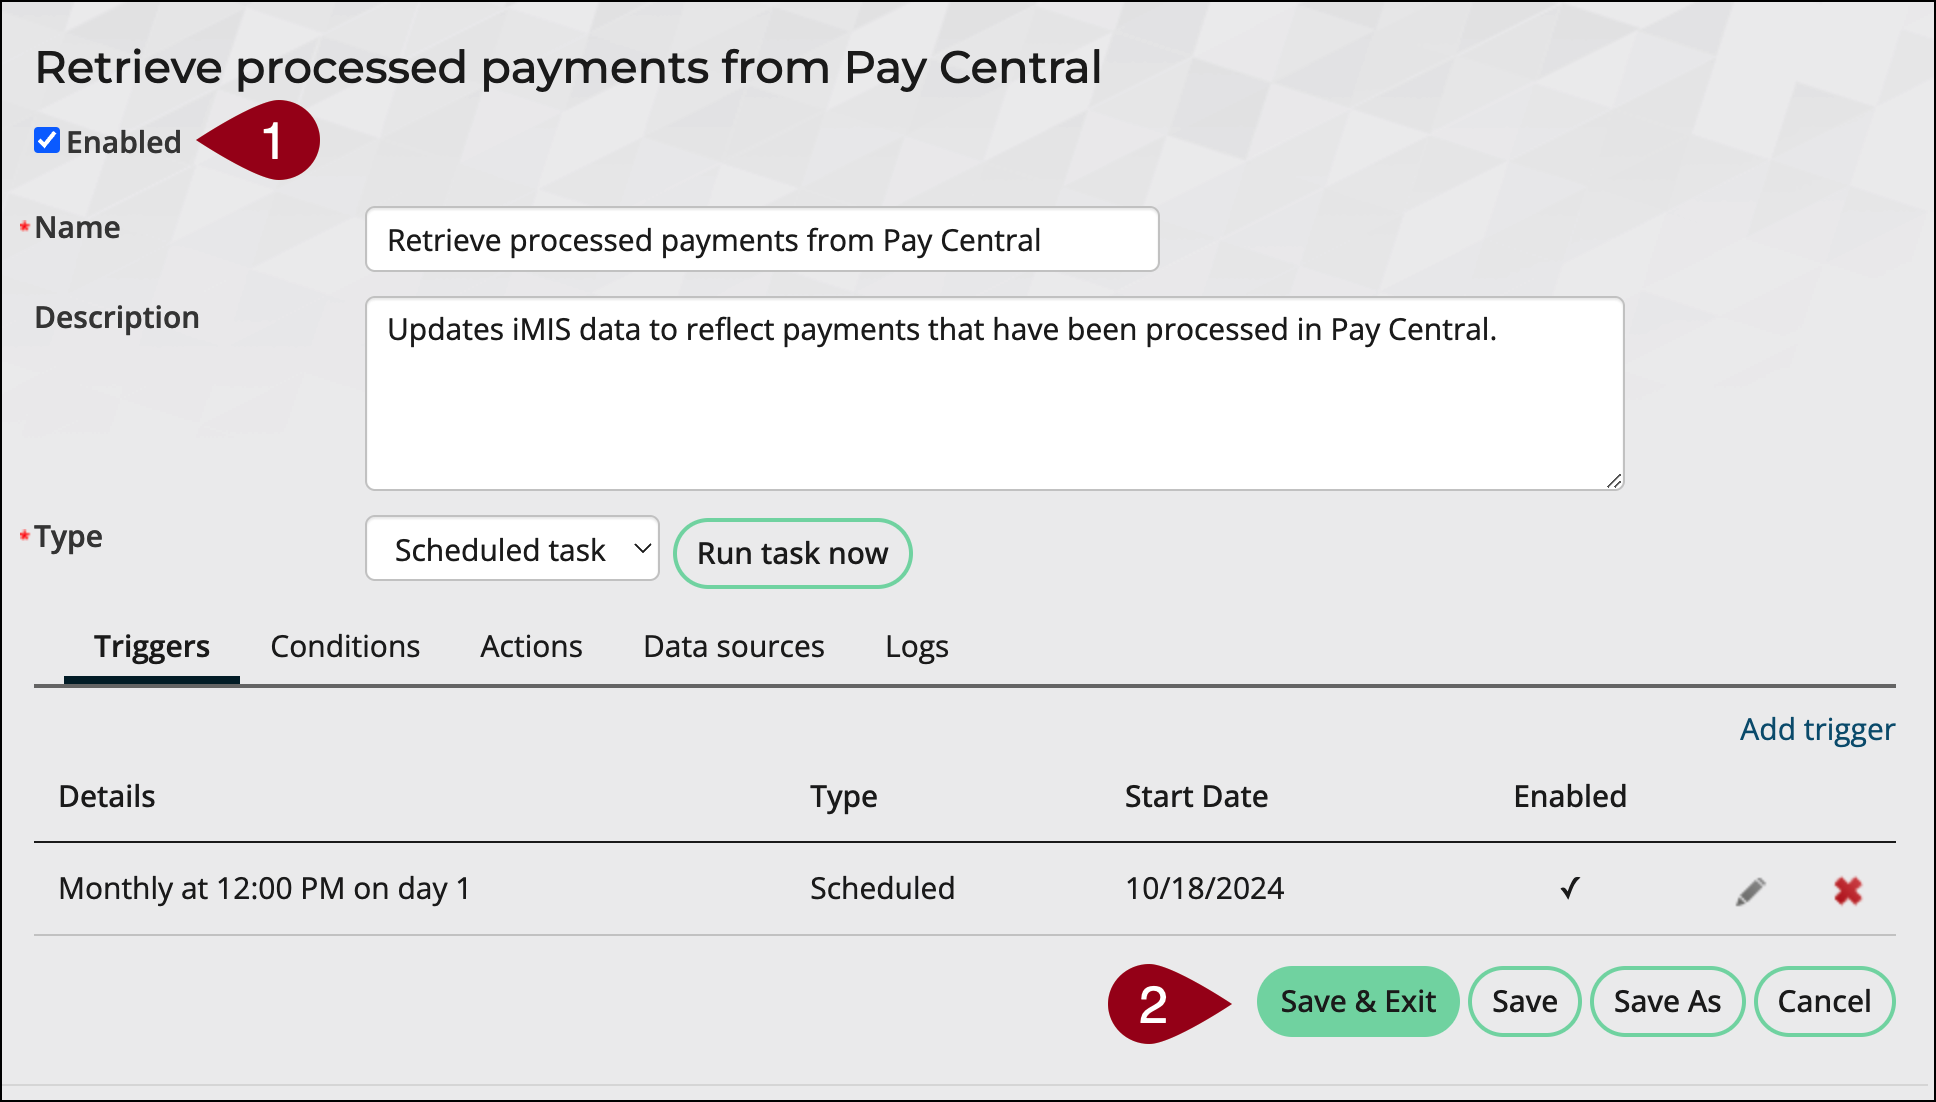
When run after the Generate membership renewals task, these tasks send the renewal invoices to Pay Central for payment processing and update renewal transactions based on processed payments. For more information, see Using the Retrieve processed payments from Pay Central task.
Configure automatic confirmation emails (AutoPay only)
Do the following to automatically send confirmation emails after payments are processed:
- Create a custom copy of the Recurring Membership Payment Confirmation template (remove ASI and iMIS details) from Marketing > Communication templates > Templates > Samples. For more information, see Customizing the out-of-the-box templates.
- Go to RiSE > Process automation and open the Recurring Membership Payment Confirmation task.
- (Actions tab) Click the edit icon next to the action and do the following:
- Remove the current template.
- Select the template you edited in step one.
- Click Save.

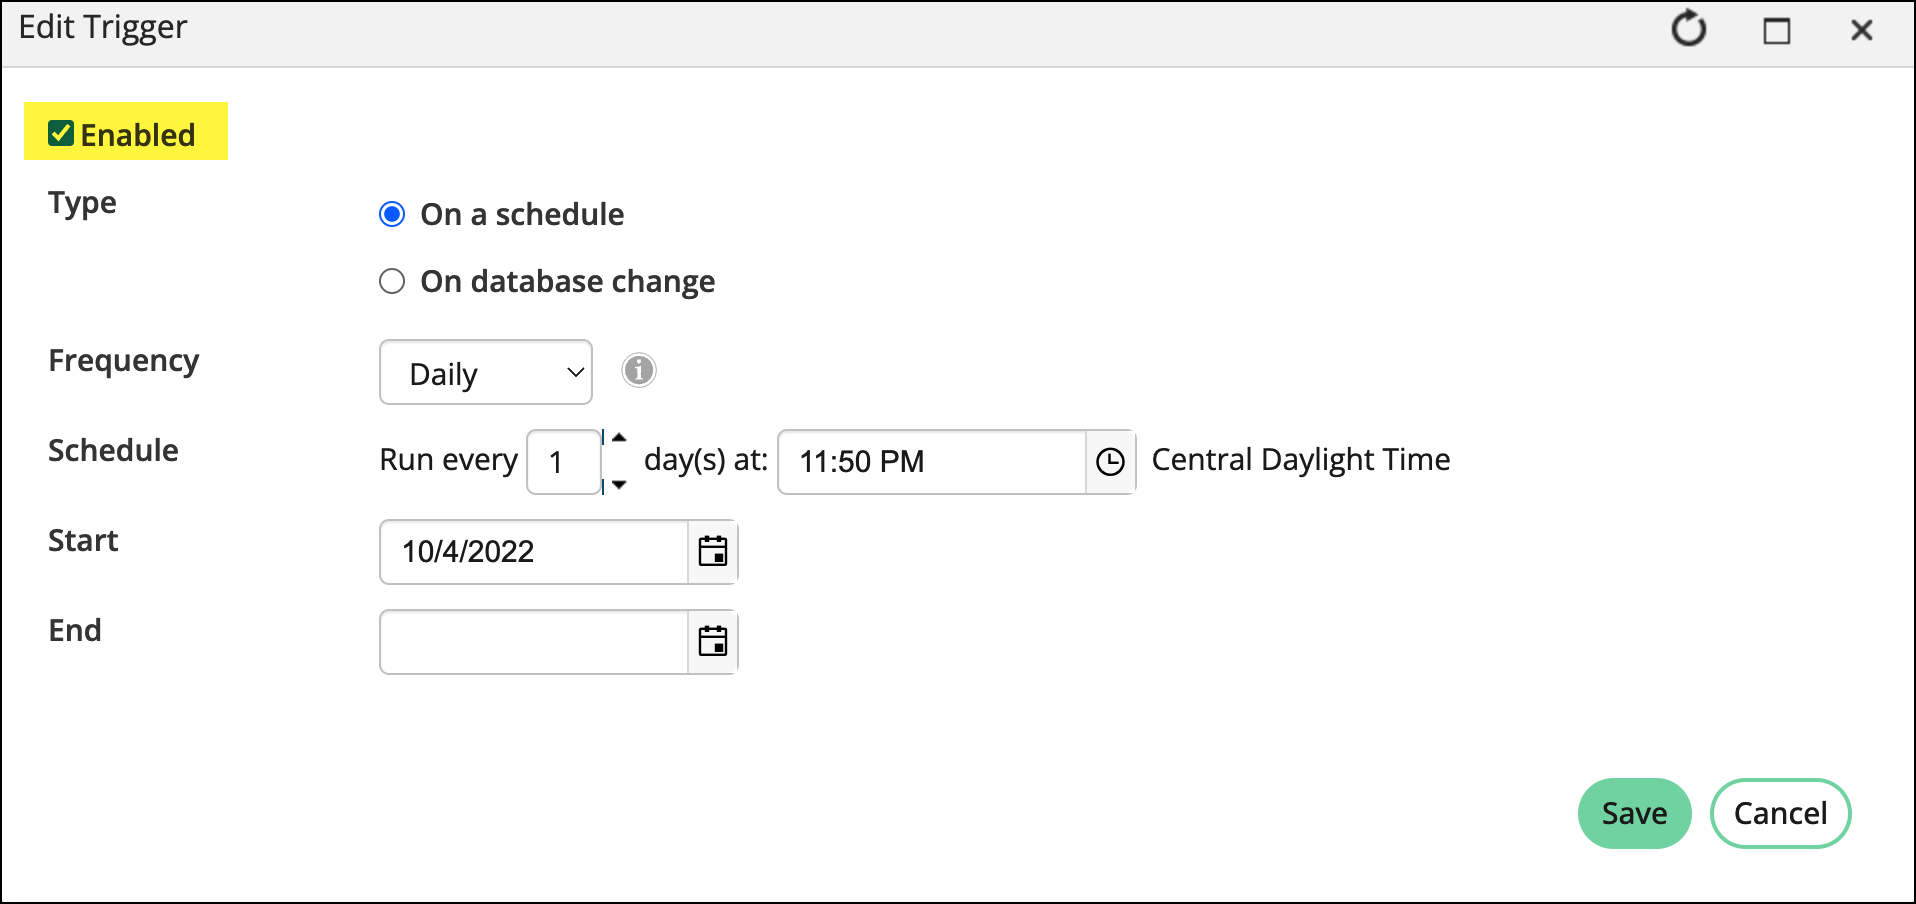
- (Triggers tab) Click the edit icon.
- Enable the trigger, then click Save. The task is scheduled for 11:50 p.m. but can be adjusted.
- Enable the task, then click Save & Exit.
For further details, see Sending confirmation emails for recurring payments.